Battle of Buna–Gona
The Battle of Buna–Gona was part of the New Guinea campaign in the Pacific Theatre during World War II. It followed the conclusion of the Kokoda Track campaign and lasted from 16 November 1942 until 22 January 1943. The battle was fought by Australian and United States forces against the Japanese beachheads at Buna, Sanananda and Gona. From these, the Japanese had launched an overland attack on Port Moresby. In light of developments in the Solomon Islands campaign, Japanese forces approaching Port Moresby were ordered to withdraw to and secure these bases on the northern coast. Australian forces maintained contact as the Japanese conducted a well-ordered rearguard action. The Allied objective was to eject the Japanese forces from these positions and deny them their further use. The Japanese forces were skillful, well prepared and resolute in their defence. They had developed a strong network of well-concealed defences.
| Battle of Buna–Gona | |||||||
|---|---|---|---|---|---|---|---|
| Part of the New Guinea Campaign of the Pacific Theater (World War II) | |||||||
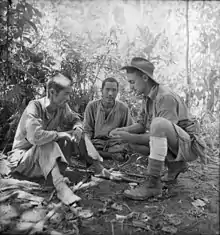
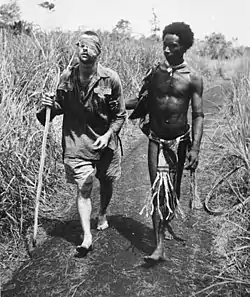 On 25 December 1942, near Buna, Papuan orderly Raphael Oimbari aids Australian soldier Private George "Dick" Whittington, who died of scrub typhus in February 1943. (Photo by George Silk, AWM104028)[Note 1] | |||||||
| |||||||
| Belligerents | |||||||
|
|
| ||||||
| Commanders and leaders | |||||||
|
|
from 6 December: | ||||||
| Units involved | |||||||
| See Battle of Buna–Gona: Allied forces and order of battle | See Battle of Buna–Gona: Japanese forces and order of battle | ||||||
| Strength | |||||||
| 20,000+ (total) [Note 2] |
5,500–6,500 (initially)[Note 3] 11,000–12,000 (total) | ||||||
| Casualties and losses | |||||||
|
1,991 killed, 12,300+ injured or sick[Note 4] |
7,000 killed (4,000 in battle, remainder from disease)[1][Note 5] 1,200 injured (evacuated), 250+ captured | ||||||
Operations in Papua and New Guinea were severely hampered by terrain, vegetation, climate, disease and the lack of infrastructure; these imposed significant logistical limitations. During the Kokoda Track campaign, these factors applied more-or-less equally to both belligerents but favoured the defender in attacks against well-fortified positions. The battlefield and logistical constraints limited the applicability of conventional Allied doctrine of manoeuvre and firepower. During the opening stages of the offensive, the Allies faced a severe shortage of food and ammunition. This problem was never entirely resolved. The battle also exposed critical problems with the suitability and performance of Allied equipment. The combat effectiveness of US forces, particularly the US 32nd Division, has been severely criticised. These factors were compounded by repeated demands from General Douglas MacArthur, Supreme Commander of Allied Forces in the Southwest Pacific Area, for a rapid conclusion to the battle. The demands were more to politically secure MacArthur's command than for any strategic need. In consequence, troops were hastily committed to battle on repeated occasions, increasing Allied losses and ultimately lengthening the battle.
Allied air power interrupted the Japanese capacity to reinforce and resupply the beachheads from Rabaul. This ultimately made the Japanese position untenable. There was widespread evidence of the Japanese defenders cannibalising the dead. In the closing stages of the battle, significant numbers of the defenders were withdrawn by sea or escaped overland toward the west and the Japanese base around Salamaua and Lae. The remaining garrison fought to the death, almost to the man.
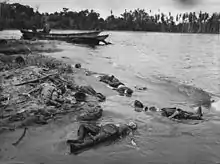
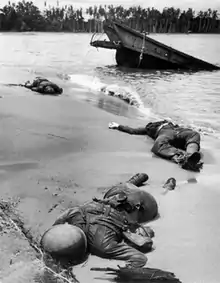
The resolve and tenacity of the Japanese in defence was unprecedented and had not previously been encountered. It was to mark the desperate nature of fighting that characterised battles for the remainder of the Pacific war. For the Allies, there were a number of valuable but costly lessons in the conduct of jungle warfare. Allied losses in the battle were at a rate higher than that experienced at Guadalcanal. For the first time, the American public was confronted with the images of dead American troops.[2]
Background
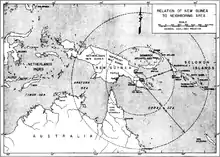
Japan's entry into World War II and the war in the Pacific commenced with the attack on Pearl Harbor on 7 December 1941, which was coordinated with closely coinciding attacks on Thailand, the Philippines, the American bases on Guam and Wake Island, and the British possessions of Malaya, Singapore, and Hong Kong.[3] Japanese forces rapidly secured territory in South-East Asia, the East Indies, and the Central and South-West Pacific. Australia had been shocked by the speedy collapse of British Malaya and the fall of Singapore. With the fall, nearly 15,000 Australian soldiers became prisoners of war along with the rest of the garrison of some 85,000 (mostly British and Indian troops).[4]
US President Franklin Roosevelt ordered General Douglas MacArthur in the Philippines to formulate a Pacific defence plan with Australia in March 1942. The Australian Prime Minister, John Curtin, agreed to place Australian forces under the command of MacArthur, who became Supreme Commander, Southwest Pacific Area. MacArthur moved his headquarters (HQ) to Melbourne in March 1942.[5]
The Japanese assaulted Rabaul on 23 January 1942.[6] Rabaul became the forward base for the Japanese campaigns in mainland New Guinea. Japanese forces first landed on the mainland of New Guinea on 8 March 1942[7] when they invaded Lae and Salamaua to secure bases for the defence of the important base they were developing at Rabaul.[8]
The Japanese 17th Army under Lieutenant General Harukichi Hyakutake was a corps-sized command involved in the New Guinea, Guadalcanal, and Solomon Islands campaigns.[9] The Japanese 8th Area Army, under General Hitoshi Imamura, was mobilised to take overall command in the areas from 16 November 1942. It was responsible for both the New Guinea and Solomon Islands campaigns. Imamura was based at Rabaul. The Japanese 18th Army, under Lieutenant General Hatazō Adachi, was also formed to take over responsibilities for Japanese operations on mainland New Guinea, leaving the 17th Army responsible for the Solomon Islands.[10]
Despite Australian fears, the Japanese never intended to invade the Australian mainland. While an invasion was considered by the Japanese Imperial General Headquarters in February 1942, it was judged to be beyond the capability of the Japanese military and no planning or other preparations were undertaken.[11] Instead, in March 1942 the Japanese adopted a strategy of isolating Australia from the United States; planning to capture Port Moresby in the Territory of Papua and the Solomon Islands, Fiji, Samoa and New Caledonia.[12] The first part of this plan, codenamed Operation Mo, was an amphibious landing to capture Port Moresby, capital of the Australian Territory of Papua.[13] This was frustrated by the Japanese defeat in the Battle of the Coral Sea and postponed indefinitely after the Battle of Midway.[14]
The Japanese then planned an overland attack to capture the town by advancing from the north coast. Having already captured much of the Territory of New Guinea earlier that year, they landed on 21 July 1942, to established beachheads at Buna, Gona and Sanananda.[15] This marked the beginning of the Kokoda Track campaign. The South Seas Detachment, under command of Major General Tomitarō Horii, advanced using the Kokoda Track to cross the rugged Owen Stanley Range.[16]
As the Kokoda Track campaign was taking place, a Japanese invasion force made up of Japanese Special Naval Landing Force units attempted to capture the strategically valuable Milne Bay area in August 1942. The Battle of Milne Bay, fought from 25 August to 7 September 1942,[17] resulted in a Japanese defeat. This was the first notable Japanese land defeat and raised Allied morale across the Pacific Theatre.[18]
Allied forces identified a Japanese airfield under construction at Guadalcanal, and 19,000 US Marines were embarked to capture the airfield.[19] An amphibious landing was made on 7 August.[20] The battle lasted until 9 February 1943[21] and was strongly contested, on land, at sea and in the air.[22]
By 16 September, Horii's force had advanced as far as Ioribaiwa, 20 miles (32 km) from Port Moresby and was close enough to see the town's lights.[23] In light of reverses at Guadalcanal, Lieutenant General Harukichi Hyakutake determined he could not support both battles and on 23 September,[24] ordered Horii to withdraw his troops on the Kokoda Track, until the issue at Guadalcanal was decided. Limited provision had been made for the supply of Horii's force. The situation had reached a crisis.[25] There were also concerns that Allied forces might land at Buna at any time.[26]
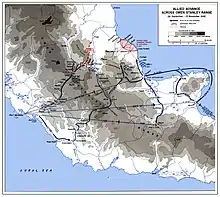
On 26 September, the Japanese began to withdraw.[27] They fought a well-ordered rear-guard action back over the Owen Stanley Range, with the Australian 7th Division in close pursuit.[28] The US 32nd Infantry Division had been sent to New Guinea in September and was ordered to make a circling move against the Japanese eastern flank near Wairopi.[29] This move commenced on 14 October.[30][Note 6] These plans were rendered ineffectual by the rate of the Japanese withdrawal but it left the division well positioned to co-ordinate its advance on the beachheads with the Australians that were approaching from the southwest.[32]
Major General Arthur Allen was controversially relieved of command[33] of the 7th Division on 28 October, and replaced by Major General George Vasey, previously commander of the 6th Division.[34] Horii's force had been severely depleted by the lack of supplies but at Oivi it was replenished and reinforced. The Japanese suffered heavy casualties in the battle around Oivi–Gorari, from 4 to 11 November. The well-ordered withdrawal that had been planned quickly disintegrated into a rout.[35] The 7th Division was about 40 miles (65 km) from Buna–Gona.[36][Note 7] Although experience demanded caution,[39] the way before them was clear of Japanese forces.[40]
Geography
Climate and terrain
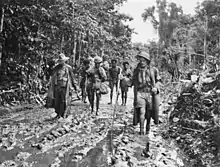
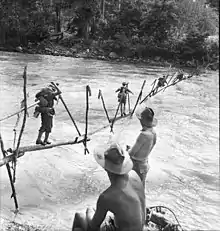
The Japanese beachheads from which the Kokoda campaign was launched were located about three key positions along a 16-mile (25 km) stretch of the north coast of New Guinea: Gona to the west, Buna to the east and Sanananda–Giruwa in the centre.[41] Roughly 100 miles (160 km) northeast of Port Moresby, it approximates to the most direct line from there to the north coast.[42][Note 8] The settlements are located on a thin coastal strip that separates the sea from a tidal forest swamp of mangroves, nipa and sago.[43] Rivers flowing across the broad, flat, coastal plain from the Owen Stanley Range disappear into the swamps and discharge to the sea through many coastal creeks.[44] The coastal strip is rarely more than a few hundred yards at its widest, to little more than a foot pad separating the swamp from the sea. The few paths through the swamp were seldom more than 12-foot (3.7 m) wide.[45]
The area is low-lying and featureless – Buna air strip is 5 feet (1.5 m) above sea level.[46] The elevation is only double this at Soputa, 7.5 miles (10 km) inland[46] and 280 feet (85 m) at Popondetta, 13 miles (21 km) inland.[47] The water table is reportedly shallow at about 3 feet (0.9 m).[48][49] This affected the digging of weapons pits and construction of defensive positions.[50]
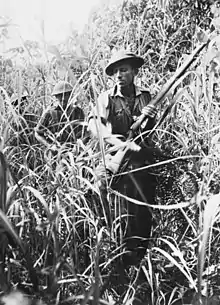
Areas not waterlogged were either dense jungle or swathes of kunai grass.[51] Coconut plantations filled the wider areas of dry ground along the coastal strip but had been neglected and undergrowth had reclaimed the ground.[52] The dense kunai grass could grow to 6 feet (nearly 2 m) and the leaves were broad and sharp.[43] Temperatures over the period of the battle ranged from 72–89 °F (22–32 °C) but with a humidity of 82 percent, this could be oppressive.[53] In the humid conditions, kunai grass trapped the heat and it was not uncommon for temperatures to reach 122 °F (50 °C).[52]
The battle was conducted during the tropical wet season.[54] Average rainfall for December was 14.5 inches (370 mm),[55] although this figure does not lend itself to a full appreciation of the impact of rain. It was characterised by heavy tropical storms, usually in the afternoon. While the worst of the monsoon held off until after the battle,[55] rain was nonetheless a prevalent feature of the battle. Lieutenant General Robert L. Eichelberger wrote: "At Buna that year it rained about a hundred and seventy inches [4,300 mm]. I have found out since that we got more than our share in December and January 1942–43."[56] Daily rainfall totals of 8 to 10 inches (200 to 250 mm) were not uncommon.[57] Under these conditions, the few tracks, seldom more than foot trails, quickly became boggy.[52]
Disease
The area was one of the most malarial regions in the world.[58] While malaria was the greatest disease threat, other tropical diseases such as dengue fever, scrub typhus, tropical ulcers, dysentery from a range of causes and fungal infections were common.[59][60] The impact and susceptibility to disease was exacerbated by a poor and insufficient diet.[61]
While the Australian Army had encountered malaria in the Middle East, few doctors with the militia had seen the disease before. Supplies of quinine, which was still the primary drug in use, were unreliable.[62] Atebrin only became the official suppressive drug used by the Australian forces in late December 1942 and the change to its use was not immediate.[63] The need for a strict anti-malaria program was not fully understood.[64]Many officers saw this as a medical rather than a disciplinary issue and did not compel their men to take their medicine.[65] It was common for Australian soldiers to wear shorts and rolled sleeves in response to the oppressive heat.[66] Mosquito nets and repellent were in short supply,[67] while the repellent that was supplied was considered ineffective.[68]
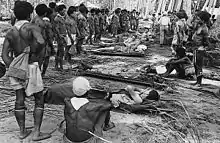
Bergerud states that 85–95 percent of all Allied soldiers in the area carried malaria during the battle.[69][Note 9] There were 4.8 men hospitalised through sickness for one Allied battle casualty.[Note 10] 75 percent of the cases were attributed to malaria.[63] After he had relieved Harding, Eichelberger gave orders to take the temperature of an entire company near the front. Every member of that company was running a fever.[72] By necessity, many men remained in the front lines with fevers up to 104 °F (40 °C).[73] Brien reports, "Japanese accounts of the prevalence of disease are similarly shocking".[74]
Logistics
For Allied forces and the Japanese, the battle of Buna–Gona was largely determined by logistics and limitations of supply. Approaching the beachheads, it was necessary for Allied forces to rely on air drops.[75][Note 11] There was a high rate of loss and breakage, up to 50 per cent.[77][78] From almost the outset of the battle, the Allies faced critical shortages of ammunition and rations.[79][80] Once the Allied forces had formed up on the Japanese positions, landing strips were quickly developed to support the engaging forces.[81][82] This eliminated the losses associated with air-dropping but the supply situation was consistently compromised by poor weather over the air route and a lack of transport aircraft.[83]

A sea route was gradually surveyed to nearby Oro Bay, which was to be developed as a port in support of the Allied operations. The first large vessel to deliver supplies to Oro Bay was the SS Karsik on the night 11/12 December.[84] Following this, regular convoys under Operation Lilliput commenced.[85] Lilliput greatly increased the tonnage of material supplied to the Allied forces but much of it was consumed by increases in the size of the force. The level of supply never reached the point where it ceased to be an "extraordinarily difficult problem".[77]
The Japanese fighting along the Kokoda Track faced the same logistical problems as the Australians but lacked the benefit of air supply to any significant extent. Stocks of rice and other foodstuffs identified at Gona when it was captured on 8 December suggest that the garrison had been well provisioned at the start of the battle.[86] The Japanese positions had been supplied by sea from Rabaul but attempts at the start of the battle to land troops and supplies from destroyers were only partly successful.[87] Allied air power at Rabaul and over the beachheads curtailed the use of surface ships for supply. Some troops and equipment destined for Buna–Gona were landed near the mouth of the Mambare River. Reinforcements and supplies were barged to the beachheads from there.[88] Some supplies were landed from submarines, although size and travel time dictated that the quantities were necessarily small. On the night of 25 December, a Japanese submarine unloaded supplies and ammunition at Buna Government Station, the last time the Japanese received supplies.[89][Note 12] There was limited use of aerial resupply by the Japanese at Buna–Gona.[90]
The normal rice ration was 28 oz (800 g or approximately 600 mL).[91] Rice formed the bulk of the Japanese ration. At the end of December, each man received around 360 mL of rice per day but this was reduced to 40–80 mL in early January. There was no food for the period 8–12 January.[92][Note 13] By the time that the battle was over on 22 January, the garrison had been virtually starved into submission and there was evidence that the Japanese had resorted to cannibalising the dead.[94][95][Note 14]
Japanese forces
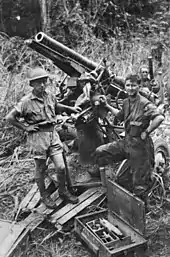
The Japanese positions in the Buna–Gona area were manned by naval and army units. The naval units included the 5th Special Landing Party, the equivalent of marines. Forces withdrawing down the Kokoda Track added to the strength of the original garrison.[97] Many survivors of the Kokoda campaign congregated to the west, near the mouth of the Kumusi River and linked up with Japanese reinforcements that were landed there in early December.[98] This force actively threatened the western flank of the Australians at Gona.[99] Sources generally quote the Japanese effective strength at the start of the battle as 5,500[100] or 6,500 after reinforcement on the night of 18 November.[101][59] Milner observes, "No precise figure can be given for Japanese strength at the beachhead in mid-November".[102] Sources give the total of Japanese forces deployed to Buna–Gona or operating to the west in the vicinity of the Kumusi and Membare Rivers from 11,000 to 12,000.[103][104][Note 15]
Between 1,000 and 1,500 troops were landed by destroyer on 17 and 18 November, just before the Allied forces reached the beachhead positions.[105] Bullard records the landing at Basabua (just east of Gona) of 800 reinforcements for the South Seas Force on the evening of 21 November. On 29 November 400–500 of the troops that had withdrawn along the Kumusi River and concentrated near its mouth were barged to Sanananda.[106]
The position at Buna to the Girua River was held by between 2,000 and 2,500 troops.[107][Note 16] Gona was held by 800–900 defenders.[109] Sources record that the Japanese forces in front of Sanananda numbered between 4,000 and 5,500 including troops in hospital.[110][Note 17] Defenders on the Sananada track are included as part of the strength of the Sanananda-Giruwa position. From 1,700 to 1,800 held the defences on the track.[111]

Four more attempts were made by destroyer convoys to reinforce the beachheads.[112] Convoys on 28 November and 9 December were turned back by air attacks.[113] A convoy on 2 December, after an aborted attempt at Basabua, landed about 500 troops, mainly the III/170th Battalion, near the mouth of the Kumusi River.[114] On 12 December 800 troops, mainly of the I/170th Battalion, were landed near the mouth of the Mambare River, further along the coast.[115][Note 18] Part of this force was moved to reinforce the III/170th Battalion operating against the flank at Gona.[117] Between 700 and 800 reached Giruwa from 26 to 31 December.[118]
Horii, who had led the attack across the Kokoda Track, drowned at sea on 19 November[119] after rafting down the Kumusi River during the withdrawal from Kokoda. Colonel Yosuke Yokoyama temporarily assumed command of the South Seas Force following Horii's death.[120] Major General Kensaku Oda succeeded Horii in command of the South Seas Force. Major General Tsuyuo Yamagata commanded the 21st Independent Mixed Brigade[121] and was given command of all 18th Army units in the area other than the South Seas Force. He landed near the Kumusi River on 2 December and reached Gona on 6 December, when he was given command of the Japanese units engaged in the battle.[122]
The Japanese defensive positions at Buna, Gona and forward at the Sanananda track junction had been strongly developed before the arrival of Allied forces. They have been described as some of the strongest encountered by the Allies in the course of the war.[123] They made excellent use of terrain, which limited the tactical possibilities for attackers and consisted of hundreds of bunkers and machine gun emplacements developed in depth.[124][125] Individual positions were mutually supporting and alternative positions were used to confound attackers.[126]
Allied forces
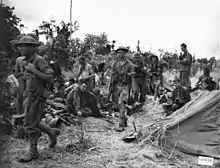
The Allied advance on the Japanese positions at Buna–Gona was made by the 16th and 25th Brigades of the Australian 7th Division and the 126th and 128th Infantry Regiments of the US 32nd Infantry Division.[127] During the course of the battle, a further four infantry brigades, two infantry regiments and an armoured squadron of 19 M3 Stuart tanks were deployed.[Note 19]
Australian units were generally well below establishment.[Note 20] American forces arrived on the battlefield with a force much closer to establishment.[Note 21] The Papuan Infantry Battalion patrolled in the vicinity for Japanese stragglers from the Kokoda Track Campaign but was not engaged directly in the battle.[132] The contribution of Papuans engaged as labourers or porters was a significant part of the Allied logistic effort.[133] More than 3,000 Papuans worked to support the Allies during the battle.[134][Note 22]
Significant criticism has been levelled at the combat effectiveness of US troops, specifically the 32nd Division, within the US command and in subsequent histories.[136][137] A lack of training is most often cited in defence of their performance.[138][139] Several historians have also commented on the lack of training afforded Australian militia units engaged in the battle[140][141][142] although some had the benefit of a "stiffening" of experienced junior officers posted to them from the Australian Imperial Force (AIF).[143]
Before the Allied forces arrived on the Buna–Gona coast, Richard K. Sutherland, then major general and MacArthur's chief of staff, had "glibly" referred to the Japanese coastal fortifications as "hasty field entrenchments".[48][49] The strength and combat effectiveness of the Japanese defenders was severely underestimated.[144] Maps of the area were inaccurate and lacked detail.[145] Aerial photos were not generally available to commanders in the field.[146]
Allied command had failed to make effective provision for supply of artillery or tanks, believing quite mistakenly that air support could replace them.[147][148][Note 23] Allied commanders in the field were unable to provide fire support capable of suppressing Japanese positions sufficient for infantry to close with and overwhelm them. Logistical limitations constrained efforts to make good these deficiencies.[149]
Scanty and inaccurate intelligence led MacArthur to believe that Buna could be taken with relative ease.[48] MacArthur never visited the front during the campaign.[150] He had no understanding of the conditions faced by his commanders and troops,[151] yet he continued to interfere and pressure them to achieve unrealistic results.[152] Terrain and persistent pressure for haste meant that there was little, if any, time given for reconnaissance.[153] MacArthur's pressure has been described as lengthening the battle and increasing the number of casualties.[154][155]
Battle
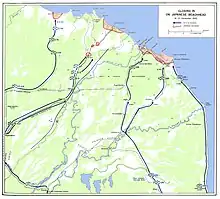
The battle started on 16 November, when the Australian 7th Division crossed the Kumusi River,[156] about 40 miles (65 km) from the beachheads, in pursuit of the withdrawing Japanese forces.[36] On the eve of 19 November, the 25th Brigade was advancing toward Gona, along the track from Jumbora, while the 16th Brigade was advancing toward Sanananda on the track from Soputa.[157] The American 126th Regiment (less the 1st Battalion) was placed under command of 7th Division to protect its eastern flank.[158] The 32nd Division was approaching Buna along the coastal route and along the track from Simemi.[159] Harding prepared to attack positions at the eastern end of the Buna defences in the vicinity of the landing strip and the plantation. Attacks were launched on 19 November, using the 1st and 3rd Battalions of the 128th Infantry Regiment.[158] On the same day, the 25th Brigade, approaching Gona, made contact with defended positions placed along its line of advance. The 16th Brigade, approaching Sanananda, made contact the following day.[160]
Up to that point, there had been only limited and light contact with the Japanese defenders as the Australians approached the beachheads.[161] It had been the same for the 32nd Division.[162] This situation quickly changed as the attacking forces met with stiff resistance. The conventional doctrine of manoeuvre and fire support was negated by terrain, a lack of heavy weapons and supply shortages.[163] Difficulties were compounded by the determination of the Japanese fighting from well-prepared defensive positions. Despite repeated attacks over the next two weeks, the Allies made little progress and were faced with mounting casualties. The conditions were likened to a "tropical vignette of the trench warfare conditions of the earlier war".[164]
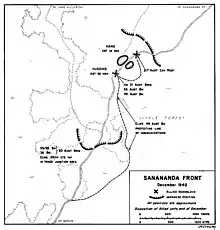
The 2nd Battalion, 126th Regiment was returned to command of 32nd Division on 22 November, while the 3rd Battalion was tasked to secure the Soputa–Sanananda–Cape Killerton track junction, to the front of the 16th Brigade.[165] On 30 November, after nearly a week of indecisive skirmishing through the bush, the position which was to become well known as "Huggins' Roadblock" was established on the Sanananda Track, just south of the second Cape Killerton track junction. The position was manned by these occupiers until relieved on 22 December by the 39th Battalion. Wedged between the Japanese positions astride the track, it compromised the line of communication to the forward Japanese positions; however, its own position was equally tenuous. The Japanese forward positions were enveloped but not sealed.[166]
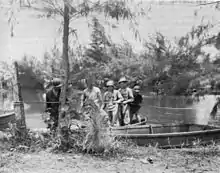
By concentrating reinforcements, the Japanese position at Gona was finally cleared on the morning of 9 December. The position was threatened by Japanese forces that had landed at the mouth of the Kumusi River and fighting continued west of Gona Creek for some time.[167]
Attacking the Buna area from both flanks, American forces entered Buna village on 14 December[168] but a virtual stalemate developed on the eastern flank. This was relieved by the arrival of the Australian 18th Brigade and Stuart tanks of 2/6th Armoured Regiment. With an attack on 18 December, steady progress thereafter followed. By 3 January, the Buna area, as far as the Girua River, had been cleared.[169]
The Australian 7th Division continued to pressure the forward Japanese positions astride the Sanananda track without a decisive result, despite reinforcements and redeploying units that had been fighting at Gona.[170] Figures prepared by HQ 7th Division showed that, from 25 November to 23 December, the division had received 4,273 troops to replace 5,905 lost to its front from all causes. Thus Vasey's force was about 1,632 weaker than at the outset.[171] As December closed, there was no prospect of the division being reinforced by further Australian units but the 163rd Infantry of the US 41st Division had been ordered to New Guinea and arrived at Port Moresby on 27 December, to be placed under command of 7th Division. After the fall of Buna, the 32nd Division was to advance on the main Sanananda position from the east.[172]
On 12 January, the Japanese positions south of Huggins' were attacked by the 18th Brigade without success.[173] Following this, Vasey made an appreciation of the situation. These observations, while made in response to the attack on the 12th, exemplify the conditions under which the battle was conducted.
As a result of the attack by 18 Aust Inf Bde on 12 Jan 43, it is now clear that the present position which has been held by the Jap since 20 Nov 42 consists of a series of perimeter localities in which there are numerous pill-boxes of the same type as those found in the Buna area. To attack these with infantry using their own weapons is repeating the costly mistakes of 1915–17 and, in view of the limited resources which can be, at present, put into the field in this area, such attacks seem unlikely to succeed.
The nature of the ground prevents the use of tanks except along the main Sanananda Track on which the enemy has already shown that he has A-Tk guns capable of knocking out the M3 light tank.
Owing to the denseness of the undergrowth in the area of ops, these pill-boxes are only discovered at very short ranges (in all cases under 100 yards (90 m)) and it is therefore not possible to subject them to arty bombardment without withdrawing our own troops. Experience has shown that when our troops are withdrawn to permit of such bombardment, the Jap occupies the vacated territory so that the bombardment, apart from doing him little damage, only produces new positions out of which the Jap must be driven. [Appreciation by Vasey][174]
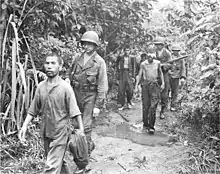
The problem of the forward positions on the main track was resolved by the Japanese withdrawing over the next two nights (commencing 12 January) and the positions were occupied by the evening of the 14th. The 18th Brigade quickly advanced on Cape Killerton and then Sanananda. A link was established with the 32nd Division at Giruwa on 21 January. The battle concluded on 22 January, but there were still many Japanese roaming the area.[175]
The Japanese had planned for evacuation of the area but this was overtaken by the rate of the Allied advance.[176] About 1,200 sick and wounded were evacuated by sea from 13 to 20 January.[177] On 20 January, Yamagata ordered an evacuation and on the night of 21 January, large sections of the force still remaining in the area began to break away in accordance with their orders. About 1,000 escaped overland to the west of Gona[178] but Japanese sources suggest this may be as high as 1,900.[103]
Advance on Buna – Warren Force
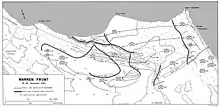
The Buna area, to be taken by the 32nd Division, stretched from the Duropa plantation in the east to Buna Village, at the mouth of the Girua River, in the west. This strip of coast is about 5,700 yards (5,200 m) from end to end. The Girua River formed the operational boundary with 7th Division.[179] The firmer ground and defended positions were widest at each end, about 1,600 yards (1,500 m) at the eastern end and a little less at the other end.[180][Note 24] With a narrower strip in between, it has some resemblance to a dog's bone.[Note 25] The inland side of the eastern end is defined by two landing strips. The Old Strip runs roughly parallel to the coast and with Simemi Creek, which flows along the seaward edge of the strip. This creek represented an obstacle for attacking troops. Dispersal bays had been constructed at the eastern end of the Old Strip and along the seaward side.[183] While not actually joined, the two strips formed a wide corner. The Simemi Creek passed between the two strips. A bridge on the track to Simemi crossed the Creek there. The bridge was 125 feet (38 m) long and had a section blown from one end.[184] The New Strip was actually a decoy strip.[45] The ground was unsuitable for developing as a landing strip. The Duropa coconut plantation occupied most of the ground around Cape Endaiadere north of the eastern end of the New Strip. A track approached Cape Endaiadere, along the coast from Hariko, to the south east.[185]
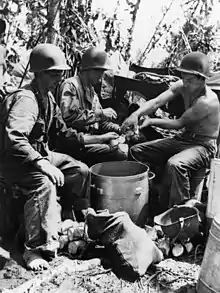
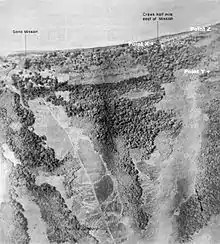
At the eastern end, the Japanese occupied the Duropa Plantation, from the New Strip, blocking the approach by the coastal route.[187] They also blocked the approach from Simemi, with positions forward of the bridge.[188] At the western end of the Buna area, a track led from Buna village and the Buna Government Station inland to Ango. The position that came to be known as the Triangle was a salient protruding from the Japanese defensive line. It straddled the track just inland of where the track branched to either the village or station.[189] The Government Station is sometimes incorrectly referred to as the Buna Mission.[190] Entrance Creek separated the Station from the village. On the track to the village, a foot bridge crossed Entrance Creek a short distance from the track junction.[191] The "Coconut Grove" lay along the track to Buna Village, after crossing Entrance Creek.[192] To the north east of the Triangle was the open area of the Government Gardens, which had formerly been cultivated.[193] The Government Plantation, a coconut grove, occupied the area around the Station and the thin coastal strip to the east, as far as the mouth of the Simemi Creek and the western end of the Old Strip. Giropa Point is about halfway between the Government Station and the mouth of Simemi Creek; Giropa Creek discharges to the sea on the western side of Giropa Point.[194]
On 18 November, the 32nd Division was approaching the Buna positions. The I/128th Battalion was nearing the Duropa Plantation along the coastal path. The I/126th Battalion, with the 2/6th Independent Company and a detached company of the 128th Battalion were well behind following the same route and arrived on 20 November.[195] The III/128th Battalion was approaching the strips on the track from Semime. The II/128th Battalion was close behind.[159] The remaining two battalions of the 126th Regiment were at Inoda, well inland and had been tasked to engage the western flank of the Buna position.[158] On 19 November, these two battalions were placed under command of the 7th Division, by order of Herring, GOC New Guinea Force, who was in immediate command of the two divisions. This was to concentrate maximum force against the main Japanese position around Sanananda.[158] The two Australian brigades had been substantially depleted by the fighting along the Kokoda Track and were approximately one-third of their establishment strength. Harding was put out by this decision. Not only did it alienate a large part of his command but it meant a major adjustment to his plans just as he was about to engage the Japanese.[158] The left flank task was reassigned to the II/128th Battalion. This left the I/126th Battalion, well to the rear, as the only reserve.[158] Movement between the two flanks entailed a two-day march.[196]

With only two mountain howitzers in support, Harding proceeded with the attack of 19 November on the eastern flank.[197] The attacks were met with intense fire from the Japanese defenders and quickly faltered with no gain.[198] The early movements of battalions blurred the assignment of tasks against the eastern and western flanks on the basis of regimental commands. The force attacking the Japanese western flank was designated Urbana Force. The concentration to the east, around Cape Endaiadere and the two strips, was called Warren Force.[199] The next day, a further attack was pressed with support from bombers and the mountain howitzers. About 100 yards (100 m) was gained on the coastal strip but the III/128th was still held up in front of the bridge.[200][Note 26]
An attack on the 21st was to be an "all-out"[203] effort. The I/126th and 2/6th Independent Company had arrived and were committed to the attack between the coast and the eastern end of the New Strip, I/128th against the coast, I/126th in the centre and 2/6th Independent Company on the left at the eastern end of the strip. Three bombing missions had been ordered in support of the attack. The orders for the attack had not been received before the first mission in the morning. The second mission was cancelled due to weather. The attack proceeded with the third that arrived at 3:57 pm. Both bombing missions caused Allied casualties: 10 killed and 14 wounded in total.[204] The bombing failed to neutralise the Japanese positions and disrupted the attackers. The attack resulted in no appreciable gain by the forces at either end of the New Strip.[205]
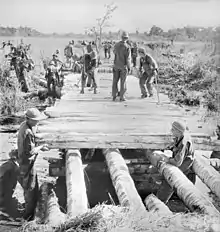
By 26 November, artillery support for the division had increased from the two mountain howitzers to include six 25-pounders.[206][Note 27] Warren Force was to concentrate its efforts against the eastern end of the New Strip. On the 22nd, the III/128th was moved to there, leaving a company to guard the Simemi Track.[192] The front was adjusted, with III/128th taking the right, seaward flank. I/126th remained in the centre, with the 2/6th Independent Company to the left. Here, the coast ran south to north toward Cape Endaiadere so that the axis of advance toward the cape was north. The I/128th was positioned behind the I/126th. It was tasked to move through the I/128th, west, along the edge of the New Strip. The I/128th was to advance north-west and the III/128th on a northerly axis. This plan, with attacking troops moving on three different axes, was perhaps altogether too complex.[211]
The attack was preceded with strafing by P-40s and Beaufighters, while A-20s bombed to the rear. Some fifty aircraft participated.[212] This was followed by half an hour of artillery bombardment. The massed fire failed to suppress the Japanese position and the attack was met with heavy fire. The advance of the I/126th was misdirected, opening a gap in the left flank. The I/126th was recalled to seal the flank. The attack ended without significant gain[213] as Japanese aircraft from Lae strafed the Americans.[207] An attack on 30 November was to coincide with one by Urbana Force. While the I/126th made some progress along the axis of the new strip, the day again ended without significant progress.[214] Through the course of these events, some small gains had been made by small attacks and infiltration.[215] Nevertheless, MacArthur became increasingly impatient with Harding's efforts and the lack of progress by the 32nd Division.[216]
Buna Station – Urbana Force
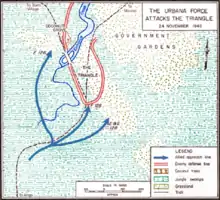
The II/128th, advancing along the track from Ango, made contact with the Japanese defenders around midday on 21 November. Reconnoitring the flanks, the Americans plunged into a mire of swamp. The II/126th was released by 7th Division on the 22nd and linked up with the II/128th on the morning of the 23rd. An attack on the 24th was pressed by these Battalions against the flanks and front of the Triangle. It was to be supported by artillery and aerial bombing but the latter did not eventuate. An Allied fighter strafed the force headquarters. The right flank emerged from the swamp and moved about 200 yards (200 m) across open kunai before being caught exposed and came under heavy fire. The left and centre fared little better and no gain was made.[217] Urbana Force concentrated its efforts against the left flank.
The plan for 30 November was to attack on a wide front from the apex of the Triangle toward Buna village, having first paralleled the Japanese defences. Little real headway was made against the defenders but at the end of the day, E Company of the II/126th was short of the village by about 100 yards (100 m) and F Company of the II/128th had made a wide flanking move to reach Siwori Village, cutting land communication between Buna and Sanananda.[218] By this time, losses for the 32nd Division were 492 men.[219] The following day saw an attempt against the village with some minor success. Though the main attack faltered, G Company, II/126th advanced to Entrance Creek after clearing a command post and several bunkers.[220]
Harding replaced
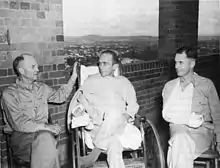
Following the inspection of 2 December, Eichelberger relieved Harding, replacing him with the division's artillery commander, Brigadier General Waldron.[221] He also sacked the regimental commanders and most battalion commanders and ordered improvements in food and medical supplies.[222][223] Through the moves to the beachheads and during the fighting the division had become badly intermixed. Many companies had been separated from their parent battalions.[224] Eichelberger halted operations on the Buna front for two days to allow units to reorganise.[225]
Eichelberger set about restoring the flagging confidence of his men, conspicuously wearing the three stars on his collar among the front-line troops, ignoring the convention of removing insignia at the front so as to not attract the enemy.[226][227][228][229] He and his staff regularly came under fire,[230] once from only 15 yards (15 m) but he insisted on being present with his forward troops to quietly urge them in their efforts.[231] He expected the same leadership from his officers at every level.[232] Waldron was injured on 5 December, accompanying Eichelberger near the front and was replaced by Brigadier General Byers.[233] An article in Time magazine from September 1945 records that "some of the 32nd's officers privately denounced Eichelberger as ruthless, Prussian. The men of the 32nd...called their division cemetery 'Eichelberger Square.'"[234]
Breakthrough at Buna Village
On 5 December, Urbana Force pressed an attack on Buna village from the south with four companies. P-40 Kittyhawks supported by attacking the station, to disrupt any attempt to reinforce the village. The attacks by the flank companies faltered while the centre advanced with limited success.[235] On the centre right, Staff Sergeant Herman Bottcher, a platoon commander in H Company, 126th Infantry, leading 18 men, was able to drive to the sea. Bottcher and his troops fought off attacks for seven days during which he was wounded twice before he was relieved.[236] Australian war correspondent George Johnston wrote in Time magazine on 20 September 1943: "By a conservative count ... Bottcher and his twelve men ... killed more than 120 Japs."[237]
Bottcher had turned the tide of the battle at Buna. His platoon's efforts cut off the Japanese in Buna village from supply and reinforcements, being already isolated on the western flank. It provided the impetus for the ultimate capture of the village. Bottcher was awarded a battlefield commission to the rank of captain and the first of two Distinguished Service Crosses.[233] A plaque was later placed at the entrance to Buna Village in memory of his actions that day.[238]
On this same day, Bren carriers were to spearhead an unsuccessful attack on the Warren Force front.[239] Subsequent actions on the Urbana front were to consolidate the gain made by Bottcher. For the next week, activity on both flanks at Buna was mainly restricted to infiltration and harassing artillery fire.[240] On 11 December, the III/127th, having arrived at Dobodura two days earlier, took over forward positions occupied by II/126th.[241] In the morning of 14 December, after concentrated mortar fire, the III/127th advanced on the village but the defenders had already fled.[242] The only positions to the west of Entrance Creek that remained were at the Coconut Grove.[243] This was cleared by the II/128th, with attacks on 16 and 17 November.[244]
Sanananda Track
On the morning of 20 November, the 16th Brigade, having advanced from Soputa on the Sanananda track, was approaching the vicinity of two track junctions that left the main track for Cape Killerton. The 2/1st Battalion in the lead, came under small arms and artillery fire and the battalion deployed to the flanks.[245] Two companies under Captain Basil Catterns were tasked to make a broad left-flanking manoeuvre around the Japanese positions astride the road. The remainder of the brigade adjusted itself in support.[246] Catterns' force skirted the Japanese forward positions and attacked the main Japanese position astride the road as evening approached (after about 6:00 pm)[247]
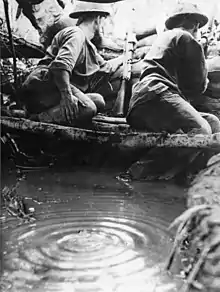
Catterns' force fought a desperate action through the night and the day of 21 November while the rest of the battalion pressed forward against Japanese positions that were threatened by Catterns' manoeuvre. The defenders fell back through the night and into the morning. By 8:30 a.m. on 21 November, the 2/2nd and 2/3rd Battalion moved through the forward companies of the 2/1st.[248] Catterns' force had made a small salient in the main Japanese defences. The 2/3rd pressed forward to relieve Catterns by the early evening, taking position immediately to Catterns' rear, while his force vacated the position it had been holding.[249] While this seemed prudent at the time, maintaining the position may have been advantageous for subsequent operations.[250] In Catterns' initial force of 91 all ranks, 5 officers and 26 other ranks had been killed and 2 officers and 34 other ranks had been wounded. The gun, the forward positions immediately delaying the brigade's advance and a further defensive position in between were secured by this action.[251]
The Japanese positions were now just north of the first track junction but denied the use of this track to Cape Killerton. To either flank was thick jungle and swamp; dispersed through the area were relatively open patches of kunai grass. One patch was immediately forward of the Japanese positions encountered by the 2/1st Battalion on 20 November.[252] After long fighting along the Kokoda Track, the effective strength of the Brigade had been reduced to less than the equivalent of a battalion.[253] The American III/126th Battalion (with two companies of the 1st Battalion) was brought forward on 22 November to make a similar left flank manoeuvre to Catterns'. It was tasked to secure the Soputa–Sanananda–Cape Killerton track junction, to the front of 16th Brigade. After a false start on 23 November, the American attack commenced the following day. On 30 November, after nearly a week of indecisive skirmishing through the bush, the position which was to become known as "Huggins' Roadblock" was established on the Sanananda Track, just south of the second Cape Killerton track junction.[254] The position had an initial strength of about 250 men.[255][Note 28]
Gona
On 19 November, the 25th Brigade approached Gona Village on the track from Jumbora. Just south of the village, the passage of a patrol of the 2/33rd through a large patch of kunai was being disputed by some Japanese riflemen. The 2/31st pushed through the kunai and then came under small arms fire from the direction of the village and deployed to the flanks. The Japanese defence was tenacious and running short of ammunition, the battalion broke contact just before midnight.[259] Having received supplies at Wariopa on 13 November, the brigade was on the last of its emergency rations and required ammunition.[260] Supplies arrived on 21 November and an attack was planned for the following day, where the 2/33rd Battalion was to advance on the village. Lieutenant Haddy's 2/16th Chaforce Company, was now under command of the 2/31st Battalion, having taken up a position just west of the village and Gona Creek.[261]
As the 2/33rd Battalion, advanced and met strong resistance, the 2/31st Battalion worked around to the east to the beach and attacked on a narrow front, confined by beach and swamp on either flank. At the forward Japanese positions, it was repulsed by heavy enfilade fire.[262] The 2/25th Battalion was to push through the 2/31st Battalion on 23 November to renew the attack from the east. The battalion made a small gain before being held and was forced to withdraw.[263] The village was bombed on 24 November and the 3rd Battalion attacked on the afternoon of 25 November, from the southwest, with mortars and artillery in support. After a small advance, the battalion was held up by a Japanese defensive position.[264] The Japanese at Gona had been aggressive in their defence. In the evening of 26 November, the 2/33rd, astride the main track, was counterattacked by the defenders.[265] By these events, the offensive capacity of the 25th Brigade was exhausted.[266] The brigade had fought the Japanese the length of the Kokoda Track. It had been reinforced by the 3rd Battalion (AMF) and the three Chaforce companies. The four battalions totalled just over the strength of a battalion and the Chaforce companies about one-third of a battalion.[Note 31]
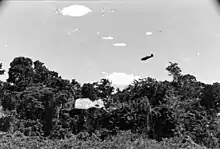
The 21st Brigade, though barely 1,000 strong, was shortly to arrive and was assigned the task of capturing Gona Village with the 25th Brigade in support; recent reinforcements had remained in Port Moresby for further training.[269] An attack was ordered for 29 November, even though the last of the Brigade's battalions was not due until the following day, possibly because of intelligence indicating the imminent arrival of Japanese reinforcements.[270] The 2/14th Battalion was to form up at Point 'Y', on the eastern flank and attack along the coastal strip from 'Point X', just west of Small Creek, about 1,000 yards (900 m) from the village; the attack was to be preceded by an air raid. A clearing patrol failed to identify strong Japanese positions between Point 'Y' and Point 'X' and the 2/14th Battalion was heavily engaged as it proceeded to the line of departure.[271] The attack was modified, with the 2/27th Battalion to move directly to Point 'X' and take over the task against the village. The 2/14th Battalion was to concentrate on the force about Small Creek, having skirted a patch of kunai, it was to move easterly from Point 'Y', then to Point 'Z' on the coast, to attack from there. Both attacking battalions met determined resistance and made small gains that day.[272]
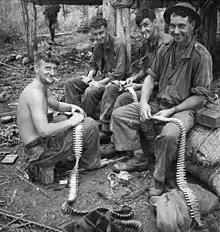
The 2/16th Battalion arrived to join the fighting the following day. It was deployed to protect the eastern flank and contributed two companies to a renewed attack against the village. The attacks were met with machine gun fire and while they failed to make any gain, the 2/14th Battalion was able to clear the beach positions.[273] A renewed attack followed on 1 December and the attackers were able to enter the village but in the face of counterattacks, were unable to consolidate their gains.[274] While the remaining force maintained pressure on the village, the 2/14th Battalion was tasked to press east toward Sanananda. It encountered no resistance except from the impenetrable swamp and an "over-zealous" member of the RAAF, who strafed the whole unit.[275] The 21st Brigade, in five days of fighting, had lost 340 casualties – over a third of its strength.[275]
The 30th Brigade was then moving to the beachheads and the 39th Battalion, which had been first to meet the advance of the Japanese across the Kokoda Track, was detached to the 21st Brigade.[276] Though then inexperienced, it had accounted for itself well and was ably led by Honner.[277] The 25th Brigade was relieved and moved to Port Moresby from 4 December.[278] The Chaforce companies remained. The 2/16th and 2/27th, so depleted by the recent fighting, were amalgamated into a composite battalion under Lieutenant Colonel Albert Caro. A fresh attack on 6 December, with the 39th Battalion from the south and the composite battalion along the coast quickly bogged down.[279]
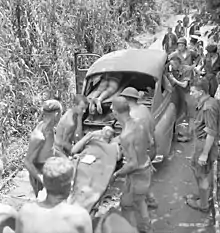
An assault was planned for 8 December, with the main thrust to be provided by the 39th Battalion. This was Brigadier Ivan Dougherty's "last throw" at taking Gona. If unsuccessful, Vasey had decided to contain Gona while concentrating on Sanananda.[280] Aerial bombardment mainly fell on the Australian positions by mistake and the attack was postponed until a 250-round artillery bombardment was fired with delay fuses. Honner committed his battalion to attack under the artillery barrage, calculating that his troops would maintain the attack under their own fire and that the barrage would give them an advantage to succeed.[281][Note 32] The delay fuses were more effective against the Japanese positions and less likely to inflict casualties in the attacking force, compared with instantaneous fuses. The day closed with the Japanese position reduced to a small enclave that was taken the following day, after which Honner sent Dougherty the message: "Gona's gone!"[283]
West of Gona – Haddy's Village
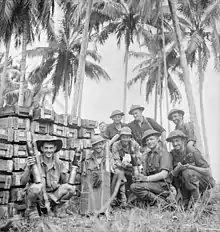
Haddy's 2/16th Chaforce company had been positioned on the west bank of Gona Creek since 21 November and had dwindled to a strength of 45 all ranks.[284] The company had been protecting the west flank and harassing the Japanese in the village. On 30 November, a Chaforce patrol, at "Haddy's" Village, a little east of the Amboga River, repulsed a Japanese force of between 150 and 200 men attempting to infiltrate east in support of the beachheads.[285] The Japanese maintained a strong presence in the area and there was an engagement on 7 December.[285] A Japanese force of 400–500 men was operating in the area.[280] Haddy, covering the withdrawal of his patrol from the village was killed.[280]
The 2/14th Battalion was tasked to protect this flank by patrolling to prevent the Japanese from reinforcing the beachheads.[286] On 10 December, the 39th Battalion patrolled by a slightly inland route toward Haddy's Village and met firm resistance from an outer perimeter of defenders to the south of the village.[287] They deployed and engaged the Japanese occupying the village while the 2/14th Battalion, which had been operating from a firm base about half-way between Gona and the village, moved along the coast to join the 39th Battalion. En route, on 11 December, it met stiff resistance from Japanese that had occupied a small cluster of huts and its advance toward Haddy's Village was slowed by a determined defence.[288] What remained of the 2/14th Battalion was placed under Honner's command and a concerted attack against the village was made on 16 December.[289] Fighting continued until the village was captured on the morning of 18 December.[290] There were 170 defenders buried after the attack but captured documents indicated a larger force had occupied the village and wounded had been evacuated prior to the final battle.[291] The occupiers were from the Japanese III/170th Infantry Regiment that had landed near the mouth of the Kumusi River in early December. After this, the Japanese forces west of the beachheads made no further serious push against the Allied western flank but Vasey maintained a force in and around Gona to secure this flank and to contain the Japanese defenders at the beachheads.[292]
Tanks at Buna
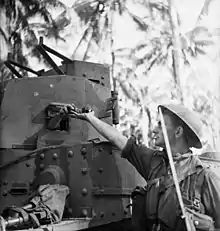
On 14 December, the 2/9th Battalion of the Australian 18th Brigade (Brigadier George Wootten) arrived at Oro Bay.[293] The brigade was attached to the 32nd Division to take over the Warren Force area, with the American units, I/126th, I/128th and III/128th Battalions, placed under command.[294] The 2/9th Battalion attacked on 18 December, on a front extending from the eastern end of the New Strip to the coast, pivoting on its left flank. The attack was supported by seven M3 tanks of the 2/6th Armoured Regiment and an eighth in reserve. The first phase was the capture of the Duropa Plantation and the area beyond bordered by the Simemi Creek. At the end of the first day, the 2/9th Battalion had lost eleven officers and 160 other ranks, two tanks had been destroyed and one damaged[295] but the right flank had been advanced to about 400 yards (400 m) west of Cape Endaiadere and the front now ran north from the eastern end of the New Strip – a substantial gain and on 19 December, the brigade consolidated.[296]
It was a spectacular and dramatic assault, and a brave one [General Eichelberger wrote later]. From the New Strip to the sea was about half a mile. American troops wheeled to the west in support, and other Americans were assigned to mopping-up duties. But behind the tanks went the fresh and jaunty Aussie veterans, tall, mustached, erect, with their blazing Tommy-guns swinging before them. Concealed Japanese positions – which were even more formidable than our patrols had indicated – burst into flame. There was the greasy smell of tracer fire ... and heavy machine-gun fire from barricades and entrenchments. Steadily tanks and infantrymen advanced through the spare, high coconut trees, seemingly impervious to the heavy opposition.[297]
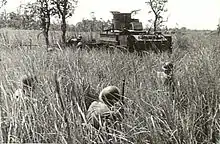
The Japanese had abandoned their positions along the New Strip and forward of the bridge, which the I/128th and I/126th (respectively) were able to occupy.[295] In an attack on 20 December, the 2/9th Battalion was strengthened by a company of the 2/10th Battalion.[298] This battalion had embarked at Porlock Harbour on 17 December.[294] On 20 December, the I/126th and then a detachment of the 114th Engineer Battalion, tried to force the Creek at the bridge but failed.[299] On the following day, the 2/10th Battalion and the two battalions of the 128th Infantry Regiment were tasked with making a crossing of the creek.[300] The 2/10th Battalion, which had concentrated at the western end of the New Strip, achieved this on 22 December about 500 yards (500 m) west of the bridge, close to where the creek returned from making a sharp 'U' toward the cape. Having made the crossing in force on the 23rd, the 2/10th Battalion then swung left back toward the bridge to occupy the bridgehead by midday with few casualties.[301] The American engineers quickly set about making repairs[302] while the I/126th Battalion crossed the creek to take up the left flank.[303] By the end of the day, the 2/10th Battalion had advanced about 400 yards (400 m) along the northern side of the Old Strip from where it had crossed the Creek. From there, the front swept back and along the fringe of the swamp toward the bridge. Phase one of Wootten's plan had concluded after six days of hard fighting.[304]
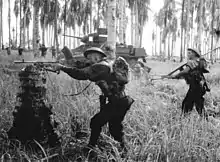
On 24 December, the 2/10th Battalion with the I/126th Battalion were to attack up the Old Strip.[305] Despite the four tanks allocated to support the attack being destroyed by a concealed anti-aircraft gun at the outset,[306] the right flank was able to advance about 600 yards (500 m), having approached the fringe of the coconut plantation that extended around the coast from the western end of the Old Strip.[307] The I/128th Battalion had also joined the fighting along the Old Strip that day.[308] The Australians were being employed as "shock troops" and relied on the Americans to clear behind them as they advanced.[309] The III/128th Battalion had similarly supported the 2/9th Battalion.[310] On 25 December, an advance by infiltration was attempted but two anti-aircraft guns and their supporting defences were encountered.[311] On 26 December, the first fell silent, out of ammunition and was over-run by the Americans.[312] The second gun and supporting positions only fell after a bitter struggle. The impetus for the advance that day had been held by strongly contested positions which ultimately yielded to the tenacity of the attackers, who suffered heavily without the benefit of supporting tanks.[313] On 27 December the attackers consolidated the position at the end of the Old Strip.[314] By 28 December, most of the Japanese were contained in the coastal strip of coconut plantation from the Simemi Creek at the end of the Old Strip to Giropa Creek, about half a mile from the coast. A plan for 28 December to squeeze the Japanese with a pivot from each flank was a costly failure and during the evening, the right flank was counter-attacked with many casualties, while the Japanese raided American positions in depth.[315] An attack was planned for 29 December, with newly arrived tanks.[316] The 2/10th Battalion was strengthened by a company of the 2/9th Battalion but the attack became a fiasco, when the tanks attacked their own troops.[317]
The 2/12th Battalion was arriving and was tasked to clear the strip of coconut plantation in an attack on 1 January, with six tanks supporting and three in reserve.[318] By this time, the III/128th Battalion had been relieved by the I/126th Battalion.[319] The fighting continued through the day.[320] The last post was reduced by 9:55 a.m. on 2 January and sporadic fighting continued into the afternoon as the position was cleared.[321] The 2/12th Battalion lost twelve officers and 179 other ranks in these two days of fighting.[322] The 18th Brigade lost 55 officers and 808 other ranks since being committed on 18 December.[322]
Huggins' roadblock
The bulk of the force occupying the roadblock on the Sanananda Track consisted of I Company, III/126th Battalion and the Regimental Anti-tank Company, with Captain John Shirley in command.[323] The forward Japanese positions had been enveloped but not isolated by Allied positions which resembled a horseshoe with the ends pointing northward and the roadblock between the two ends. Cannon Company and K Company, at the western end of the horseshoe, were about 1,400 yards (1,000 m) west of the roadblock.[324] Initially, this provided a base from which to supply the roadblock position.[255] Huggins was leading a ration party to the roadblock on 1 December when, shortly after his arrival, Shirley was killed. Huggins then took command of the force but was wounded and evacuated from the position on 8 December.[325]
The Americans mounted an attack against the enveloped Japanese positions on 5 December without success.[326] It became apparent that reinforcements were needed and the Australian 30th Brigade (less the 39th Battalion) was assigned this task for 7 December.[327] The 49th Battalion was allocated the right side of the track and was to attack in the morning, while the 55th/53rd, allocated the left side, were to attack in the afternoon. Both attacks made little gain for heavy casualties, though, the 49th Battalion did link with parts of the 2/2nd Battalion in positions near the far right end of the horseshoe of positions.[328] Until mid-December and the arrival of the 2/7th Cavalry Regiment and the 36th Battalion, the forces deployed on the track adopted a policy of patrolling and infiltrating the Japanese positions.[329]
James' roadblock
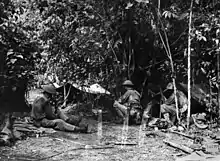
The 36th Battalion took over positions astride the track on 18 December, with the 55th/53rd and 49th Battalions shuffling left and right respectively. Attacks were to be made by these two battalions the following day against the forward Japanese positions, with the 36th in reserve.[330] The 2/7th Cavalry Regiment had circled left to advance to Huggins' that night, to launch an attack in the morning along the track and press on to Sanananda.[331] Having lost many of its junior leaders, the attack by the 55th/53rd Battalion was soon held.[332] The 49th Battalion was able to push forward, mainly along the Japanese flank, to the vicinity of the roadblock position.[333] Renewed attacks by the 49th Battalion with support from part of the 36th Battalion were held up.[334] An attempt by the 36th Battalion on 21 December to push through from positions gained by the 49th Battalion made little progress.[335]
The 2/7th Cavalry Regiment was able to advance about 450 yards (400 m) before meeting strong resistance, which also threatened the flanks of its advance. By nightfall, Captain James, with about 100 men was able to establish a perimeter about 400 yards (400 m) from Huggins'.[336] Most of the remaining force was able to fall back to Huggins'.[337] The attacking forces continued to patrol vigorously on 20 and 21 December. While the attacks failed to capture the forward position or achieve a breakthrough along the track, they isolated a further cluster of Japanese posts between Huggins' and the fresh roadblock position occupied by James.[338] There was now also a line of posts along the eastern flank to Huggins', manned by the 49th Battalion. This then became the line of communication and supply for the roadblock positions.[339] It was clear that the reinforcements were insufficient to force a decision on the Sanananda Track. There were no more Australian forces available for the beachheads unless the defences elsewhere in New Guinea were stripped. The US 163rd Infantry Regiment (41st Infantry Division) was en route to the beachheads and the 18th Brigade, with the tanks of the 2/6th Armoured Regiment, would be released from the 32nd Division when Buna fell. This would not relieve the situation on the Sanananda Track until early in the new year and patrolling continued during this lull.[340]
Buna Government Station falls
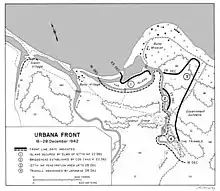
After the fall of Buna Village on 14 December, the II/128th Battalion cleared the Coconut Grove by noon on 17 December, having attacked the day before.[341] On 18 December, an attempt was made by the III/128th Battalion to advance on the Government Station by crossing to Musita Island. The advance across the Island was unopposed but was driven back off the island by heavy fire as it attempted to cross the bridge at the eastern end.[342] An attempt by the II/126th Battalion was made on the Triangle on 19 December from near the bridge over Entrance Creek, driving south but was a costly failure.[343] On 20 December, the II/127th Battalion crossed the creek at the Coconut Grove under cover of smoke but the attack became confused and "fizzled out"; Urbana Force had made no progress in three days.[344]
A bridgehead was to be made across Entrance Creek, about half-way between the Island and the Triangle, with the attack pressing through the Government Gardens and bypassing the Triangle. A crossing was made by the III/127th Battalion in assault boats on the night of 21 December and a bridge was built by which five companies were able to cross on 24 December.[345] A bridge at the south-west end of Musita Island was repaired and the occupation of the Island by midday on 23 December was uneventful.[346] An advance across the Government Gardens along an axis slightly north of east on 24 December was planned and the attack became a small unit action by companies without a clear distinction between battalions. On 24 December, the right and centre attacks bogged down. However, on the left, a platoon advanced to the sea but when it found itself isolated, out of contact and under fire from its own guns, it was forced to withdraw.[347] A renewed effort was joined by parts of the I/127th Battalion which was just arriving. The attack on 25 December produced a similar result to the previous day but this time, two companies were able to establish a perimeter about 300 yards (300 m) from the sea and 600 yards (500 m) from the Government Station.[348] The position was isolated and strongly contested by the Japanese. By 28 December, the position had been consolidated and progress had been made in the centre and on the right.[349] By this time, it had been found that the Japanese had abandoned the Triangle.[350] Also on 28 December, the III/128th Battalion tried to force a bridgehead from Musita Island in assault boats but this failed when the artillery cover lifted while the boats were in midstream.[351]

On the night of 29 December, it was discovered that the Japanese were no longer contesting an approach to the Government Station across the spit seaward of Musita Island.[352] Plans were made to exploit this with an attack early on 31 December, approaching from the spit and from the bridge on Musita Island. Irresponsible firing alerted the Japanese of the approach along the spit and the inexperienced company of the II/127th Battalion broke under fire after the company commander was wounded. Disaster was averted by the intervention of the regimental commander, Colonel Grose, who rallied the troops. The second of the companies committed along this axis was "more resolute" and a beachhead was secured.[353] On 1 January 1943, Urban Force attacked the Government Station and by 2 January, some Japanese troops were breaking to the sea. By mid-afternoon, the advances from the coast and the bridge had met. Final positions were captured later that afternoon and a link was made with the Australians on the right flank.[354]
Realignment of Allied forces
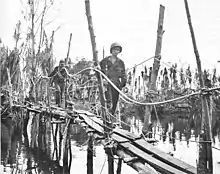
With the fall of Buna, the 32nd Division was to press on against the Japanese at Sanananda–Giruwa from the east while the 18th Brigade and tanks of the 2/6th Armoured Regiment were to join the 7th Division at the Sanananda Track, with the US 163rd infantry Regiment was also joining at the Track. On 22 December, the headquarters of the 21st Brigade and the 39th Battalion moved from Gona to the Sanananda Track, where the 49th Battalion and 2/7th Cavalry Regiment came under command and the 39th Battalion relieved the Americans occupying Huggins' Roadblock.[355] The AIF battalions properly belonging to the brigade remained in the Gona area, to be known as Goforce, under command of Lieutenant Colonel Challen. The Americans of the 126th Infantry Regiment that remained were under command of the 30th Brigade but were returned to the 32nd Division at Buna on 9 January.[356]
Brigadier Porter, commanding the 30th Brigade wrote to Eichelberger:
I am taking the opportunity offered by Major Boerem's return to you to express my appreciation of what the men of your division who have been under my command have done to assist our efforts on the Sanananda Road. By now it is realized that greater difficulties presented themselves here than were foreseen, and the men of your division probably bore most of them ... Your men are worthy comrades and stout hearts. I trust that they will have the opportunity to rebuild their depleted ranks in the very near future. With their present fund of experience they will rebuild into a formidable force ...[357]
.JPG.webp)
On the night of 2/3 January, with the arrival of the 163rd Regiment, there was a general reshuffle. The Americans took over the positions then held by the Australians under command of the 21st Brigade. These Australian units then came under command of the 30th Brigade and relieved the 36th and 55th/53rd Battalions, which were placed under command of the newly arrived Headquarters 14th Brigade which took over the responsibilities of Goforce.[358] Thus relieved, the 21st Brigade and its AIF battalions returned to Port Moresby.[359] On the morning of 10 January, the 18th Brigade took the 2/7th Cavalry Regiment under command and occupied the positions held by the 39th and 49th Battalions of the 30th Brigade, in preparation for an attack on 12 January.[360]
Rankin roadblock
Leading up to this, Colonel Doe, commanding the 163rd Infantry Regiment, tried to force the Japanese positions between the two roadblocks. The attack by the I/163rd Battalion on 8 January was fiercely met and thrown back by the defenders.[361] On 9 January, the II/163rd Battalion deployed through Huggins' (known as Musket by the 163rd Infantry Regiment) to a position on the Killerton Track.[362] The battalion established a roadblock in close contact with Japanese positions to the south. This position was slightly south of west from Huggins' and was known as "Rankin", after the battalion commander.[363]
Tanks at Sanananda Track
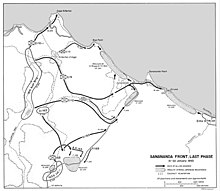
On 12 January, the 2/9th and 2/12th Battalions, each reinforced with a company from the 2/10th Battalion attacked the forward Japanese positions along the Sanananda Track. Three tanks were allocated to support the attack with one in reserve. Unable to manoeuvre, the tanks were quickly knocked out by a concealed gun and the attack was repulsed, particularly by the Japanese on the left, in front of the 2/12th Battalion but the Japanese abandoned the forward positions that had barred the track to Cape Killerton. The positions south of Huggins' were abandoned over the nights of 12 and 13 January.[364]
Tarakena
The 127th Regiment had been tasked to advance along the coast toward Sanananda–Giruwa from Buna and a beachhead had been established at Siwori but at dusk on 4 January, the Japanese attacked the advanced American position forward of the village, forcing them back.[365] Two companies crossed Siwori Creek on the morning of 5 January and advanced toward Tarakena, against a Japanese delaying action, reaching the village on the evening of 8 January.[366][367] The fast flowing Konombi Creek, immediately west of the village was covered by fire and a significant obstacle to any further advance.[368] A bridgehead was secured by 10 January but the country beyond was impassable because at high tide, the ocean and swamp merged.[369] The advance by the 32nd Division paused until 15 January.[362][Note 33]
Cape Killerton, Sanananda and Giruwa
The 18th Brigade advanced toward Cape Killerton on the morning of 15 January, with the 2/10th leading but the going became very heavy as the track petered into swamp. The beach was reached the next day and Wye Point by that evening, where the battalion encountered the outer defences of a strong position.[373] The II/163rd, leaving Rankin, followed in the wake of the 18th Brigade. It left the Killerton track at the coconut grove (a little less than half-way to Cape Killerton) to find the second, more easterly Killerton track.[374] On 16 January, it moved south along the second track to support of the rest of the regiment. It approached the Japanese positions near James' (known as Fisk or Kano by the 163rd Infantry Regiment) from the rear and linked with the I/163rd Battalion.[375][Note 34] The 2/12th struck east from the coconut grove on the Killerton track for the main Sanananda track to press along the track to Sanananda. It reached this by 11:30 on 17 January. The 2/9th struck east from the Kilerton track, through the village. It paralleled the coast before striking northeast for Sanananda, bypassing the Japanese coast defences east of Wye Point.[378] It halted just short of the Sanananda village positions for the night.[379]
The positions between Huggins' and James' were reduced on 16 January by the 163rd Infantry Regiment.[380] It also enveloped the Japanese positions to the front of James'. This was the last of the cluster that had held the advance of the Australians along the track. The II/163rd, having patrolled back along the second Killerton track to meet with the rest of the regiment, skirted east to the main Sanananda Track and advanced along this until it linked with the 2/12th Battalion.[381] Having found the track clear, it returned to the regiment, which was detained by the task before it until 22 January.[382]
On the morning of 18 January, the 2/9th Battalion approached Sanananda village through swamp from the southwest. This unlikely approach was not strongly defended and the village fell by 1:00 pm. The battalion then cleared Sanananda Point and east to the Giruwa River before nightfall.[383] The 127th Infantry Regiment, having paused at Konombi Creek recommenced its advance on 16 January and made steady progress, taking Giruwa on 21 January and linked with the Australians already on the Giruwa River.[384][Note 35]
By the evening of 17 January, the 2/12th Battalion was astride the Sanananda Track and had linked with 'A' Company of the 2/10th Battalion that had been directed to patrol to the track from Killerton village earlier.[378] On 18 January, it advanced north toward Sanananda but the battalion met determined resistance that could not be overcome that day despite three attacks.[387] On 19 January, positions on the western side of the track were taken by 'A' Company of the 2/10th Battalion, who were detached temporarily to the 2/12th Battalion. Lieutenant Colonel Arthur Arnold, commanding the 2/12th Battalion, described this feat as "one of the outstanding features of this phase of the campaign".[387] The battalion was able to link with a company of the 2/9th Battalion that had been lending assistance from the north end of the track. Defences on the eastern side of the track resisted the efforts of the attackers that day and the following but on the morning of 21 January, only the sick and wounded manned the position and offered little resistance.[388]
The 2/10th Battalion confronted stubborn resistance in its advance from Wye Point, compounded by extremely difficult terrain.[392] The strip separating sea from swamp was only a few feet wide at high tide and not much more at low tide.[393] Progress was painfully slow, with the only effective fire support coming from mortars and this was limited since the ammunition had to be man-packed forward.[394] Having cleared Sanananda, the 2/9th Battalion pushed west in support of the 2/10th Battalion, initially with one company.[394] By 20 January, only 300 yards (300 m) separated the two battalions but it was not until 1:15 p.m. on 22 January that it was reported that the forces had joined and organised resistance had ended.[395]
Aftermath
Although the main fighting was over, significant numbers of Japanese remained at large about the beachheads and had to be dealt with over the following days.[396] The 14th Brigade clashed sharply with bands of fugitives in the Amboga River area.[396] The remaining regiments of the US 41st Division were moved forward to relieve the depleted Allied forces and had the remnants of the Japanese forces around the Kumusi River to deal with.[397] Dobodura was developed as a major forward air base, supported by improved harbour facilities at Oro Bay.[398]
Australian battle casualties were 3,471, with 1,204 killed in action or died of wounds and 66 missing, presumed dead. This does not include those who were evacuated sick.[399] For a total strength of 13,645, American ground forces suffered 671 killed in action, 116 other deaths, 2,172 wounded in action and 7,920 sick for a total of 10,879. The 163rd Infantry Regiment sustained 88 killed in action and 238 wounded.[400] Overall, about 60,000 Americans fought on Guadalcanal, suffering 5,845 casualties, including 1,600 killed in action. On Papua more than 33,000 Americans and Australians fought, and they suffered 8,546 casualties, of whom 3,095 were killed. On Guadalcanal, one in 37 died, while troops in New Guinea had a one in 11 chance of dying.[401]
In his book, Our Jungle Road to Tokyo, written in 1950, Eichelberger wrote, "Buna was ... bought at a substantial price in death, wounds, disease, despair, and human suffering. No one who fought there, however hard he tries, will ever forget it." Fatalities, he concluded, "closely approach, percentage-wise, the heaviest losses in our Civil War battles." He also commented, "I am a reasonably unimaginative man, but Buna is still to me, in retrospect, a nightmare. This long after, I can still remember every day and most of the nights."[404]
Historian Stanley Falk agreed, writing that "the Papuan campaign was one of the costliest Allied victories of the Pacific war in terms of casualties per troops committed."[89] The 2/126th was especially hard hit. The fighting on the Sanananda track had reduced their strength of over 1,300 to 158.[405][Note 37]
During Kokoda, Horii had been ordered to withdraw, or euphemistically, according to Bullard, to "advance in another direction".[407] At Gorari, the well-ordered withdrawal collapsed under the pressure applied by the 7th Division.[35] Vasey wrote of this, "... we have just proved he does not like being attacked from all directions anymore than we do. ... [Gorari] absolutely routed the Jap."[408] For the defence of Buna, orders were given by the Japanese that, "It is essential for the execution of future operations that the Buna area be secured."[409] There, Vasey observes: "The Jap is being more stubborn and tiresome than I thought and I fear a war of attrition is taking place on this front. The Jap won’t go till he is killed and in the process he is inflicting many casualties on us."[410] He went on to write, "I had no idea that the Japanese, or anyone, could be as obstinate and stubborn as he has proved to be. I compared our situation now to Crete reversed, but unfortunately the Japanese is not playing by our rules."[411][Note 38] The resolve and tenacity of the Japanese defenders was, to Western perceptions, unprecedented to the point of being "fanatical",[413] and had not previously been encountered. It was to mark the conduct of further battles throughout the war.[414][Note 39]
Estimating the Japanese losses is as difficult as determining the strength of their force. Japanese sources give their losses at about 8,000.[104][Note 40] More than 200 prisoners, including 159 Japanese were taken at Gona and Sanananda.[417] At Buna, only 50 prisoners, mostly non-Japanese labourers, were taken.[418][Note 41] However, the victory, "was not as complete as could be desired", as many of the able-bodied Japanese troops escaped.[417]
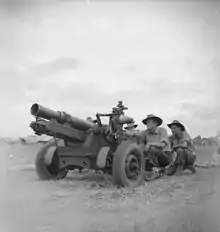
Authors including McCarthy[420] and McAuley[421] have questioned whether it was necessary to engage the Japanese in a costly battle or whether they could have been contained and reduced by starvation. Both concluded that a battle was necessary and that a victory was necessary for the Allies and not just MacArthur. Condon-Rall and Cowdrey have a similar position but a different rationale, citing Eichelberger, who wrote that disease "was a surer and more deadly peril to us than enemy marksmanship. We had to whip the Japanese before the malarial mosquito whipped us."[422][423][Note 42] However, it is difficult not to question whether this victory could have been achieved without the loss that was incurred.[425] It is clear that undue pressure for haste exacerbated the Allies losses.[154][153] It is also apparent that the process of pinching off or infiltrating the Japanese defences produced results where repeated assaults failed to produce any gain.[426][Note 43] The losses suffered by the Australian forces limited their offensive capacity for "months" following the battle.[430][431]
There were many valuable, albeit costly lessons gained through the campaign.[432] It proved to be a massive learning experience for the Allies.[433] These lessons came to form the core of doctrines and tactics employed by the Australian Army throughout the remainder of the war.[434]
Recognition and memorials
For eligible Australian units, the battle honour "Buna–Gona"[435] was bestowed. Subsidiary honours were also bestowed for: "Gona",[436] "Sanananda Road",[437] "Amboga River",[438] "Cape Endaiadere–Sinemi Creek"[439] and "Sanananda–Cape Killerton".[440][Note 44]

First Sergeant Elmer J. Burr[443] and Sergeant Kenneth E. Gruennert[444] were later posthumously awarded the Medal of Honor for their actions in the Battle of Buna–Gona. Herman Bottcher was awarded the Distinguished Service Cross twice.[445]
A brass memorial plaque was placed at the site of the Huggins' roadblock after the war.
3rd Battalion, 126th Infantry Regiment,
32nd Division "Huggins Road Block"
November 1941 – December 1942
With grateful appreciation The American Legion remembers Capt. Meredith Huggins. Erected on behalf of the American Legion by National Commander April[446]
The Japanese also erected a monument commemorating their soldiers' struggle.
The war dead from Kochi-ken lies here. 1974, July Governor of Kochi, Kochi-ken, Masumi Mizobuchi, representative of bereaved New Guinea society.[447][448]
Australian units placed a plaque in memory of their fallen comrades.
To the memory of the 161 members of the 53, 55, 55/53rd Australian Infantry Battalion (A.I.F.)[Note 45] who gave their lives in Papua New Guinea 1942–1945.[447]
Footnotes
- Australian War Memorial (AWM) collection reference number.
- See Order of battle for details.
- This is the number of combat effective troops. Total strength initially has been estimated at 9,000–10,000. See Japanese strength for details.
- Deaths include 1,204 Australian and 671 US killed in action or died of wounds. Illness from contracting tropical diseases exceeded 50 percent of the Allied troops. This figure includes nearly 8,000 Americans evacuated sick but does not include Australian troops evacuated sick (see section – 'Aftermath').
- 4,000 buried by Allies. See Number of Japanese killed for details.
- An advance party under Captain Medendorp departed on 6 October.[31]
- Anderson reports the distance as 25 mi (40 km).[37] This is consistent with the straight-line distance indicated by maps in other sources.[38]
- Confirmed by measurement using Google Earth.
- Brigadier Harold Disher was the Deputy Director Medical Services, New Guinea Force from late November 1942. At the end of December, he remarked in his diary, "that he thought that 100 percent of the men at Milne Bay and in the Buna area had been infected".[70] By the end of January 1943, the malarial rate for operational areas rose to a peak equivalent to 2,496 per 1,000 per year,[71] or nearly 250 percent. This would include relapses at an average of two per man. The 163rd Infantry Regiment arrived at Sanananda from early January. It had deployed from Australia in late December, where it had not been exposed to the risk of malaria.
- These figures appear to be based on the whole of New Guinea and not just operations around Buna–Gona.
- Harding, commanding the US 32nd Division, had intended to use a number small coastal vessels and barges to ferry supplies forward from Oro Bay. Air raids on 16 and 17 November damaged or destroyed the vessels he had intended to use.[76]
- Bullard reports the landing of supplies by submarine near Mambare Bay. He does not record submarines directly resupplying Buna–Gona.[90]
- In September 1942, Japanese daily rations had consisted of 800 g (28 oz) of rice and tinned meat; by December, this had fallen to 50 g (1.8 oz).[93]
- Bartholomew,[95] among other evidence of cannibalism, recounts having been shown food tins that contained fleshless hands. AWM records indicate that a "Japanese custom was to cut off a dead friend's hand, skin it, char the flesh and bones, and send the mementos to the dead man's family."[96]
- See Japanese strength and Reconciling reported strengths for details.
- Sandler gives the force as 3,450.[108] See Strength at key positions for further details.
- See Strength at key positions for details.
- Bullard reports the strength landed as 591.[116]
- See Order of battle for details.
- The establishment strength of an Australian battalion at this time was 910 all ranks.[128] The 2/12th Battalion was the strongest of the battalions in the 18th Brigade.[129] It was deployed with a total strength of 615 men.[130] Other Australian battalions were typically about half this strength or fewer.
- On 14 November, the 32nd Divisions forward strength was reported as 6,951, consisting of the 126th and 128th Regimental Combat Teams and the forward echelon of division headquarters.[131]
- Nelson reports that by the end of 1942, 5,500 men were employed by ANGAU in the Buna area.[135]
- Historian, Adrian Threlfall, among others, notes that tactical air support in jungle conditions was in its infancy and that the amount of support provided was insufficient.[149]
- Sandler described the Buna area as being three-quarters of a mile deep (about 1300 m).[181]
- The Japanese defences shown on the commander's photo map[182] are indicative of the firm ground at Buna. See section – 'Intelligence' herein for photo map.
- Milner[201] reports the gain as "several hundred yards". A reconnaissance by Major Harry Harcourt, Officer Commanding the 2/6th Independent Company, found that the gain on the 20th was not nearly as great as what Lieutenant Colonel Robert McCoy, commanding the I/128th Battalion, believed.[202]
- The cited reference (Center of Military History 1990, p. 32), additionally lists one 105mm howitzer and a third mountain howitzer. McCarthy records that the 105mm howitzer did not arrive until 29 November, which is supported by Milner.[207][208] Gillison records that it was not landed until 26 November.[209] Allan & Cutts indicate that the third mountain howitzer did not join the battle in support of the 32nd Division until 5 December and was still located near Kokoda on 26 November.[210]
- Milner[256] reports the initial attacking force as 256. Captain Meredith Huggins reported the strength on 5 December as 225.[257]
- Gona had been an Anglican mission before the war.
- The location of points indicated is approximate. They have been transposed onto the air photo from the sketch appearing in McCarthy.[258]
- The total strength of the three battalions was 35 officers and 701 other ranks.[265] The 3rd Battalion entered the fighting with a strength of 179 all ranks.[267] The three Chaforce companies entered the fighting with a combined strength of 18 officers and 311 other ranks.[268] The establishment of a battalion at this time was 910 all ranks.[128]
- Brune opined that Honner's decision "took guts".[282]
- McCarthy states that the pause lasted until 16 January.[370] Milner recounts that the 127th Infantry Regiment met stiff opposition when it attempted to advance on 15 January.[371] The advance began in greater force on 16 January. The Center of Military History records that there was active patrolling on this front until the attack on 16 January.[372]
- The Center of Military History publication[376] states that the II/163rd Battalion moved via the transverse track from the junction on the second Killerton track to the main Sanananda track. From there, it advanced south to support the Regiment. Milner records that the II/163rd Battalion followed the second Killerton track southward, even though all trace of it disappeared.[377]
- McCarthy[385] refers to the river at Giruwa but none of the maps in the principal sources[386] appear to indicate a watercourse at this point. They do indicate a lagoon.
- For a further image, see "The Photo That Won World War II: 'Dead Americans at Buna Beach,' 1943". TIME. 19 October 2013. Archived from the original on 18 May 2015. Retrieved 10 May 2015.
- McCarthy[356] states, "battle casualties, sickness and the transfer of regimental headquarters to the Buna front having reduced their original 1,400 to a mere 165".[406]
- McCarthy observes, "Quite obviously the Japanese were soldiers to whom, lacking a means of escape, only death could bring an acceptable relief."[412]
- Bergerud[415] and Powers[416] discuss the source of this fanaticism as arising from indoctrination. Powers explores other contributing factors. The Battle of Tarawa is an example of future experiences. From the Japanese garrison of 4,836, 17 Japanese soldiers and 129 Korean labourers were taken prisoner. The balance of the garrison was killed during the battle.
- See Number of Japanese killed for detail.
- Milner reports that 350 prisoners were taken during the fighting in Papua, indicating this included fighting along the Kokoda Track, at Milne Bay and Goodenough Island.[419]
- McAuley also notes, "history abounds with examples of besiegers defeated by disease"[424]
- Porter referred to this as "Peaceful Penetration".[427] This phrase originally referred to a successful policy of aggressive patrolling and infiltration employed by Australian forces near Armiens in World War I, following the German Spring Offensive of 1918.[428] At Buna–Gona, this was also referred to as "stalk and consolidate" and "soft spot" tactics.[429]
- The AWM refers to a sixth subsidiary honour of "Buna Village".[435] The Battlefields Nomenclature Committee which was responsible for determining the official names of battles and engagements with respect to Britain and the Commonwealth, also lists six subsidiary battles.[441] Battle honours use the titles as determined by the Committee but these are not, per se, battle honours. While "Buna Village" is the official name of the engagement, it does not appear to have been actually conferred upon any unit as a subsidiary battle honour. Maitland lists only five subsidiary honours.[442]
- The inscription "A.I.F." is accurate.[449] Militia units with more than 75 percent volunteers could be identified as AIF units.[450]
Citations
- MacArthur 1994b, p. 188.
- Cosgrove, Ben. "The Photo That Won World War II: 'Dead Americans at Buna Beach,' 1943". Time. Archived from the original on 20 September 2017. Retrieved 30 July 2017.
- Costello 1982; Liddell Hart 1971; Williams 2004.
- Wigmore 1957, p. 382 & 511.
- Milner 1957, pp. 17–23.
- Bullard 2007, pp. 20–21.
- Bullard 2007, p. 40.
- Keogh 1965, p. 134.
- Smith 2000, p. 25.
- Milner 1957, p. 146.
- Stanley 2007, p. 29.
- Horner 1993, pp. 4–5.
- Bullard 2007, pp. 57–61.
- Horner 1993, p. 10.
- McCarthy 1959, pp. 122–125; Bullard 2007, pp. 106–107.
- Bullard 2007, pp. 94–176; Milner 1957, pp. 54–121; McCarthy 1959, pp. 108–146, 193–228.
- Milner 1957, pp. 81, 87.
- Coates 2006, p. 232.
- Hough 1958, p. 252.
- Dod 1966, p. 172; Hough 1958, p. 254.
- Dod 1966, p. 209; Hough 1958, p. 371.
- Hough 1958, pp. 254–374; Hopkins 2008, p. 135.
- Smith 2000, pp. 162–193.
- Bullard 2007, p. 159.
- Bullard 2007, pp. 159, 166.
- Bullard 2007, p. 158; Milner 1957, pp. 54–121.
- Bullard 2007, p. 160.
- Milner 1957, pp. 98–104.
- Fitzsimons 2004, p. 400; Center of Military History 1990, p. 5.
- Milner 1957, p. 112.
- Milner 1957, p. 111.
- McCarthy 1959, pp. 352–353.
- Brune 1998, pp. 149–150.
- McCarthy 1959, p. 307.
- Milner 1957, p. 121.
- McCarthy 1959, p. 418; James 2008, p. trek map; Milner 1957, p. 147.
- Anderson 1992, p. 7.
- Milner 1957, p. 127; McCarthy 1959, p. 385.
- McCarthy 1959, pp. 385–386.
- McCarthy 1959, pp. 384–387, 418–419. McCarthy does not record the advance of the 7th Division from Wairopi meeting any significant opposition until it approached the immediate vicinity of the main Buna–Gona defences.
- Anderson 1992, p. 11.
- "No title". Evi. Amazon. Archived from the original on 8 December 2015. Retrieved 11 November 2014. Cite uses generic title (help)
- Center of Military History 1990, p. 10.
- Center of Military History 1990, pp. 9–10; MacArthur 1994, p. 87.
- Center of Military History 1990, p. 11.
- Center of Military History 1990, p. 9.
- "Popondetta". Innovative Technologies for Engaging Classrooms. Archived from the original on 8 December 2015. Retrieved 13 November 2014.
- "World War II: Buna Mission". Archived from the original on 23 October 2008. Retrieved 4 February 2009.
- Edwards 2010, p. 153.
- Milner 1957, pp. 140–141.
- Brien 2013, pp. 3–4.
- Brien 2013, p. 4.
- Center of Military History 1990, p. 12; Brien 2013, p. 4.
- Condon-Rall & Cowdrey 1998, p. 130.
- Center of Military History 1990, p. 12.
- Eichelberger 1950, p. 37.
- Drea 1993, pp. 3–4.
- Bullard 2004, p. 203.
- "Advance to Buna – Part 2 of The 32nd 'Red Arrow' Infantry Division in World War II". 32nd 'Red Arrow' Veteran Association. Archived from the original on 8 September 2010. Retrieved 6 January 2010.
- Bergerud 1996, p. 75.
- Walker 1957, p. 321; Condon-Rall & Cowdrey 1998, p. 131.
- Walker 1957, pp. 70–71.
- Walker 1957, p. 122.
- Walker 1957, p. 47.
- Walker 1957, p. 114; Sandler 2001, p. 613.
- Walker 1957, p. 49; Sandler 2001, p. 613.
- Walker 1957, p. 70.
- McCarthy 1959, pp. 157–158.
- Bergerud 1996, p. 94.
- Walker 1957, p. 121.
- Walker 1957, p. 123.
- Gailey 2000, p. 165.
- Walker 1957, p. 86.
- Brien 2013, p. 6.
- McCarthy 1959, pp. 354, 385, 419; Center of Military History 1990, p. 22.
- McCarthy 1959, pp. 354–355.
- Center of Military History 1990, p. 20.
- Watson & Rohfleisch 1950, pp. 116–117, gives a general account of details.
- Center of Military History 1990, p. 24.
- McCarthy 1959, p. 419; Milner 1957, p. 151.
- McAuley 1992, p. 57; Dod 1966, p. 198.
- Gillison 1962, pp. 659, 661.
- McAuley 1992, pp. 8–9; MacArthur 1994, p. 89.
- Mayo 1968, p. 82; Milner 1957, p. 257.
- Masterson 1949, pp. 588–589; Gill 1968, pp. 262, 268.
- McCarthy 1959, p. 442; McAuley 1992, p. 116.
- McCarthy 1959, pp. 415–416.
- Bullard 2007, p. 197.
- Campbell 2007.
- Bullard 2007, p. 182.
- "Japanese Armed Forces Standard Rations". Archived from the original on 15 March 2015. Retrieved 1 November 2014.
- Bullard 2007, p. 197; Brune 2003, p. 542.
- Happell 2008, p. 78.
- Brien 2013, p. 26; McCarthy 1959, p. 523; McAuley 1992, p. 290; Milner 1957, pp. 340, 363.
- Bartholomew, Frank (24 April 1945). "Japanese Cannibalism in New Guinea". The Sydney Morning Herald. Australian Associated Press. p. 3. Retrieved 27 November 2014.
- "P02443.017". Australian War Memorial. Retrieved 27 November 2014.
- MacArthur 1994, p. 85; Center of Military History 1990, p. 14.
- McCarthy 1959, p. 444; Milner 1957, p. 214.
- McAuley 1992, p. 110.
- McAuley 1992, p. 12; Milner 1957, p. 144 and note 48.
- Anderson 1992, p. 22; Milner 1957, p. 146.
- Milner 1957, p. 144, note 48.
- Bullard 2007, p. 205.
- McCarthy 1959, p. 531.
- Milner 1957, p. 146; McAuley 1992, pp. 24–25; Bullard 2007, p. 177.
- McCarthy 1959, p. 416; Milner 1957, p. 213.
- McCarthy 1959, p. 383; Milner 1957, p. 146; Edwards 2010, p. 151.
- Sandler 2001, p. 201.
- McCarthy 1959, p. 441; Milner 1957, pp. 145, 148.
- McCarthy 1959, p. 415; Center of Military History 1990, p. 64; Bullard 2007, p. 197; Milner 1957, p. 346.
- McAuley 1992, p. 127; McCarthy 1959, p. 415; Milner 1957, p. 145.
- McAuley 1992, p. 40.
- McCarthy 1959, pp. 415–416; Bullard 2007, pp. 181, 185–186; Milner 1957, pp. 213, 217.
- McCarthy 1959, pp. 415–416; Milner 1957, p. 214; Bullard 2007.
- McCarthy 1959, p. 416; Milner 1957, p. 218; Bullard 2007, p. 187.
- Bullard 2007, p. 187.
- McCarthy 1959, p. 447.
- Milner 1957, pp. 232–233; McCarthy 1959, p. 527.
- Bullard 2007, p. 173.
- Bullard 2007, p. 177.
- McAuley 1992, p. 40; Bullard 2007, p. 181.
- Bullard 2007, pp. 181, 185.
- Brien 2013, p. 8.
- Milner 1957, p. 141.
- MacArthur 1994, p. 88.
- McCarthy 1959, p. 359; Brien 2013, p. 9; Center of Military History 1990, p. 14.
- Milner 1957, pp. 127–132.
- Palazzo 2004, p. 94.
- McCarthy 1959, pp. 454, 463, 480.
- McCarthy 1959, p. 480.
- Milner 1957, pp. 131–132 and note 13.
- McCarthy 1959, pp. 331, 446.
- Center of Military History 1990, p. 22; Dod 1966, pp. 198, 203; HBC 1943, pp. 94–95.
- Kienzle 2011, p. 191.
- Nelson 2007, p. 80.
- McAuley 1992, p. 66.
- McCarthy 1959, p. 374.
- Milner 1957, pp. 132–137.
- Brune 2003, p. 491.
- Dean 2013, p. 230.
- Brune 2003, pp. 56, 565.
- Brien 2013, p. 12.
- McCarthy 1959, pp. 405–406.
- Anderson 1992, p. 22.
- Dod 1966, pp. 189,195–196.
- Watson 1944, pp. 88–89.
- Gailey 2000, p. 139.
- "Papuan Campaign – The Battle of Buna". The 32D Infantry Division in World War II The 'Red Arrow'. Archived from the original on 6 August 2012. Retrieved 1 November 2014.
- Threlfall 2014, p. 149.
- Brien 2013, p. 10; McAuley 1992, pp. 237, 276.
- McAuley 1992, p. 33.
- Brien 2013, p. 10.
- "From Syria To Gona And Kokoda in Between – Captain Harry Katekar M.I.D. of the 2/27th Battalion". 30 November 2010. Archived from the original on 29 October 2013. Retrieved 23 October 2013.
- Milner 1957, pp. 369–370.
- Brune 2003, pp. 552–553.
- McCarthy 1959, p. 355.
- McCarthy 1959, pp. 418, 385.
- McCarthy 1959, p. 358.
- Milner 1957, p. 140.
- McCarthy 1959, pp. 418–419, 386.
- Milner 1957, pp. 147–149, 151; McCarthy 1959, pp. 384–386; McAuley 1992, pp. 16–29.
- McAuley 1992, pp. 18, 29.
- Brien 2013, p. 18.
- McCarthy 1959, p. 434.
- McCarthy 1959, pp. 394–395.
- McCarthy 1959, pp. 402, 501.
- McCarthy 1959, pp. 423–424, 442–446.
- Milner 1957, pp. 251–252; McCarthy 1959, p. 382.
- Milner 1957, pp. 260–281, 304–309; McCarthy 1959, pp. 455–485.
- McCarthy 1959, pp. 403–413, 498–508.
- McCarthy 1959, p. 508.
- Milner 1957, pp. 328–330, 332–333.
- McCarthy 1959, pp. 513–517; Milner 1957, pp. 333, 343–346; Center of Military History 1990, p. 73.
- Quoted in McCarthy 1959, pp. 516–517.
- McCarthy 1959, pp. 517–526; Milner 1957, pp. 350–364.
- Milner 1957; Bullard 2004, p. 201.
- McCarthy 1959, p. 527.
- McCarthy 1959, pp. 527, 530.
- Milner 1957, p. 147; Anderson 1992, p. 11.
- McCarthy 1959, p. 370 see map.
- Sandler 2001, pp. 200–201.
- Milner 1957, p. 175.
- McCarthy 1959, p. 455.
- Dod 1966, p. 200.
- Milner 1957, pp. 140, 175, 190; McCarthy 1959, p. 370; Center of Military History 1990, p. 26. See maps.
- Center of Military History 1990, p. 42; McAuley 1992, p. 179.
- Center of Military History 1990, p. 31.
- Milner 1957, p. 142; Center of Military History 1990, p. 52.
- McCarthy 1959, p. 361; Center of Military History 1990, p. 30.
- McCarthy 1959, p. 356.
- McCarthy 1959, p. 366; Milner 1957, p. 185.
- McCarthy 1959, p. 361.
- McCarthy 1959, pp. 488–489; Milner 1957, p. 182.
- McCarthy 1959, p. 356; McCarthy 1959, p. 370.
- McCarthy 1959, pp. 355, 357–360; Milner 1957, p. 157.
- Center of Military History 1990, p. 13.
- McCarthy 1959, pp. 356, 358.
- McCarthy 1959, p. 358; Center of Military History 1990, p. 27; Milner 1957, pp. 174–176.
- Center of Military History 1990, p. 29.
- McCarthy 1959, p. 359.
- Milner 1957, p. 176.
- McCarthy 1959, p. 360.
- Center of Military History 1990, p. 28.
- Milner 1957, pp. 177–178.
- McCarthy 1959, pp. 360–361; Center of Military History 1990, p. 28; Milner 1957, pp. 177–178.
- Center of Military History 1990, p. 32.
- McCarthy 1959, p. 367.
- Milner 1957, p. 193.
- Gillison 1962, p. 662.
- Allan & Cutts 1994, pp. 47, 64.
- Milner 1957, pp. 366–367; McCarthy 1959, pp. 180–182.
- McCarthy 1959, p. 366.
- McCarthy 1959, p. 367; Center of Military History 1990, pp. 30–33.
- McCarthy 1959, pp. 369–370; Milner 1957, pp. 194–195.
- McCarthy 1959, p. 364.
- McAuley 1992, pp. 68–71.
- Center of Military History 1990, pp. 29–30; McCarthy 1959, pp. 364–365.
- Center of Military History 1990, p. 32; McCarthy 1959, pp. 370–371; Milner 1957, pp. 189–192.
- McCarthy 1959, p. 372.
- McCarthy 1959, p. 373; Milner 1957, p. 193.
- Huber 1995, p. 124; Milner 1957, pp. 211–212; Center of Military History 1990, p. 37.
- Huber 1995, p. 124; Milner 1957, p. 212; Center of Military History 1990, p. 37.
- McAuley 1992, p. 179; Huber 1995, p. 124.
- Huber 1995, p. 124; Milner 1957, p. 234.
- Gailey 2000, p. 167; McCarthy 1959, p. 374.
- Huber 1995, p. 124.
- Whitney 1956, p. 83.
- Fath 2004, p. 46.
- McAuley 1992, p. 185; Huber 1995, p. 124.
- Fath 2004, p. 44.
- McAuley 1992, p. 185; Fath 2004, p. 46.
- Fath 2004, pp. 42–44.
- Milner 1957, p. 244.
- "Uncle Bob". Time Magazine. 10 September 1945. Archived from the original on 8 May 2010. Retrieved 4 February 2009.
- McCarthy 1959, pp. 378–380; Center of Military History 1990, pp. 39–42.
- Milner 1957, pp. 243–250.
- Johnston, George H. (20 September 1943). "The Toughest Fighting in the World". TIME Magazine. Archived from the original on 24 November 2011. Retrieved 30 October 2007.
- Williams 2012.
- McCarthy 1959, pp. 374–378; Milner 1957, pp. 234–240.
- Center of Military History 1990, p. 42; McCarthy 1959, p. 380.
- McCarthy 1959, p. 381.
- Milner 1957, p. 252; McCarthy 1959, p. 382.
- Center of Military History 1990, p. 43; McCarthy 1959, p. 382.
- McCarthy 1959, p. 382; Milner 1957, pp. 252–254.
- Milner 1957, p. 151; McCarthy 1959, pp. 386–387.
- McCarthy 1959, p. 388.
- McCarthy 1959, p. 389.
- McCarthy 1959, p. 392.
- McCarthy 1959, pp. 390–393.
- McCarthy 1959, p. 393.
- McCarthy 1959, pp. 393–394.
- McCarthy 1959, p. 386.
- McCarthy 1959, p. 394.
- McCarthy 1959, pp. 394–402; Milner 1957, pp. 155–164.
- McCarthy 1959, p. 403.
- Milner 1957, p. 163.
- Milner 1957, p. 224.
- McCarthy 1959, p. 423.
- McCarthy 1959, pp. 418–419.
- McCarthy 1959, p. 419.
- Milner 1957, p. 149.
- McCarthy 1959, pp. 419–421; Milner 1957, p. 149.
- McCarthy 1959, p. 421; Milner 1957, p. 149.
- McCarthy 1959, pp. 421–422; Milner 1957, p. 150.
- McCarthy 1959, p. 422.
- McCarthy 1959, p. 422; Milner 1957, p. 150.
- McAuley 1992, p. 36.
- McCarthy 1959, pp. 425, 427, 437.
- McCarthy 1959, pp. 434, 427.
- McCarthy 1959, p. 424.
- McCarthy 1959, pp. 425–427; Milner 1957, p. 424.
- McCarthy 1959, pp. 427–430; Milner 1957, pp. 214–215.
- McCarthy 1959, pp. 430–431; Milner 1957, p. 215.
- McCarthy 1959, pp. 431–432; Milner 1957, p. 215.
- McCarthy 1959, p. 343.
- McCarthy 1959, pp. 126–126.
- McCarthy 1959, p. 434; Milner 1957, p. 60.
- McCarthy 1959, p. 435.
- McCarthy 1959, pp. 436–437; Milner 1957, p. 216.
- McCarthy 1959, p. 439.
- Brien 2013, p. 21.
- Brune 2003, p. 476.
- McCarthy 1959, p. 442.
- McCarthy 1959, p. 437.
- McCarthy 1959, p. 438.
- McCarthy 1959, p. 439 & 443–444.
- McCarthy 1959, pp. 442–443.
- McCarthy 1959, p. 444.
- McCarthy 1959, pp. 444–445.
- McCarthy 1959, pp. 444–446.
- McCarthy 1959, p. 446.
- McCarthy 1959, pp. 505, 518–519, 526, 530; Milner 1957, pp. 217, 219.
- McCarthy 1959, p. 452; Milner 1957, p. 258.
- McCarthy 1959, p. 454.
- McCarthy 1959, p. 462.
- Milner 1957, pp. 260–264; McCarthy 1959, pp. 456–462.
- Eichelberger 1950, pp. 44–45.
- McCarthy 1959, pp. 463–464; Milner 1957, pp. 266–267.
- McCarthy 1959, p. 464; Milner 1957, pp. 267–268.
- McCarthy 1959, p. 465.
- McCarthy 1959, p. 468; Milner 1957, pp. 269–270.
- Milner 1957, p. 271; McCarthy 1959, p. 468.
- McCarthy 1959, p. 468; Milner 1957, p. 272.
- McCarthy 1959, p. 468.
- Milner 1957, p. 273; McCarthy 1959, p. 469.
- Milner 1957, p. 273; McCarthy 1959, pp. 469–470.
- McCarthy 1959, p. 470; Milner 1957, p. 273.
- Milner 1957, p. 273; McCarthy 1959, p. 468.
- McCarthy 1959, p. 470.
- McCarthy 1959, p. 461.
- McCarthy 1959, p. 471; Milner 1957, pp. 274–277.
- McCarthy 1959, pp. 471–472.
- McCarthy 1959, pp. 472.
- McCarthy 1959, p. 473; Milner 1957, p. 278.
- McCarthy 1959, pp. 475–477; Milner 1957, pp. 279–280.
- Milner 1957, pp. 304–305; McCarthy 1959, p. 477.
- McCarthy 1959, p. 479.
- McCarthy 1959, p. 481; Milner 1957, p. 306.
- McCarthy 1959, pp. 480–481.
- Milner 1957, pp. 307–309.
- McCarthy 1959, pp. 481–484.
- McCarthy 1959, p. 484.
- Milner 1957, p. 164.
- McCarthy 1959, p. 402.
- McCarthy 1959, pp. 403, 413.
- Milner 1957, p. 222; McCarthy 1959, pp. 403–405.
- McCarthy 1959, p. 405.
- McCarthy 1959, pp. 408–411; Milner 1957, p. 223.
- McCarthy 1959, pp. 412–413; Milner 1957, p. 223.
- McCarthy 1959, pp. 498–500.
- McCarthy 1959, p. 501.
- McCarthy 1959, pp. 499–500.
- McCarthy 1959, p. 499; Milner 1957, p. 226.
- McCarthy 1959, p. 500.
- McCarthy 1959, pp. 500–501; Milner 1957, p. 227.
- Milner 1957, p. 226.
- McCarthy 1959, pp. 501–504.
- McCarthy 1959, pp. 504–505.
- McCarthy 1959, p. 505.
- McCarthy 1959, pp. 508–511; Milner 1957, pp. 328–333.
- McCarthy 1959, pp. 382–383; Milner 1957, pp. 252–254.
- McCarthy 1959, p. 487; Milner 1957, pp. 283–284.
- Milner 1957, pp. 284–285; McCarthy 1959, p. 487.
- McCarthy 1959, p. 487; Milner 1957, pp. 285–287.
- McCarthy 1959, p. 488; Milner 1957, pp. 289–291, 293.
- Milner 1957, pp. 291–293; McCarthy 1959, p. 488.
- McCarthy 1959, pp. 488–490; Milner 1957, pp. 293–298.
- McCarthy 1959, p. 490; Milner 1957, p. 298.
- Milner 1957, pp. 298–301; McCarthy 1959, pp. 490–492.
- Milner 1957, pp. 301–302; McCarthy 1959, p. 492.
- McCarthy 1959, p. 492; Milner 1957, pp. 310–311.
- McCarthy 1959, p. 493; Milner 1957, p. 312.
- McCarthy 1959, pp. 493–494; Milner 1957, pp. 312–314.
- McCarthy 1959, pp. 494–495; Milner 1957, pp. 316–319.
- McCarthy 1959, pp. 501, 505.
- McCarthy 1959, p. 513.
- Milner 1957, pp. 334–335.
- McCarthy 1959, p. 512.
- McCarthy 1959, p. 519.
- McCarthy 1959, pp. 513–514; Milner 1957, p. 333.
- McCarthy 1959, p. 513; Center of Military History 1990, p. 70; Milner 1957, pp. 339–341.
- Milner 1957, p. 339.
- Milner 1957, p. 342; McCarthy 1959, p. 513; Center of Military History 1990, p. 72.
- McCarthy 1959, pp. 513–517; Milner 1957, pp. 333 & 343–346; Center of Military History 1990, p. 73.
- Milner 1957, pp. 324–325.
- Milner 1957, p. 336; McCarthy 1959, p. 511.
- Milner 1957, pp. 336–337; McCarthy 1959, p. 511.
- McCarthy 1959, p. 511; Milner 1957, p. 338.
- Milner 1957, p. 338; McCarthy 1959, pp. 511–512.
- McCarthy 1959, p. 522.
- Milner 1957, pp. 351–354.
- Center of Military History 1990, p. 75.
- McCarthy 1959, pp. 517–519; Milner 1957, pp. 350, 354.
- Milner 1957, p. 350; McCarthy 1959, p. 524; Center of Military History 1990, p. 74.
- Milner 1957, p. 350; McCarthy 1959, p. 524.
- Center of Military History 1990, p. 74.
- Milner 1957, p. 357.
- McCarthy 1959, p. 520; Milner 1957, p. 355.
- McCarthy 1959, p. 520; Milner 1957, pp. 355–356.
- Milner 1957, pp. 356–357; McCarthy 1959, pp. 524–525.
- Milner 1957, p. 357; McCarthy 1959, p. 525; Center of Military History 1990, p. 77.
- McCarthy 1959, pp. 525–526; Milner 1957; Center of Military History 1990, pp. 357–361, 363–364.
- McCarthy 1959, pp. 520–521; Milner 1957, pp. 355–356.
- McCarthy 1959, pp. 522–523; Milner 1957, pp. 358, 361, 363; Center of Military History 1990, pp. 77–80.
- McCarthy 1959, p. 520.
- McCarthy 1959; Milner 1957; Center of Military History 1990.
- McCarthy 1959, p. 521.
- McCarthy 1959, pp. 521–522; Milner 1957, pp. 359, 362.
- "WW II Buna Beach Photo of 1942". Archived from the original on 10 November 2014.
Casualties were from the Companies E and F, 128th IR, 32nd ID.
- Thompson, Mark (27 March 2013). "Cal Whipple, 1918–2013". Time. Archived from the original on 22 October 2013. Retrieved 19 October 2013.
- "World War II: The Photos We Remember". LIFE. 19 May 2013. Archived from the original on 22 October 2013. Retrieved 19 October 2013.
- McCarthy 1959, p. 523; Milner 1957, pp. 355, 358, 362.
- McCarthy 1959, p. 524.
- McCarthy 1959, p. 523.
- McCarthy 1959, p. 524; Milner 1957, pp. 362–363.
- McCarthy 1959, p. 526.
- Milner 1957, p. 368.
- McCarthy 1959, p. 532.
- "List of casualties for Kokoda, Milne Bay and Buna–Gona". kokoda.commemoration.gov.au. Department of Veterans Affairs', Australia. Archived from the original on 8 May 2015. Retrieved 1 November 2014.
- Center of Military History 1990, p. 82.
- Larrabee 2004, p. 329.
- "Cape Endaiadere (Maggot Beach)". PacificWrecks.com. Archived from the original on 29 October 2013. Retrieved 22 October 2013.
- "Near half submerged hulk of a small landing craft lie the bo..." Getty Images. Archived from the original on 29 October 2013. Retrieved 22 October 2013.
- Larrabee 2004, p. 327.
- "126th Infantry in the Australian Zone during the Battle of Buna". The 32D Infantry Division in World War II The 'Red Arrow'. The 32D 'Red Arrow' Veteran Association. Archived from the original on 28 March 2015. Retrieved 16 November 2014.
- Stockman 1947, p. 73.
- Bullard 2007, pp. v & 157–160.
- McAuley 1992, p. 14.
- Bullard 2007, p. 178.
- Horner 1992, p. 253.
- McAuley 1992, p. 89.
- McCarthy 1959, p. 443.
- Bergerud 2008, p. 100; Anderson 1992, p. 13.
- Bergerud 2008, pp. 100–101.
- Bergerud 2008, pp. 96–103.
- Powers 2011.
- Milner 1957, p. 366.
- McCarthy 1959, p. 496.
- Milner 1957, p. 372-374.
- McCarthy 1959, p. 533.
- McAuley 1992, pp. 303–304.
- Eichelberger 1950, p. 43.
- Condon-Rall & Cowdrey 1998, p. 132.
- McAuley 1992, p. 304.
- Milner 1957, p. 375.
- Malkasian 2002, pp. 73–80.
- Quoted in Malkasian 2002, p. 73.
- Malkasian 2002, pp. 73–74; Bean 1942, pp. 32–60.
- Malkasian 2002, pp. 73 & 79.
- McAuley 1992, p. 303.
- Blamey to F. Shedden, quoted in Horner 1978, p. 247.
- Milner 1957, pp. 376–377; Sandler 2001, p. 202.
- Anderson 1992, pp. 20–22.
- Brien 2013, pp. 27–28; Threlfall 2008; Threlfall 2014.
- "Buna–Gona". Australian War Memorial. Archived from the original on 21 October 2014. Retrieved 11 November 2014.
- "Gona". Australian War Memorial. Archived from the original on 21 October 2014. Retrieved 11 November 2014.
- "Sanananda Road". Australian War Memorial. Archived from the original on 16 June 2014. Retrieved 11 November 2014.
- "Amboga River". Australian War Memorial. Archived from the original on 28 December 2013. Retrieved 11 November 2014.
- "Cape Endaiadere–Sinemi Creek". Australian War Memorial. Archived from the original on 25 December 2013. Retrieved 11 November 2014.
- "Sanananda–Cape Killerton". Australian War Memorial. Archived from the original on 25 December 2013. Retrieved 11 November 2014.
- BNF 1958.
- Maitland 1999, p. 142.
- "Medal of Honor recipients – World War II (A – F)". Medal of Honor citations. United States Army Center of Military History. 3 August 2009. Archived from the original on 16 June 2008. Retrieved 10 August 2009.
- "Medal of Honor recipients – World War II (G – L)". Medal of Honor citations. United States Army Center of Military History. 3 August 2009. Archived from the original on 30 April 2008. Retrieved 10 August 2009.
- "Distinguished Service Cross Recipients". The 32D Infantry Division in World War II: The 'Red Arrow'. The 32D 'Red Arrow' Veteran Association. Archived from the original on 8 November 2014. Retrieved 16 November 2014.
- "2/7 Australian Divisional Cavalry Regiment". Archived from the original on 7 July 2011. Retrieved 8 September 2010.
- "Sanananda (Sanananda Point)". Pacific Wrecks Incorporated. Archived from the original on 15 April 2015. Retrieved 16 November 2014.
- "Japanese memorial at Higgins Road Block". Pacific Wrecks Incorporated. Archived from the original on 15 April 2015. Retrieved 16 November 2014.
- "World War II Battle Honours Awarded to Australian Infantry Units" (PDF). Australian Army. Australian Army History Unit. Archived from the original (PDF) on 1 April 2015. Retrieved 24 November 2014.
- Long 1963, p. 20.
References
Books
- Allan, Jack; Cutts, Chris (1994). As It Seemed To Us: The 1st Australian Mountain Battery, RAA, AIF. Brisbane, Queensland: AEbis. ISBN 978-0-646-17515-7.
- Anderson, Charles (1992). Papua. The US Army Campaigns of World War II. 11. Washington, D.C.: United States Army Center of Military History. ISBN 978-0-16-035883-8.
- Battles Nomenclature Committee (Great Britain): The Official Names of the Battles, Actions & Engagements Fought by the Land Forces of the Commonwealth during the Australian Campaign in the South-West Pacific 1942–1945 and the New Zealand Campaign in the South Pacific 1942–1944 and the Korean Campaign: Final Report of the Battles Nomenclature Committee as Approved by the Army Council. London: HMSO. 1958. OCLC 3371797.
- Bean, C. E. W. (1942). The Australian Imperial Force in France during the Allied Offensive, 1918. Official History of Australia in the War of 1914–1918. VI. Sydney, New South Wales: Angus and Robertson. OCLC 41008291.
- Bergerud, Eric (1996). Touched With Fire. New York: Viking. ISBN 978-0-14-024696-4. LCCN 95034149.
- Bergerud, Eric (2008). "No Quarter. The Pacific Battlefield". In Yerxa, Donald A. (ed.). Recent Themes in Military History: Historians in Conversation. University of South Carolina Press. ISBN 978-1-57003-739-9.
- Brune, Peter (1998). The Spell Broken: Exploding the Myth of Japanese Invincibility: Milne Bay. Allen & Unwin. ISBN 978-1-86448-693-3.
- Brune, Peter (2003). A Bastard of a Place: The Australians in Papua. Crow's Nest, New South Wales: Allen & Unwin. ISBN 978-1-74114-403-1. LCCN 2004401145.
- Bullard, Steven (2007). Japanese Army Operations in the South Pacific Area New Britain and Papua Campaigns, 1942–43. translator. Canberra: Australian War Memorial. ISBN 978-0-9751904-8-7.
- Campbell, James (2007). The Ghost Mountain Boys: Their Epic March and the Terrifying Battle for New Guinea – The Forgotten War of the South Pacific. New York: Crown. ISBN 978-0-307-33596-8. LCCN 2007013140.
- Coates, John (2006). An Atlas of Australia's Wars. Melbourne: Oxford University Press. ISBN 978-0-19-555914-9. LCCN 2009583321.
- Condon-Rall, Mary Ellen; Cowdrey, Albert E. (1998). The Technical Services—The Medical Department: Medical Service in the War Against Japan (PDF). United States Army in World War II. Washington, D.C.: Center of Military History, United States Army. LCCN 97022644.
- Costello, John (1982). The Pacific War: 1941–1945. New York: Harper Perennial. LCCN 82015054.
- Dean, Peter (2013). "Anzacs and Yanks: US and Australian Operations at the Beachhead Battles". In Dean, Peter (ed.). Australia 1942: In the Shadow of War. Cambridge: Cambridge University Press. ISBN 978-1-107-03227-9. LCCN 2012464720.
- Dod, Karl (1966). The Corps of Engineers: The War Against Japan. United States Army in World War II. Washington, D.C.: Center of Military History (US Army). ISBN 978-0-16-001879-4. LCCN 66060004.
- Drea, Edward J. (1993). New Guinea. The US Army Campaigns of World War II. Washington, D.C.: US Army Center of Military History. ISBN 978-0-16-038099-0.
- Edwards, Paul M. (2010). Between the Lines of World War II: Twenty-one Remarkable People and Events. Jefferson, N.C.: McFarland & Co. ISBN 978-0-7864-4667-4. LCCN 2010025083.
- Eichelberger, Robert L. (1950). Our Jungle Road to Tokyo. New York: Viking Press. LCCN 50009852. OCLC 1262852.
- Fitzsimons, Peter (2004). Kokoda. Sydney: Hachette. ISBN 978-0-7336-1962-5. LCCN 2005440684.
- Gailey, Harry (2000). MacArthur Strikes Back. Novato: Presidio Press. ISBN 978-0-89141-702-6.
- Gill, G. Hermon (1968). Royal Australian Navy 1939–1942. Australia in the War of 1939–1945. Series 2 – Navy. 2. Canberra: Australian War Memorial. LCCN 76454854. OCLC 848228.
- Gillison, Douglas (1962). Royal Australian Air Force 1939–1942. Australia in the War of 1939–1945. Series 3 – Air. 1. Canberra: Australian War Memorial. OCLC 2000369.
- Happell, Charles (2008). The Bone Man of Kokoda. Sydney: Macmillan. ISBN 978-1-4050-3836-2.
- History of the Buna Campaign December 1, 1942 – January 25, 1943. Part 2 (June 17, 1943). 1943. Retrieved 1 November 2014.CS1 maint: others (link)
- Hopkins, William B. (2008). The Pacific War: The Strategy, Politics, and Players that Won the War. Minneapolis: MBI Publishing. ISBN 978-1-61673-240-0.
- Horner, David Murray (1978). Crisis of Command: Australian Generalship and the Japanese Threat, 1941–1943. Canberra: Australian National University Press. ISBN 978-0-7081-1345-5.
- Horner, David (1992). General Vasey's War. Melbourne: Melbourne University Press. ISBN 978-0-522-84462-7.
- Horner, David (May 1993). "Defending Australia in 1942". The Pacific War 1942. War and Society. 11. Canberra: Department of History, Australian Defence Force Academy. pp. 1–21. doi:10.1179/072924793791198886. ISSN 0729-2473.
- Hough, Frank O.; Ludwig, Verle E.; Shaw, Henry I. Jr. (1958). Pearl Harbor to Guadalcanal. History of US Marine Corps Operations in World War II. I. Historical Branch, G-3 Division, Headquarters, US Marine Corps. OCLC 11613327.
- Huber, Thomas M. (1995). "Eichelberger at Buna: A Study in Battle Command". Studies in Battle Command (PDF). Fort Leavenworth, KS: Faculty Combat Studies Institute, US Command and General Staff College. pp. 123–127. OCLC 58724472.
- James, Bill (2008). Field Guide to the Kokoda Track: An Historical Guide to the Lost Battlefields. Lane Cove: Kokoda Press. ISBN 978-0-9775704-0-9.
- Keogh, E. G. (1965). South West Pacific 1941–45. Melbourne: Grayflower. OCLC 7185705.
- Kienzle, Robyn (2011). The Architect of Kokoda. Sydney: Hachette. ISBN 978-0-7336-2763-7. OCLC 710810025.
- Larrabee, Eric (2004). Commander in Chief: Franklin Delano Roosevelt, His Lieutenants, and Their War. Annapolis, MD: Naval Institute Press. ISBN 978-1-59114-455-7.
- Liddell Hart, B. H. (1971). History of the Second World War. New York: Putnum. OCLC 129897.
- Long, Gavin (1963). The Final Campaigns. Australia in the War of 1939–1945. Series 1 – Army. 7. Canberra: Australian War Memorial. OCLC 1297619.
- MacArthur, Douglas (1994). The Campaigns of MacArthur in the Pacific. Reports of General MacArthur. 1. other authors: Staff of his General Headquarters. Washington, D.C.: United States Army Center of Military History. LCCN 66-60005.
- MacArthur, Douglas (1994b). Reports of General MacArthur. Reports of General MacArthur. 2. other authors: Staff of his General Headquarters. Washington, D.C.: United States Army Center of Military History. LCCN 95162929.
- Maitland, Gordon (1999). The Second World War and its Australian Army Battle Honours. East Roseville, New South Wales: Kangaroo Press. ISBN 978-0-86417-975-3.
- Malkasian, Carter (2002). A History of Modern Wars of Attrition. Greenwood Publishing. ISBN 978-0-275-97379-7.
- Masterson, Dr. James R. (1949). U. S. Army Transportation in the Southwest Pacific Area 1941–1947. Washington, D. C.: Transportation Unit, Historical Division, Special Staff, U. S. Army. OCLC 207313.
- Mayo, Lida (1968). The Technical Services—The Ordnance Department: On Beachhead And Battlefront. United States Army in World War II. Washington, D.C.: Center of Military History, United States Army. LCCN 79014631.
- McAuley, Lex (1992). To the Bitter End. Sydney: Random House. ISBN 978-0-09-182557-7.
- McCarthy, Dudley (1959). South – West Pacific Area – First Year: Kokoda to Wau. Australia in the War of 1939–1945. Series 1 – Army. 5 (1st ed.). Canberra: Australian War Memorial. OCLC 3134247.
- Milner, Samuel (1957). Victory in Papua. United States Army in World War II. Washington, D.C.: Center of Military History, United States Army. LCCN 56-60004.
- Palazzo, Albert (2004). "Organising for Jungle Warfare". In Dennis, Peter; Grey, Jeffrey (eds.). The Foundations of Victory: The Pacific War 1943–1944. Canberra: Army History Unit. pp. 86–101. ISBN 978-0-646-43590-9. Archived from the original on 9 March 2016.CS1 maint: bot: original URL status unknown (link)
- Papuan Campaign: Buna-Sanananda Operation 16 November 1942 – 23 January 1943. Washington, D.C.: United States Army Center of Military History. 1990. LCCN 91601186. OCLC 21992748. Archived from the original (PDF) on 10 July 2001.
- Sandler, Stanley, ed. (2001). World War II in the Pacific: An Encyclopedia. London: Taylor & Francis. ISBN 978-0-8153-1883-5. Retrieved 13 November 2014.
- Smith, Michael (2000). Bloody Ridge: The Battle That Saved Guadalcanal. New York: Pocket. ISBN 978-0-7434-6321-8.
- Stockman, James (1947). Marines in World War II Historical Monograph: The Battle for Tarawa. Historical Section, Division of Public Information Headquarters, US Marine Corps. Retrieved 30 November 2014.
- Threlfall, Adrian (2014). Jungle Warriors: From Tobruk to Kokoda and Beyond, How the Australian Army Became the World's Most Deadly Jungle Fighters. Sydney: Allen & Unwin. ISBN 978-1-74237-220-4.
- Walker, Allan Seymour (1957). The Island Campaigns. Australia in the War of 1939–1945. Series 5 – Medical. 3. Canberra: Australian War Memorial. OCLC 1293257.
- Watson, Richard L. (1944). Air Action in the Papuan Campaign: 21 July 1942 to 23 January 1943 (PDF). Washington, D. C.: Assistant Chief of Air Staff, Intelligence; Historical Division. OCLC 22357584. Retrieved 26 November 2014.
- Watson, Richard L.; Rohfleisch, Kramer J. (1950). "The Crisis in the South and Southwest Pacific". In Craven, Wesley Frank; Cate, James Lea (eds.). The Pacific: Guadalcanal to Saipan, August 1942 to July 1944. The Army Air Forces in World War II. IV. Chicago: University of Chicago Press. OCLC 5732980. Retrieved 6 December 2014.
- Whitney, Courtney (1956). MacArthur, His Rendezvous with History. New York: A. A. Knopf. OCLC 458989952.
- Wigmore, Lionel (1957). The Japanese Thrust. Australia in the War of 1939–1945. Series 1 – Army. 4. Canberra: Australian War Memorial. OCLC 3134219.
- Williams, David (2004). Defending Japan's Pacific War: The Kyoto Philosophers and the Idea of a Post-White World. Abingdon: RoutledgeCurzon. ISBN 978-0-415-32314-7.
- Williams, Peter (2012). Kokoda Trail for Dummies. John Wiley & Sons. ISBN 978-0-7303-7701-6.
Journals
- Bullard, Steven (2004). "The Great Enemy of Humanity: Malaria and the Japanese Medical Corps in Papua, 1942–1943". Journal of Pacific History. London. 39 (2): 203–220. doi:10.1080/0022334042000250733. ISSN 1469-9605. S2CID 160490887.
- Nelson, Hank (2007). "Kokoda: And Two National Histories" (PDF). Journal of Pacific History. London. 42 (1): 73–88. doi:10.1080/00223340701286859. ISSN 1469-9605. S2CID 162458682. Archived from the original (PDF) on 23 September 2015. Retrieved 7 December 2014.
- Stanley, Peter (2007). "What is the Battle for Australia?" (PDF). Australian Army Journal. Canberra, Australian Capital Territory. 4 (2, Winter 2007): 17–34. ISSN 1448-2843.
Theses
- Fath, Matthew (2004). Intrepidity, Iron Will, and Intellect: General Robert L. Eichelberger and Military Genius (PDF) (MMAS). Fort Leavenworth, KS: Command and General Staff College. OCLC 834274802. Retrieved 6 December 2014.
- Threlfall, Adrian (2008). The Development of Australian Army Jungle Warfare (PDF) (PhD). Victoria University. OCLC 428961444. Retrieved 1 November 2014.
Websites
- Brien, James (2013). "The Bloody Beachheads: Buna, Gona and Sanananda, 1942–43" (PDF). Australian War Memorial.
- Powers, David (17 February 2011). "Japan: No Surrender in World War Two". BBC. Retrieved 30 November 2014.
Further reading
Books
- Casey, Hugh J., ed. (1951). Airfield and Base Development. Engineers of the Southwest Pacific. Washington, D.C.: United States Government Printing Office. OCLC 220327037.
- Collie, Craig; Marutani, Hajime (2009). The Path of Infinite Sorrow: The Japanese on the Kokoda Track. Crow's Nest: Allen and Unwin. ISBN 978-1-74175-839-9. LCCN 2010294738.
- FM 3-09 Field Artillery Operations and Fire Support (PDF). Washington, D.C.: Department of the Army. 2014. Archived from the original (PDF) on 4 March 2016. Retrieved 6 October 2014.
- Franzwa, Gregory M.; Ely, William J. (1980). Leif Sverdrup: Engineer Soldier at His Best. Gerald, Missouri: The Patrice Press. ISBN 978-0-935284-12-6. LCCN 80000361.
- Gailey, Harry A. (2004). MacArthur's Victory The War in New Guinea, 1943–1944 (1st ed.). New York: Presidio Press. ISBN 978-0-307-41593-6.
- Gerber, Dan (2005) [1990]. A Voice From The River: A Novel. East Lansing: Michigan State University Press. ISBN 978-0-87013-755-6.
- Horner, David (1995). The Gunners: A History of Australian Artillery. St Leonards, New South Wales: Allen and Unwin. ISBN 978-1-86373-917-7.
- James, D. Clayton (1975). The Years of MacArthur, 1941–1945. II. Houghton Mifflin. ISBN 978-0-395-20446-7.
- Jones, Laurence (1989). Defense of the Philippines to the Battle of Buna: A Critical Analysis of General Douglas MacArthur (PDF). Maxwell Air Force Base, AL: Air War College, Air University. OCLC 834250873. Retrieved 29 December 2014.
- Kahn, E. J. (1943). G. I. Jungle: An American Soldier in Australia and New Guinea. New York: Simon and Schuster. OCLC 1330561.
- Lunney, Bill; Finch, Frank (1995). Forgotten Fleet: A History of the part Played by Australian Men and Ships in the U.S. Army Small Ships Section in New Guinea, 1942–1945. Medowie, New South Wales: Forfleet. ISBN 978-0-646-26048-8. LCCN 96150459.
- Manchester, William (1978). American Caesar: Douglas MacArthur, 1880–1964. Boston: Little, Brown. OCLC 3844481.
- Mayo, Lida (1974). Bloody Buna. New York: Doubleday and Company, Inc. ISBN 978-0-385-06268-8.
- McKenney, Janice E. (2007). The Organizational History of Field Artillery, 1775–2003 (PDF). Washington, D.C.: Center of Military History, United States Army. OCLC 217152972. Retrieved 24 November 2014.
- Morton, Louis (1962). Strategy and Command: The First Two Years. United States Army in World War II: The War in the Pacific. Washington, D.C.: Center of Military History, United States Army. OCLC 1355622.
- Rottman, Gordon L. (2005). Anderson, Duncan (ed.). Japanese Army in World War II: The South Pacific and New Guinea, 1942–43. Oxford and New York: Osprey. ISBN 978-1-84176-870-0.
- Russell, William (1948). The Second Fourteenth Battalion: A History of an Australian Infantry Battalion in the Second World War. Sydney, New South Wales: Angus and Robertson. OCLC 12884515.
- Tanaka (1996). Hidden Horrors: Japanese War Crimes in World War II. Boulder: Westview Press. ISBN 978-0-8133-2718-1.
- Trigellis-Smith, Syd (1992). The Purple Devils: The 2/6 Australian Commando Squadron. Melbourne: 2/6 Commando Squadron Association. ISBN 978-0-646-07125-1.
- Winters, Harold A.; Galloway, Jr., Gerald E.; Reynolds, William J.; Rhyne, David W. (2001). Battling the Elements: Weather and Terrain in the Conduct of War (illus. ed.). JHU Press. ISBN 978-0-8018-6648-7. Retrieved 19 January 2017.
Journals
- Brockschmidt, Kelli (2005). "The New Guinea Campaign: A New Perspective Through the Use of Oral Histories". McNair Scholars Journal. 9 (1): 25–34. OCLC 65221796.
- Strock, George (22 February 1943). "Booty at Buna". New York: LIFE. Retrieved 5 June 2010. Cite journal requires
|journal=(help) - Strock, George (15 February 1943). "The Battle for Buna". New York: LIFE. Retrieved 5 June 2010. Cite journal requires
|journal=(help) - Edgar, W. J. (2002). "Potts, Arnold William (1896–1968)". Australian Dictionary of Biography. Melbourne University Press. 16: 22–23. ISBN 978-0-522-84997-4.
Websites
- Blakeley, Herbert W., Major General, Retired (1956). "The 32d Infantry Division in World War II (General Orders Number 21, War Department)". OCLC 220454668. Archived from the original on 11 January 2009. Retrieved 14 November 2008.
- James, Karl (2009). ""The Track": A Historical Desktop Study of the Kokoda Track" (PDF). Commonwealth Department of the Environment. Retrieved 29 November 2014.
External links
- 2/7th Australian Cavalry Regiment
- Battle of Buna Australian Military Units Australian War Memorial
- Battle of Buna, 19 November 1942 – 2 January 1943
- Karsik and Tramsik: Operation Lilliput Allies in Adversity: Australia and the Dutch in the Pacific War. Australian War Memorial
- The 32nd Red Arrow Infantry Division in World War II, 32nd Division Veterans Association website
- Photos by George Strock
- Southern Cross, a Japanese account of the New Guinea campaigns by the Chief of Staff of the 18th Army, Lieutenant Colonel Yoshiharu Kane
