Second Battle of Gaza
The Second Battle of Gaza was fought between 17 and 19 April 1917, following the defeat of the Egyptian Expeditionary Force (EEF) at the First Battle of Gaza in March, during the Sinai and Palestine Campaign of the First World War. Gaza was defended by the strongly entrenched Ottoman Army garrison, which had been reinforced after the first battle by substantial forces. They manned the town's defences and a line of strong redoubts which extended eastwards along the road from Gaza to Beersheba. The defenders were attacked by the Eastern Force's three infantry divisions, supported by two mounted divisions, but the strength of the defenders, their entrenchments, and supporting artillery decimated the attackers.
| Second Battle of Gaza | |||||||
|---|---|---|---|---|---|---|---|
| Part of the Middle Eastern theatre of World War I | |||||||
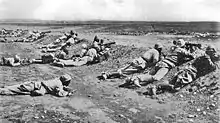
 Ottoman machine gun corps defending Tel esh Sheria, and the Gaza line in 1917. | |||||||
| |||||||
| Belligerents | |||||||
|
|
| ||||||
| Commanders and leaders | |||||||
|
|
| ||||||
| Units involved | |||||||
|
52nd (Lowland) Division 53rd (Welsh) Division 54th (East Anglian) Division Anzac Mounted Division Imperial Mounted Division Imperial Camel Brigade |
| ||||||
| Casualties and losses | |||||||
|
509 killed, 4,359 wounded, 1,534 missing Total: 6,444 & 3 tanks |
82–402 killed, 1,337–1,364 wounded, 247 missing, 200 prisoners | ||||||
As a result of the EEF victories at the Battle of Romani, the Battle of Magdhaba and the Battle of Rafa, fought from August 1916 to January 1917, the EEF had pushed the defeated Ottoman Army eastwards. The EEF reoccupied the Egyptian territory of the Sinai Peninsula, and crossed over into the Ottoman Empire territory of southern Palestine. However, the result of the First Battle of Gaza had been as close to a British Empire victory as a defeat could get. In the three weeks between the two battles, the Gaza defences were strongly reinforced against a frontal attack. The strong entrenchments and fortifications proved unassailable during the disastrous frontal attacks, and EEF casualties approached, and in some cases exceeded 50 per cent for slight gains.
Background
Strategic situation
An 11 January War Cabinet decision to reduce large scale operations in Palestine was reversed on the 26 February Anglo-French Congress, and the Egyptian Expeditionary Force (EEF) was now required to capture the stronghold of Gaza as a first step towards Jerusalem.[1] Gaza was one of the most ancient cities in the world, being one of five city-states mentioned in the Bible as ruled by the Philistines, and had been fought over many times during its 4,000-year history. The Egyptians and the Assyrians had attacked Gaza, followed in 731 BC by the Greeks, with Alexander conducting three attacks and the Siege of Gaza in 332 BC. The town was completely destroyed in 96 BC and rebuilt slightly to the south of the original site. This Gaza was captured by Caliph Omar in 635 AD, by Saladin in 1187 AD, and by Napoleon in 1799.[2] At Gaza there was an important depot for cereals with a German steam mill, barley, wheat, olives, vineyards, orange groves, and wood for fuel were grown as well as many goats grazed. Barley was exported to England for brewing into English beer and in 1912 the 40,000 inhabitants of Gaza imported £10,000 of yarn from Manchester. Maize, millet, beans, and water melon, all harvested in early autumn, were cultivated in most of these localities.[3][4][5]
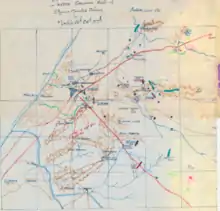
All of the Desert Column mounted and infantry divisions had fought during the first battle of Gaza, when the column's 53rd (Welsh) Division had been heavily involved.[6] This "encounter battle" by the mounted divisions emphasised speed and surprise,[7] at a time when Gaza had been an outpost garrisoned by a strong detachment on the flank of a line stretching inland from the Mediterranean Sea.[8]
While the Desert Column's Anzac Mounted Division and the partly formed Imperial Mounted Division had quickly deployed to guard against Ottoman reinforcements strengthening the Ottoman garrison at Gaza on 26 March, the 53rd (Welsh) Division supported by a brigade from the 54th (East Anglian) Division attacked the strong entrenchments to the south of the town.[9][10][11] In the afternoon, after being reinforced by the Anzac Mounted Division, the all arms' attack quickly began to succeed. With most objectives captured, night stopped the attack and a withdrawal was ordered before the commanders were fully aware of the victory.[12][13][14] The first battle ended in debacle, according to Pugsley when the Anzac Mounted Division "knew they were winning, and saw victory snatched away from them by the order to withdraw."[15] This defeat coincided with low public morale in the British Empire reflecting the continuing Allied failures on the Western Front. General Archibald Murray commanding the EEF reported the defeat at Gaza to the War Office in overly optimistic terms such that his reputation, as a consequence, depended on a decisive victory at the second attempt.[16] The commander of Eastern Force, Lieutenant General Charles Dobell, also indicated a substantial victory and Murray was ordered to move on and capture Jerusalem. The British were in no position to attack Jerusalem as they had yet to break through the Ottoman defences at Gaza.[17][18] However, the Australian official historian described the First Battle of Gaza quite differently. "In itself the engagement was a severe blow to the British Army, since it affected the troops on both sides to a degree out of all proportion to the casualties suffered, or to the negative victory gained by the Turks. There was not a single private in the British infantry, or a trooper in the mounted brigades, who did not believe that failure was due to staff bungling and to nothing else."[19]
Preparations for the second attack included the extension of the railway to Deir el Belah, the headquarters of Eastern Force, to enable "all available troops" to be deployed for battle.[20] Water reservoirs for 76,000 gallons were built in the Wadi Ghuzzee and dumps of ammunition and supply were established nearby.[21] The weather was "reasonably cool" and the health of the troops "was good." Morale had "recovered from the disappointment of the First Battle, in which victory had so narrowly eluded them."[20] Up until 4 April, Eastern Force had been responsible for the southern sector of the Suez Canal Defence troops, 150 miles (240 km) away. This duty was transferred to the Egyptian Expeditionary Force, lightening Dobell's load.[6][20]
Reorganisation of Desert Column
Between the first and second battles of Gaza, Desert Column, commanded by Lieutenant General Philip Chetwode, was reorganised into an exclusively mounted force comprising the Anzac Mounted Division commanded by Major General Henry Chauvel and the Imperial Mounted Division commanded by Major General Henry Hodgson, each with four brigades. Desert Column was to cover the infantry's right flank and attack Ottoman forces along the Gaza to Beersheba road as far as Hareira.[6][22] The 1st and 4th Light Horse Brigades were ordered forward to join their divisions,[21][23] to make up four brigades, in each. The Anzac Mounted Division consisted of the 1st and 2nd Light Horse, the New Zealand Mounted Rifle, and the 22nd Mounted Brigades. The Imperial Mounted Division consisted of the 3rd and the recently reformed 4th Light Horse with the 5th and 6th Mounted Brigades.[24] The 4th Light Horse Brigade arrived at Khan Yunus on 11 April and after dumping baggage was preparing to move forward on 14 April, carrying the Light Mobile Scale of six emergency pack bags per squadron, three days rations, and 12 pounds (5,400 g) grain on each horse.[25]
Reconnaissance operations
On 1 April, a reconnaissance mission was carried out east of Wadi Ghuzze between Wadi esh Sheria and the sea by one battalion each from the 52nd (Lowland), 53rd (Welsh), and 54th (East Anglian) Divisions. The next day 1,000 Ottoman infantry advanced to the right bank of the Wadi Ghuzze.[20] Both sides conducted day and night patrols. The 10th Light Horse Regiment's Scouts led a reconnaissance by the 3rd Light Horse Brigade east of the Wadi el Ghuzze, when Ottoman artillery was very active during a skirmish with an Ottoman cavalry patrol, some miles beyond the EEF front line.[26]
Joseph W. McPherson, an officer in the Egyptian Camel Transport Corps was invited by two Royal Engineer messmates to accompany them on a reconnaissance during the afternoon of Good Friday, 6 April 1917. He subsequently wrote, "we saw parties of Turks and mapped down new trenches they had made, got sniped at incidentally, and had to travel a good bit of the way on our bellies."[27]
Air war
Aerial reconnaissance was carried out by both sides.[20] Aerial photographs enabled a new partly contoured map on the 1/40,000 scale to be printed before the Second Battle of Gaza.[28] However, each side was keen to monitor the others' preparations and the air became disputed territory. Newly arrived German aircraft attacked EEF reconnaissance aircraft during which several duels were fought, none being decisive.[29] On 6 April five German aircraft approaching Rafa were intercepted by two AFC Martinsyde aircraft, one of which was forced to land and was destroyed on the ground, while the other went for reinforcements. Three Martinsydes arrived to attack the German formation. Aerial bombing was also strenuously continued by both sides, and while this aerial fight was taking place, hostile aircraft bombed Bir el Mazar. On 7 April a joint raid by four Australian aircraft, with several from No. 14 Squadron, bombed Gaza and the Ramleh aerodrome, hitting two hangars.[29] At El Arish hospital, Dr. Duguid described the strong moon light on 8 April 1917, "... now it is climbing the heavens. 10.30pm. It is as clear as day, and the shadow thrown on the sand is very definite. I hear we are expecting an air raid soon. The regiments are digging funk holes everywhere."[30]
Rafa was bombed twice on 12 April by three German aircraft, after which 17 aircraft from the combined EEF squadrons bombed Ottoman positions along the Beersheba line, dropping 1,000 lbs of bombs each on Huj and Kh. el Bir. Retaliatory raids followed in quick succession before midday and continued on during the three subsequent days, accompanied by increased heavy artillery fire from both sides.[20][29]
I should think there are at least three hundred smoke wreaths floating above us in the sky, some black, some white, the only clouds in the serene blue: A Taube and an English plane are manoeuvring and occasionally getting in a shot at one another: more English planes are coming up through a barrage of shell bursts and pieces of our own shells are falling in our own camp, almost a greater danger than Fritz's bombs.
— Joseph W. McPherson, Egyptian Camel Transport Corps[31]
Prelude
Defending forces
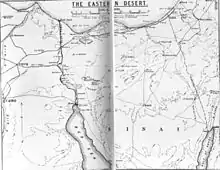
During the three weeks between the first two battles for Gaza, the town was quickly developed into the strongest point in a series of strongly entrenched positions extending to Hareira 12 miles (19 km) east of Gaza,[8] and southeast towards Beersheba.[32] They increased the width and depth of their front lines,[33] developing mutually supporting localities on ideal defensive ground.[34] The construction of these defences changed the nature of the attack to an infantry frontal attack across open ground, with mounted troops in a supporting role.[35]
The Ottoman force defended 10–12 miles (16–19 km) of entrenched defences supported by well concealed and sighted guns.[29] The positions held by the force commanded by Kress von Kressenstein began on their right flank on the Mediterranean coast, which was strongly entrenched. Next, Gaza and the country to the east of the city was dominated by wired trenches situated on rising ground, while the line towards Beersheba was less strongly fortified.[36] The German and Ottoman forces' well-prepared positions emphasised "the advantages of defence by areas as opposed to linear defence, at least by day and in clear weather."[7] The well-sited redoubts covering wide gaps provided mutual support and facilitated a large reserve force outside the danger zone, which was available to take advantage of counterattack opportunities.[37] The defences at Atawineh, Sausage Ridge, Hareira, and Teiaha supported each other as they overlooked an almost flat plain, making any attack against them almost impossible.[38]
After the first battle an additional two regiments of the 53rd Division, four artillery batteries, and some cavalry reinforced the defences.[39] The force defending the town of Gaza and the western coastal sector consisted of:
- 3rd Infantry Division
- 31st Infantry Regiment (two battalions including machine guns)
- 32nd Infantry Regiment (two battalions including machine guns)
- Two machine gun companies
- Four batteries of field artillery
- Austrian mountain howitzer batteries
- One 15-centimetre (5.9 in) howitzer battery
- One regiment of the 16th Infantry Division
- Group Tiller, a total of seven infantry battalions
- 79th Infantry Regiment
- 2nd Battalion, 81st Infantry Regiment
- 125th Infantry Regiment
- One squadron of cavalry
- One company of camelry
- 12 heavy mountain howitzers in two Austrian howitzer batteries
- Two long guns in the German 10-cm battery from Pasha I
- Two Ottoman field artillery batteries.
At Hareira
- One regiment of the 16th Infantry Division
At Tel esh Sheria (Force Headquarters)
- 16th Infantry Division and one regiment, either of the 47th Infantry Regiment or the 48th Infantry Regiment
- 3rd Cavalry Division's 1,500 swords[40][41][42]
At Kh Sihan
- 53rd Division[Note 1]
- Two battalions of the 79th Regiment (16th Infantry Division)
- Four batteries
- Some cavalry
At Beersheba
- Two battalions of the 79th Regiment (16th Infantry Division)
- One artillery battery[39]
They were supported by the 7th and 54th Infantry Divisions of the XX Corps and 3,000 reinforcements from the 23rd and 24th Infantry Divisions of the XII Corps.[43]
The British estimated 21,000 Ottoman defenders at Gaza and Tel esh Sheria, 4,500 at Kh. Sihan, with a further 2,000 at Atawineh.[44] Other British estimates include 25,000 German and Ottoman troops in the area, with 8,500 at Gaza, 4,500 east of Gaza, 2,000 in the Atawineh redoubt, and 6,000 at Hareira and Tel el Sheria about halfway between Gaza and Beersheba.[45][46] The official British historian notes there "were 18,000 rifles on the front" during this second battle, including the Beersheba detachment.[47] The ration strength of the defending force was 48,845, including 18,185 armed with rifles, 86 armed with machine guns. Although they had a total of 101 artillery pieces, only 68 guns were in action during the battle, 12 of which were larger than field-gun calibre.[39][36] The War Office thought there could be 30,000 Ottoman troops in southern Palestine with the Gaza–Beersheba line, defended by about 18,000 men.[16]
On 10 April, Dobell understood that Gaza was defended by three regiments, with two regiments east of the town, two regiments at Hareira, and one each at Tel esh Sheria and near Huj, with potential for mutual support. Just before the attack, it was understood that an Ottoman force of 21,000 held the ground between Tel esh Sheria and Gaza, including 8,500 at Gaza, 4,000 at Kh el Bir, and 2,000 at Atawineh.[44] On 15 April 1917, the Ottoman forces were estimated at about 1,500 to 2,000 cavalry, 60 to 70 guns, and 20,000 to 25,000 infantry holding the Sheria, Hareira to Gaza line with a small reserve near Akra.[48]
Attacking forces
Murray ordered Dobell to attack Gaza with three infantry divisions.[49] These were the 52nd (Lowland) Division commanded by Major General W. E. B. Smith, the 53rd (Welsh) Infantry Division commanded by Brigadier General Stanley Mott (replacing Major General Alister Dallas who resigned due to poor health after the first battle), and the 54th (East Anglian) Division commanded by Major General S. W. Hare.[50] The 52nd (Lowland) Division had not been involved in fighting since the Battle of Romani eight months ago, while the 53rd (Welsh) Division and to a lesser extent, the 54th (East Anglian) Division had both been involved in the first battle.[51][52][53] These two divisions had been almost up to establishment levels before the battle, but they were now on average about 1,500 below establishment.[54] The approximate 4,000 casualties suffered during the first battle had been suffered, "almost entirely by the 53rd Division", although the 161st Brigade (54th Division) had also suffered "particularly heavy losses", remaining in divisional reserve during the second battle. It is not known what reinforcements the 53rd (Welsh) Division received during the period between the two battles.[55] The 74th (Yeomanry) Division, which had been hastily formed from 18 dismounted yeomanry regiments, was now complete except for artillery and one field company. The Division arrived and on 7 April took over the outpost line along the Wadi Ghuzzee from the 54th (East Anglian) Division.[23][56] The infantry would be supported by the Desert Column's two mounted divisions, each consisting of four brigades.[23]
Artillery and armour
Eastern Force had 170 guns, 16 of which were of medium or larger calibre.[57] With the arrival of railhead at Deir el Belah on 5 April,[58] more medium artillery was transported forward.[21] These included all 12 of the 60-pounder guns, the 201st Siege Battery of two 8-inch and 6-inch howitzers and the third brigades of the 53rd (Welsh) and the 54th (East Anglian) Division's field artillery, and represented the only additional artillery received between the first and second battles.[23] By 18 April all heavy guns had been registered on their targets by artillery aircraft flying up and down the line, marking every flash.[29]
A detachment of eight heavy Mark I tanks from the Tank Corps (also known as Heavy Section, Machine Gun Corps) reached the front.[59] Tanks had been in use in France since September 1916 and Palestine was to be the only other theatre of the war they were employed.[57] They "seemed to offer the best chance of a successful frontal assault."[57] Lyden-Bell reported to the War Office that they would frighten the defenders "out of their lives."[57] Senior officers apparently deployed them for this purpose in widely separated pairs.[60]
The tanks which arrived in Palestine in January 1917 had been used for instruction and were not of the latest type, however during a trial attack they proved themselves in the sandy conditions. "[T]he sand though fairly heavy, did not interfere with them in the least. They buzzed along most satisfactorily."[57] They worked well in sand so long as the treads were not greased, which was the normal practice.[61] The tank, War Baby was powered by a 105-horsepower engine. It had a revolver, loop holes, periscopes, dynamos and differentiator, and was armed with four Hotchkiss machine guns and two auxiliary guns. This tank was manned by one officer sitting beside the driver, four gunners on bike seats and two greasers.[27]
The tanks were to be deployed along the front and advance across open country where they could give shelter to the infantry following behind them. However, as the tanks became targets the infantry also suffered, and only two tanks succeeded in reaching their objectives.[62][63] A supply of 4,000 rounds of 4.5-inch gas shells was received by the EEF. These were to be the first gas shells used in the Palestine campaign.[23]
Aerial support
A total of 25 aircraft were available in the 5th Wing, including 17 B.E.2s and eight Martinsydes which, although being the best fighters available, tended to overheat.[28] At this time, the 5th Wing headquarters, the headquarters of No. 14 Squadron along with its "A" Flight and No. 67 Squadron A.F.C., were all stationed at Rafa. No. 14 Squadron's "B" Flight and advanced headquarters were located at Deir el Belah, while "X" Aircraft Park was across the Suez Canal at Abbassia, with the Advanced Aircraft Park on the canal at Kantara.[61]
During the three days of the second battle, EEF artillery aircraft flew 38 missions and engaged 63 targets. They located 27 batteries, despite difficulties identifying targets through the haze and dust caused by the bombardment, and being attacked by hostile aircraft. Nevertheless, 128 direct hits were recorded by the artillery and three guns destroyed, while German and Ottoman anti-aircraft artillery caused the death of three pilots and the loss of two aircraft.[39][64]
Medical support
All the camels of the mounted field ambulances remained at Dier el Belah during the fighting except for a small proportion which moved forward, but ambulance men and transport remained at Deir el Belah during the fighting. As the attacks were made across open country without any cover, many casualties had to be collected in full view of the enemy. Evacuations from Desert Column were carried out by 36 Ford ambulance wagons, six from each division, with a convoy of 24 operating between divisional receiving stations at Tel el Jenimi and the 53rd British Casualty Clearing Station at Deir el Belah. Then they were transported back to the No. 2 Australian Stationary Hospital at El Arish on the railway before continuing their journey back to Kantara.[65]
Dobell's plan
Dobell and Murray discussed the advantages of a flank attack on Gaza from the east, instead of a frontal attack. However, the lack of water in the area towards Beersheba put it beyond the resources of the EEF in April 1917.[28] Dobell therefore planned a direct frontal attack on the well-prepared Ottoman defences.[49] He would employ all his available force to "crush" the main positions defending Gaza, while Desert Column advanced on the right flank, in preparation for a pursuit.[66][67]
The assault would be made in two stages. Firstly the 52nd (Lowland) and 54th (East Anglian) Divisions would attack and capture Sheikh Abbas and make a general advance of 2–3 miles (3.2–4.8 km) beyond the Wady Ghuzzee, to place the infantry in a position to launch the main attack on Gaza.[68][69] These two divisions, with the 74th (Yeomanry) Division in reserve, would advance east of the Es Sire Ridge with the 53rd (Welsh) Division, advancing between the Rafa to Gaza road and the Mediterranean coast. They would subsequently entrench and wire their new forward line, stretching from Tel el Ujul on the Mediterranean shore to Es Sir Ridge, along the Manusra Ridge to Sheikh Abbas, where an infantry brigade would strengthen the defences. This attack was to be covered by the Desert Column, operating to the east and southeast to stop reinforcements, moving from Hareira and Tel esh Sheria, from reinforcing Gaza.[69][Note 2]
Secondly, as soon as preparations were complete and allowing at least one clear day between the two stages, the 52nd (Lowland), the 53rd (Welsh), and the 54th (East Anglian) Divisions, supported by the Imperial Camel Brigade, were to launch the main attack on Gaza from the south, southwest, and southeast.[68][69] The 74th (Yeomanry) Division would form the reserve,[6] while their right flank was protected by Desert Column. The Column was to "protect the right of the infantry from an advance by the enemy in and beyond the entrenchments at Atawineh and Hareira on the Gaza to Beersheba road."[69] They also had orders to exploit an infantry breakthrough and attack Hareira on the extreme right, and they carried rations for the next day along with an iron ration.[6][48][68]
According to Falls, "Some subordinate commanders" suggested a concentrated infantry attack in depth on the coastal side of Gaza, "offered far more favourable opportunities" for an infantry attack.[70] Some infantry divisional commanders considered the artillery insufficient for the width of the proposed attack. They thought a more narrowly focused attack would make better use of the available artillery. Chetwode and Chauvel, "the two most experienced generals in the force", watched the extension of the Ottoman defences at Gaza with "some foreboding." They had seen the strength and determination of Ottoman defenders in entrenched positions at the Battle of Magdhaba and the Battle of Rafa.[34]
After receiving fresh information regarding Ottoman deployments on 10 April, Dobell modified his plan to incorporate a more flexible approach. While the first stage would remain unchanged, during the second stage of the battle he might attack directly by swinging his line slightly northeast, with only one division attacking Gaza to create a gap for Desert Column, depending on whether the hostile Atawineh defences were reinforced by units from the Hareira detachment. Or he might send most of his force to the coastal side of Gaza to make an attack there.[44]
Battle
Preliminary move: 16 April
By 16 April Murray had moved his advanced GHQ EEF in a railway train, from El Arish to Khan Yunis, and was in telephone communication with Dobell's Eastern Force battle headquarters at Deir el Belah, 5 miles (8.0 km) south of the Wadi Ghuzzee. Meanwhile, Chetwode moved his Desert Column headquarters from near In Seirat to Tel el Jemmi.[21][71]
Just after 19:00, the infantry divisions marched towards the Wadi Ghuzzee crossings,[34] while the Anzac Mounted Division left Deir el Belah at 18:30 with the New Zealand Mounted Brigade leading the night march. At 04:30 on 17 April the Canterbury Mounted Rifles Regiment led the way across the Wadi Ghuzzee at the Shellal ford, followed by the remainder of the Anzac Mounted Division.[72] The Imperial Mounted Division closed its headquarters at Deir el Belah and reopened at Tel el Jemmi. At 15:45 the 3rd Light Horse Brigade left Goz el Taire to take up an outpost line at Jemmi, while the 4th Light Horse, 5th and 6th Mounted Brigades were in the bivouac area by 22:00. The 5th Mounted Brigade moved out at 01:30 on 17 April with orders to capture Kh Erk.[73]
Initial assault: 17 and 18 April
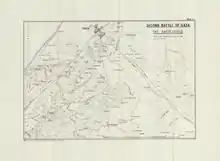
The Second Battle of Gaza began on April 17, 1917 and lasted three days.[33] Operating as "Eastern Attack" commanded by W. E. B. Smith, the 52nd (Lowland) and 54th (East Anglian) Divisions were to capture a line from Sheikh Abbas, through Mansura to Kurd Hill on the Es Sire Ridge as quickly as possible, and entrench their new positions. These two divisions were deployed for the attack, the 54th (East Anglian) Division on the right and the 52nd (Lowland) Division on the left, while the 53rd (Welsh) Division advanced across the Wadi Ghuzzee, west of the Rafa-Gaza road to Tel el Ujul, to establish an outpost line in the sand dunes covering the 52nd (Lowland) Division's left flank, with the 74th (Yeomanry) Division in reserve.[56][74]
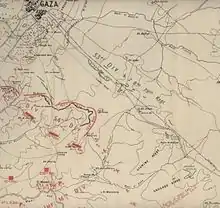
Two tanks attached to the 163rd (Norfolk & Suffolk) Brigade, 54th (East Anglian) Division, started their advance from Dumb-bell Hill at 04:30, but the leading tank was put out of action after being hit by three shells. The attack on Sheikh Abbas succeeded by 07:00 when the area was occupied and work began to fortify and entrench the position.[71][72] The advance by the 52nd (Lowland) Division was more strongly opposed but after their 157th (Highland Light Infantry) Brigade captured the Ottoman outpost at El Burjabye, they were able to occupy Mansura Ridge. Here their advance was brought to a halt when they were targeted by Ottoman artillery firing from Ali Muntar. Despite this, the captured position was consolidated.[71] During the day a fortified line was constructed from Sheikh Ailin to Sheikh Abbas about 3 miles (4.8 km) from Gaza.[75] With the capture of the Mansura Ridges, a line from there to the sea, about 2 miles (3.2 km) from the Wadi Ghuzzeh was established.[76]
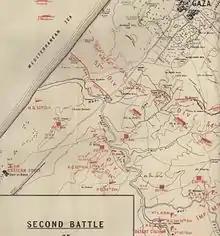
At daylight, tanks moved round the Mansura Ridge to destroy any remaining Ottoman posts,[29] but the terrain was unsuitable and they were stopped by Ottoman artillery.[56] Eastern Attack suffered 300 casualties, but all the objectives they had captured had been defended only by Ottoman outposts.[71]
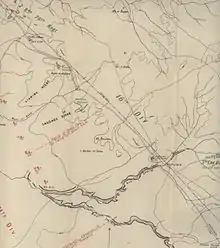
Desert Column's role during the day was to protect the right flank of the 54th (East Anglian) Division and "demonstrate against Hareira."[77] The 5th Mounted Brigade (Imperial Mounted Division) crossed the Wadi Ghazze at 02:30 and moved up the Wadi esh Sheria to occupy Kh. Erk 3 miles (4.8 km) south southwest of Hareira, at dawn. A patrol of the 1/1st Worcestershire Yeomanry (5th Mounted Brigade) cut the telegraph line between Hairpin and Hareira redoubts, taking out 100 yards (91 m) of line and removing the insulators. Meanwhile, the New Zealand Mounted Rifles Brigade (Anzac Mounted Division) drove in an Ottoman outpost, during their advance towards Hareira.[78] The Anzac Mounted Division, "watched the country to the south east", during the day while being frequently bombed. Field ambulances in the rear were also bombed. The Imperial Mounted Division remained at Desert Column headquarters at Tel el Jemmi.[75] From noon, the New Zealanders held a line near Im Siri on the Shellal to Beersheba road, from where they saw a great deal of movement around Tel esh Sheria, and the Beersheba to Ramleh railway viaduct at Irgeig. At dusk the 22nd Mounted Brigade of yeomanry continued to hold the outpost line, while the remainder of the Anzac Mounted Division retired to Shellal to water.[72]
The following day, on 18 April while the infantry consolidated their positions and prepared for battle, and an EEF artillery bombardment of hostile positions from the land and sea was reciprocated. During this artillery duel, the guns searched for the positions of the Ottoman artillery, EEF artillery, and shipboard guns targeting Gaza and Hareira positions.[29][75][79] Also during the day, the infantry was reinforced by the Imperial Mounted Divisions and the Imperial Camel Brigade.[56][76] The right flank continued to be guarded by the Anzac Mounted Division, which repeated their movements of the previous day to cover the right flank of the new infantry positions, when they were subjected to frequent bombing which caused heavy casualties. Supplies of ammunition and water were brought forward to them, across the Wadi Ghuzzee.[29][75][79]
Exploitation: 19 April
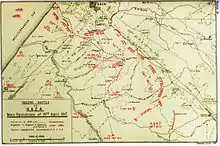
Following the success of the first phase of Dobell's plans, he decided not to attempt a flanking attack from Atawineh or Hareira on Gaza, but to return to his original plan and launch a series of attacks while Desert Column pinned the defenders to their positions on the right.[79] The 53rd (Welsh) Division, Eastern Force, and Desert Column were to attack the 10–12 miles (16–19 km) of entrenched Ottoman defences, which were strongly supported by well-concealed and sighted guns.[80]
The Eastern Attack's two infantry divisions would make the main attacks stretching from Mansura and Sheikh Abbas, then swing to the left to capture Ali Muntar before moving into the town of Gaza. This attack would cover the route taken by the Anzac Mounted Division during the first battle, to Kh. el Bir and Kh Sihan where a gap would be made for units of Desert Column to ride through. The deployments shown on the maps do not indicate any available mounted units. While this attack took place on the eastern side of Gaza, on the western side the 53rd (Welsh) Division was to capture the coastal defences in the sand dunes. Five tanks were attached to "Eastern Force" and two tanks attached to the 53rd (Welsh) Division, while the 74th (Yeomanry) Division would remain in reserve.[81] The Anzac Mounted Division would extend the line eastwards from the Imperial Mounted Division, in preparation for an attack on the Atawineh redoubt, leaving the 22nd Mounted Brigade to defend the Shellal ford.[76]
Bombardment
The battle began at 05:30 with a two-hour artillery bombardment during which the French coastguard ship Requin, protected by a screen of drifters and trawlers and escorted by two French destroyers, fired at Ali Muntar. French ships became involved after operations passed out of the British naval zone, which ended at El Arish. One monitor fired on the Warren on the western side of the ridge and another monitor fired on the Labyrinth.[49][82] After 07:30, the ships shifted their fire to north and northwest of Gaza and north and northeast of Ali Muntar to avoid firing on the infantry.[83] The ships were targeted by a German submarine during the afternoon which fired a torpedo at Requin', just missing the ship.[84]
Eastern Force heavy artillery fired on the hostile artillery batteries and strong defensive points that held up the infantry attack. For the first 40 minutes, the field howitzers fired gas shells at hostile battery positions and at the woodland area south west of Ali Muntar. Afterwards they continued their bombardment, firing high explosive shells for the remainder of the two hours.[85] The 15th Heavy Battery shelled gun positions and trenches near Kh el Bir, the 10th Heavy Battery targeted the ridge east of Gaza to Fryer Hill, the 91st Heavy Battery fired on El Arish Redoubt, Magdhaba Trench, and hostile batteries west of Gaza, while the 6-inch howitzers of the 201st Siege Battery targeted Outpost Hill and Middlesex Hill on the Es Sire Ridge. The 8-inch howitzer fired on Green Hill and the southern Gaza defences. These guns were supplied with 500 rounds per 60-pdr and 6-inch howitzers, 400 rounds per 8-inch howitzer, 600 rounds per 4.5-inch howitzer, and 600 rounds per 18-pdr.[86] Divisional commanders controlled the use of their divisional artilleries, excepting three brigades of 18-pdrs.
- The 263rd Brigade, 52nd (Lowland) Division was attached to 54th (East Anglian) Division until 07:30 when it transferred to the 74th (Yeomanry) Division with the objective of defending the Sheikh Abbas Ridge.
- The 267th Brigade, 53rd (Welsh) Division was attached to the 52nd (Lowland) Division until 07:30 when it returned to the 53rd (Welsh) Division.
- The 272nd Brigade, 54th (East Anglian) Division was attached to Eastern Force artillery until 18:30 18 April when it came under orders of 74th (Yeomanry) Division.[87]
The available guns had been deployed at a ratio of one gun every 100 yards (91 m), compared with one gun every 36 feet (11 m) at Arras, on the Western Front, in April 1917.[62] There were not enough guns to cover the 15,000 yards (14,000 m) front.[80][88] The light field guns could not produce a sufficiently dense bombardment, and the thin barrage was not effectively strengthened by the naval guns.[32][62] It quickly became clear that the gunfire from the warships, heavy artillery, and field howitzers, including the gas shells, had not silenced the defenders' artillery.[89] Ten minutes before the infantry attack, 18-pdrs began their covering fire.[90]
Infantry attacks
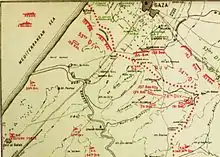
On the western side of Gaza in the coastal sector, from their position across the Wadi Ghuzze at Tel el Ujul, the 53rd (Welsh) Division was to attack and capture Samson Ridge, a great sand dune halfway between the Wadi Ghuzzee and Gaza. Then they were to advance and capture the western Ottoman defences between Gaza and the Mediterranean Sea. Meanwhile, on the eastern side of Gaza, Eastern Attack's 52nd (Lowland) Division on the left was to attack Ali Muntar, including the Labyrinth and Green Hill. On their right the 54th (East Anglian) Division, with the Imperial Camel Brigade attached to broaden the infantry attack, was to advance north from Sheikh Abbas towards Kh Sihan and Kh. el Bir.[91]
- Coastal attack – 53rd (Welsh) Division
Brigadier General S. F. Mott's 53rd (Welsh) Division began their advance from Tel el Ujul between the Mediterranean coast and the Rafa to Gaza road at 07:15 in extended order, moving across the sand hills fifteen minutes before the 52nd (Lowland) Division began to advance on their right.[92][Note 3] The 159th (Cheshire) Brigade on the left was to capture Sheikh Ajlin on the sea shore, while the 160th (Wales) Brigade on the right was to capture Sampson Ridge, each supported by one tank. They were to subsequently make contact with the 52nd (Lowland) Division on Ali Muntar in order to launch a joint attack from the Zowaiid trench in the west to the Romani trench on the Rafa to Gaza road.[93]
The 159th Brigade on the left advanced fairly well until it reached about 800 yards (730 m) from Sheikh Ajlin, where orders required it to wait for the capture of Samson Ridge, due to the possibility of exposing their right flank. On their right, machine gun fire from the woodland area delayed the 160th Brigade's attack on Samson Ridge, which was not captured until 13:00.[93] This woodland area south west of Ali Muntar in the vicinity of Romani Trench and Outpost Hill, had been targeted with gas shells during the artillery bombardment.[94][Note 4] Despite heavy casualties, Samson Ridge was captured during a bayonet attack, but most of the officers and NCOs were casualties. By the time Samson Ridge was captured, a 2nd Lieutenant was in command of the battalion.[92] They also captured 39 prisoners. Subsequently, the 159th Brigade captured Sheikh Ajlin on the coast without difficulty, while a counterattack on Samson Ridge against the 160th Brigade was unsuccessful. The division suffered 600 casualties, most of them during the fighting for Samson Ridge, but were unable to advance further until the 52nd (Lowland) Division came up to protect their right flank. The official British historian was critical of this division: "It appears that the men of the 53rd Division still felt the effects of their losses, disappointments and fatigue in the battle fought three weeks earlier, for their advance, even up to Samson Ridge, had been much slower than that of the other two divisions."[93]
- Eastern Attack – 52nd (Lowland) Division
On the left of Eastern Attack and extending the line of the 53rd (Welsh) Division, the leading brigade of the 52nd (Lowland) Division, the 155th (South Scottish) Brigade would begin their attack by pushing forward along the Es Sire Ridge with the 156th (Scottish Rifles) Brigade echeloned behind to their right. Having captured the ridge, the 155th Brigade was to swing up to make a joint attack with the 156th Brigade on Green Hill and Ali Muntar, while their 157th (Highland Light Infantry) Brigade remained in Eastern Attack reserve.[95]
The advance by the Eastern Attack, from their consolidated positions at El Burjabye, Mansura Ridge and Sheikh Abbas, began at 07:30, fifteen minutes after the attack by the 53rd (Welsh) Division.[95][96] The 155th Brigade moved along the spine of the Es Sire Ridge, with deep gullies on either flank. The 5th Battalion, of the King's Own Scottish Borderers on the left, was flank guard against the woodlands on the western slope of the ridge, which had been targeted by gas shells during the artillery bombardment, with the 4th Battalion Scots Fusiliers on their right. The 4th Battalion King's Own Scottish Borderers was in support. When the leading troops and the tank reached the gullies between Queen's and Lee's Hills on Es Sire Ridge, the tank nose-dived into a gully. However, the second tank took its place and by 08:15, Lee's Hill was occupied.[97]
Having secured Es Sire Ridge, the 155th Brigade's attack towards Outpost Hill came under artillery and machine gun fire from their front and left flank, from the direction of the Romani trench and the Labyrinth.[98] Until the 53rd (Welsh) Division captured Samson Ridge at 13:00, the 155th Brigade on the left flank of the 52nd (Lowland) Division, was exposed to heavy fire from rifles and machine guns.[96][99] The 5th Battalion King's Own Scottish Borderers, following the remaining tank continued the attack, wheeling slightly away to the left to attack and occupy the Ottoman lunette fortification (two faces forming a projecting angle on two flanks), on Outpost Hill at 10:00. Meanwhile, the 4th Battalion Royal Scots Fusiliers suffered very heavy casualties while attacking Middlesex Hill to the northeast and was stopped within 300 yards (270 m) of their objective.[100]
By this time the shortage of artillery shells was beginning to affect the attack. Had Middlesex Hill, Green Hill, and Ali Muntar, all within a relatively small area, been heavily bombarded, the 52nd (Lowland) Division's third brigade could have dominated Gaza. Instead, hostile fire from the woodland area continued to target the 155th Brigade, and an hour after capturing Outpost Hill the 5th Battalion King's Own Scottish Borderers were forced to withdraw after being heavily counterattacked. After hand–to–hand fighting, Outpost Hill was recaptured by the 4th Battalion King's Own Scottish Borderers, reinforced by the 5th Battalion King's Own Scottish Borderers and the 5th Battalion Royal Scots Fusiliers.[100] This lunette fortification continued to be held by the 155th Brigade during the afternoon, despite continuing counterattacks. After all the senior officers became casualties the 70 survivors were withdrawn, minutes before the 7th (Blythswood) Battalion Highland Light Infantry (157th Brigade), under heavy Ottoman artillery fire, arrived from Eastern Force reserve to reinforce them.[101] The Highland Light Infantry battalion was forced to dig in just to the south of Outpost Hill.[93]
The attack of the 156th Brigade was held up at 10:00 until the right of the 155th Brigade recommenced their advance. However, shortly afterwards the 156th Brigade's 8th Battalion Cameronians (Scottish Rifles) was stopped by fire from Middlesex and Outpost Hills. They were caught out in the open for five hours, with their right flank exposed to constant fire mainly from Green Hill, as a consequence of the 54th (East Anglian) Division on their right flank advancing out of sight. After the 156th Brigade made a slight withdrawal, effective divisional artillery fire halted a strong Ottoman counterattack from Ali Muntar at about 15:30.[101]
Meanwhile, the 157th Brigade, less the 7th Battalion supporting the 155th Brigade, moved forward from reserve below Mansura Ridge to Lee's Hill and Blazed Hill. A planned joint attack timed for 16:00 was delayed, and at 16:40 Eastern Force ordered the infantry to "discontinue the advance and dig in" from east of Heart Hill (in touch with the 53rd (Welsh) Division) through Outpost Hill to the right of the 54th (East Anglian) Division near Kh en Hamus (also called Kh. en Namus). The 157th Brigade relieved the 155th Brigade, which had suffered 1,000 casualties from a strength of 2,500.[102] Regarding the names of the numerous locations in the Gaza area, the official British historian notes, "new names appear with each new attack."[103]

- Eastern Attack – 54th (East Anglian) Division
On the left of the 54th (East Anglian) Division, advancing from Sheikh Abbas, the 162nd (East Midland) Brigade stretched from the intersection of the Wadi Mukaddeme with the Gaza to Beersheba road in the west, to the 163rd (Norfolk & Suffolk) Brigade on the right advanced on a 1,500 yards (1,400 m) front, its right towards the north east to an Ottoman redoubt 1 mile (1.6 km) northwest of Kh Sihan, with the Imperial Camel Brigade on their right. The 161st (Essex) Brigade formed a divisional reserve.[72][88]
The attack by the 162nd Brigade on the left was almost immediately fired on by artillery from behind Ali Muntar and by machine guns and mountain guns firing from nearby hostile trenches. The 10th Battalion London Regiment attacked on the left with the 4th Battalion Northamptonshire Regiment on the right, and the 11th Battalion London Regiment in support.[104] During the attack the left half of the 10th Battalion London Regiment became separated from their right. This occurred when the left section faced a non-connected line of trenches, through which they were able to fight their way across the Gaza to Beersheba road at 08:30, forcing an artillery gun to withdrawn. A member of the Signal Section twice successfully climbed telegraph poles and cut the line, before being killed during a third attempt by an artillery shell.[105] The left section of the 10th Battalion London Regiment became completely isolated from the right section when a gap of 800 yards (730 m) formed between the two sections of the battalion. They had also advanced out of sight of the 156th Brigade (52nd Division) on their left, and although their exposed left flank on the Wadi Mukaddeme was partly covered by the advance of two machine gun sections, the left section of the 10th Battalion was "hopelessly exposed." Subsequently, the 52nd (Lowland) Division advanced their right to ease the situation, but the advanced group was eventually forced to withdraw back across the road when two Ottoman battalions counterattacked strongly. They were forced back another 600 yards (550 m) before supporting machine guns in the Wadi Mukaddeme stopped the counterattack.[106] Meanwhile, the right half of the 10th Battalion London Regiment had kept touch with the 4th Battalion Northamptonshire Regiment, which was held up 500 yards (460 m) from Ottoman trenches. A small party from the Northamptonshire Regiment, including Lewis gunners, attacked a parapet, shooting Ottoman soldiers defenders at point blank range, "but this small party was eventually destroyed."[104]
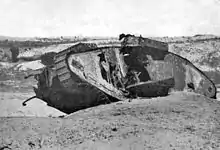
The attack by the 163rd (Norfolk & Suffolk) Brigade (on the east of the 162nd Brigade) was led by a tank towards an Ottoman redoubt 1 mile (1.6 km) northwest of Kh. Sihan. They advanced with the 4th Battalion Norfolk Regiment on the left and the 5th Battalion Norfolk Regiment on the right. While fighting their way to within 500 yards (460 m) of their objective, about two thirds of the 4th Battalion Norfolk Regiment became casualties while the remainder were pinned down. Despite being reinforced by the 8th Battalion Hampshire Regiment, no more ground was gained during fighting, which saw the Hampshires also suffer very heavy losses. Meanwhile, at 09:00 the tank, followed by part of the 5th Battalion Norfolk Regiment on the right, entered a redoubt, capturing 20 prisoners and killing others of the hostile garrison. The fire from several hostile artillery batteries was concentrated on the redoubt, destroying the tank and killing most of the infantrymen. So many casualties were suffered by this battalion that they were unable to withstand a strong counterattack, during which the survivors were captured. The few who managed to escape were forced back to the ridge from which they had launched their attack. These three battalions lost 1,500 men, including two commanding officers and all twelve company commanders.[104] At 13:00 the 161st (Essex) Brigade was ordered to reinforce the line held by the 163rd Brigade. Subsequently, the 5th Battalion Suffolk Regiment (163rd Brigade), and the 6th Battalion Essex Regiment (161st Brigade) made a fresh attack on the redoubt which had briefly been captured by the 5th Battalion Norfolk Regiment. At 14:20, before this advance had become "seriously engaged", orders were received for the whole line to stand fast.[107] Eastern Force ordered the divisions to dig in on the line they occupied.[108] During the battle three tanks were captured by the Ottoman defenders.[33]
On the right of the 163rd Brigade, the Imperial Camel Brigade—reinforced by one battalion of the 161st Brigade (54th Division)—advanced from Dumb-bell Hill. The 1st Battalion Imperial Camel Brigade advanced to occupy Tank redoubt on the left of the line, while the 3rd Battalion Imperial Camel Brigade crossed the Gaza to Beersheba road and temporarily occupied both "Jack" and "Jill" positions to the east of Kh. Sihan. They withdrew when the 4th Light Horse Brigade on their right was forced to withdraw during an Ottoman counterattack.[109]
Mounted attacks
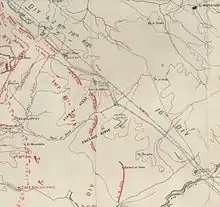
The Desert Column was deployed on the right of the Imperial Camel Brigade attached to Eastern Force, with the Imperial Mounted Division with the 17th Motor Machine Gun Battery was attached on the left, attacking towards the Atawineh redoubt, while the Anzac Mounted Division with the 7th Light Car Patrol attached covered their right flank and attacked towards the Hareira redoubt. Anzac Mounted Division was also to remain prepared to exploit any gaps in the Ottoman line.[110] The mounted force supported the main infantry attack until either the defenders withdrew or a gap was forced in the front line.[111]
- Atawineh – Imperial Mounted Division
At 06:30, one hour before the infantry attack began, the Imperial Mounted Division advanced on a wide front towards the Atawineh and Hairpin redoubts. On the left, the 4th Light Horse Brigade continued the line of the Imperial Camel Brigade to the Wadi el Baha, 7 miles (11 km) south east of Gaza. Then the 3rd Light Horse Brigade and the 5th Mounted Brigade on the extreme right continued the line, all attacking Atawineh on a 2-mile (3.2 km) front, with the 6th Mounted Brigade in divisional reserve. After approaching mounted, they were to launch their attack dismounted, when one quarter of the troopers would be holding four horses each, in led horses.[112][113] The Imperial Mounted Division's attack was supported by the Inverness and Ayrshire Batteries escorted by the 3rd Squadron of the Auckland Mounted Rifles Regiment (New Zealand Mounted Rifles Brigade, Anzac Mounted Division).[114]
The enemy artillery fire was the heaviest we had experienced, with shrapnel and high explosive. It was reported that the Turks had more than 250 big guns in action. Our troop, by short sharp rushes, got to within striking distance, but the heavy casualties made it impossible to go any further.
— Brigade Scout, 3rd Light Horse Brigade[115]
With its left in touch with the Imperial Camel Brigade, the 4th Light Horse Brigade's dismounted advance captured a position overlooking the Gaza to Beersheba road near Kh. Sihan. To their right, the 3rd Light Horse Brigade was by 09:15 ordered to halt its advance, as its forward position was attracting fire. They were close to the Atawineh redoubt, having captured 70 prisoners, but the brigade began to suffer enfilading fire from the narrow spur known as Sausage Ridge to the southeast of the Wadi el Baha.[116]
- Sausage Ridge – 5th Mounted and New Zealand Mounted Rifles Brigades (Anzac Mounted Division)
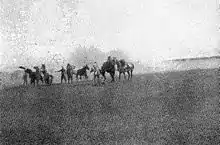
This strongly held position to the southeast of the Atawineh position was being attacked by the 5th Mounted Brigade on the right of the Imperial Mounted Division. Their embattled attack was reinforced at 09:30 by the Wellington Mounted Rifles Regiment (New Zealand Mounted Rifles Brigade, Anzac Mounted Division), although the New Zealand Mounted Rifles Brigades was to be prepared for a mounted attack. As the New Zealanders advanced with four machine guns under cover of fire from the Ayrshire Battery, the right of the mounted brigade was being forced back by the machine gun fire of an Ottoman battalion on the ridge. The New Zealanders took the pressure off the 5th Mounted Brigade, supported at one point by effective fire from two and a half Horse Artillery Batteries. The Somerset and Ayrshire Batteries and all available machine guns concentrated fire on Sausage Ridge, while the Wellington Mounted Rifles Regiment captured the southern end of the ridge. However, Ottoman fire from Hairpin redoubt at the northern end of Sausage Ridge near the Gaza to Beersheba road stopped their advance. At this stage, the Canterbury Mounted Rifles Regiment was ordered to reinforce the Wellington Mounted Rifles Regiment and the 5th Mounted Brigade.[113][114][117] At around noon, the remainder of the New Zealand Mounted Rifles Brigade advanced at the trot, with the Canterbury Mounted Rifles Regiment on the left. Although hostile aircraft bombed them and artillery fire also caused severe casualties, the machine guns were placed in positions between 1,000 to 1,600 yards (910 to 1,460 m) from the Hairpin redoubt to produce effective fire, with advancing Ottoman troops only 400 yards (370 m) away.[118][Note 5]
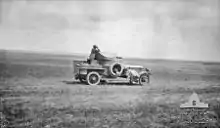
The strong counterattacks suffered by Eastern Attack extended eastwards and, at 14:00, a large Ottoman force supported by artillery was attacking along the whole front held by the Imperial Mounted Division. The 3rd and 4th Light Horse Brigades were pushed back some distance, suffering numerous casualties, while the 6th Mounted Brigade in reserve was sent to reinforce the line. One regiment filled a gap which had developed between the 3rd and 4th Light Horse Brigades, while two regiments reinforced the 5th Mounted Brigade, supported by fire from the 263rd Brigade RFA. Together they held the Ottoman counterattack and no further ground was lost before nightfall put an end to the fighting.[119]
- Hareira – 1st Light Horse Brigade (Anzac Mounted Division)
While the 22nd Mounted Brigade (Anzac Mounted Division) in reserve moved to Tel el Fara on the Wadi Ghuzzee, 4 miles (6.4 km) south of Hiseia, to cover the right of the Imperial Mounted Division and guard engineers developing water wells in the area, the 1st Light Horse Brigade was ordered to make a dismounted attack towards Hareira on the extreme right of the battle line.[116] Before noon, the 1st Light Horse Brigade had advanced to occupy Baiket es Sana. In the afternoon, while the Ottoman counterattacked the Eastern Force and the Imperial Mounted Division, on their left a hostile force marched out from Hareira to counterattack the 1st Light Horse Brigade.[119] The light horsemen were also attacked on their flank by a regiment of the Ottoman 3rd Cavalry Division from Tel esh Sheria. They advanced to the attack between the Wadis esh Sheria and Imleih.[120] Fire from the 1st Light Horse Brigade's Hotchkiss and Vickers machine guns, with the support of the Leicester Battery, stopped the counterattack.[121]
Although the 2nd Light Horse Brigade was to be prepared for a mounted attack,[116] the 5th and 7th Light Horse Regiments (2nd Light Horse Brigade) held a wide stretch of front line south of the Wadi Imleih. Here they were attacked by a squadron of Ottoman cavalry, supported by another cavalry regiment and a force of Bedouin. With their rifles on their backs the light horsemen were defenceless in mounted attack and they were forced back under cover of their machine gun detachments before eventually halting the Ottoman advance. Near dark, a threatened counterattack by infantry from Beersheba on the extreme right of the line failed to develop. The Anzac Mounted Division retired to water in the Wadi Ghuzzee at Heseia where they were shelled, causing some casualties.[121][122]
Aftermath
Cessation of EEF attacks
Darkness ended fighting with anticipation for a renewal of the battle the next day.[75][123] Although the EEF infantry brigades had succeeded in entering the Ottoman trenches at several points, they were too weakened by the fierce defence to retain their gains during strong counterattacks.[108] Towards the end of the afternoon, it had become apparent there was "no prospect of success on any portion of the front", and offensive operations ended after the Ottoman counterattack was forced back.[121] Dobell received reports from his divisional commanders describing the state of the troops, the low supply of ammunition, and the estimated 6,000 casualties. He decided to postpone the attack for twenty-four hours and reported to Murray that he was in agreement with the divisional commanders that another assault would only result in more losses. Murray agreed.[111]
The 53rd (Welsh) Division held Samson Ridge, and the 52nd (Lowland) Division held the line at the foot of Outpost Hill where construction of new defences at Heart Hill and Blazed Hill were begun. Although ordered not to abandon any ground, the position of the 54th (East Anglian) Division, out in the open and swept by fire, could not be maintained. The division was forced to withdraw to a position near Sheikh Abbas where they made contact with the 74th Division. The Imperial Camel Brigade, whose right was close to Kh. Sihan, covered this withdrawal, before withdrawing in turn at 19:45 to Charing Cross, southwest of Sheikh Abbas.[111][124] Desert Column was withdrawn to an outpost line extending from the right of the 54th (East Anglian) Division near Dumb-bell Hill on the edge of the Sheikh Abbas Ridge, through Munkheile south of the Wadi el Baha, to a point on the Wadi Ghuzzee about 1 mile (1.6 km) north of Shellal at Hiseia.[121][124]
An Ottoman counterattack was anticipated on 20 April, when German aircraft bombed EEF camps and Ottoman cavalry massed at Hareira. This threat did not "seriously develop" after the Ottoman cavalry was bombed by three B.E.s and two Martinsydes.[125] Although no general counterattack occurred, there were numerous local attacks. One of these attacks, which attempted to advance down the Wadi Sihan, was stopped by the 54th (East Anglian) Division's artillery.[7]
Casualties
During the battle the Ottoman defenders suffered between 82 and 402 killed, between 1,337 and 1,364 wounded, and between 242 and 247 missing.[33][126] About 200 Ottoman prisoners were captured.[7]
| Unit | Casualties |
|---|---|
| 52nd (Lowland) Division | 1,874 |
| 53rd (Welsh) Division | 584 |
| 54th (East Anglian) Division | 2,870 |
| Anzac Mounted Division | 105 |
| Imperial Mounted Division | 547 |
| Imperial Camel Brigade | 345 |
| Total | 6,325 |
Between 17 and 20 April, EEF lost 6,444 casualties. The infantry suffered 5,328 casualties; 2,870 of these were from the 54th (East Anglian) Division and 1,828 from the 163rd Brigade alone. The 52nd (Lowland) Division suffered 1,874 casualties, the 53rd (Welsh) Division 584, the Imperial Camel Brigade 345 casualties, the Imperial Mounted Division 547 casualties, and the Anzac Mounted Division 105 casualties.[7][66] Only one brigade in each of the 52nd (Lowland) and the 54th (East Anglian) Divisions was intact or had suffered only light casualties. The 74th Division had not been engaged.[127]
Official casualty figures include 509 killed, 4,359 wounded, and 1,534 missing; including 272 prisoners of war,[128] while unofficially the figure was much higher at 17,000.[18] A slightly lower figure of 14,000 has also been claimed.[123] The 10th Light Horse Regiment, (3rd Light Horse Brigade, Imperial Mounted Division) lost 14 officers and almost half the regiment's other ranks killed or wounded.[115] Three months later on 12 July, General Allenby reported "Units are, however, below strength, and 5,150 infantry and 400 yeomanry reinforcements are required now to complete the four divisions and mounted now in the line to full strength."[129] The Gaza war cemetery bears silent witness to the casualties which were much more severe than the British public was told.[18]
Consequences
The defeat of the EEF boosted the Ottoman Fourth Army's morale.[33] Within weeks Kress von Kressenstein was reinforced by the 7th and the 54th Divisions,[130] and by October 1917 the Eighth Army commanded by Kress von Keressenstein had been established with headquarters at Huleikat north of Huj.[131] The EEF's strength, which could have supported an advance to Jerusalem, was now decimated.[32] Murray and Dobell were relieved of their commands and sent back to England.[49]
The line secured during the battle by the EEF was consolidated and strengthened and trench warfare established from Sheikh Ailin on the Mediterranean coast to Sheikh Abbas and on to Tel el Jemmi. This line was to be held for six months, during the so-called Stalemate in Southern Palestine, when plans for a fresh effort in the autumn were developed to capture Gaza and Jerusalem.[32][56][75]
Notes
- This Ottoman division should not be confused with the EEF's 53rd (Welsh) Division.
- Falls Sketch Map 14 of the First Battle of Gaza shows Tel el Ujul on the coast north of the Wadi Ghuzzee. Sketch Map 16 of the Second Battle of Gaza also shows Tel el Ujul to the north of the Wadi Ghuzzee but half way between the coast and the Rafa to Gaza road. [Falls 1930 Vol. 1 Sketch Maps 14 and 16]
- Mott replaced Major General Alister Dallas who resigned owing to ill health following the first battle, when the majority of the 4,000 casualties were suffered by his division. [Grainger 2006 p. 138, Falls 1930 Vol. 1 pp. 315, 332 note]
- It was reported that the gas had "some effect", [German and Turkish sources in Falls 1930 Vol. 1 p. 349] and "no apparent effects." [Erickson 2001 p. 163]
- 2nd Lieutenant L. A. Craven earned the Military Cross for the effective placement of these machine guns. His wounds stopped him rejoining his unit. [Powles 1922 p. 102]
Citations
- Woodward 2006, p. 68–9
- Falls 1930 Vol. 1 p. 281
- McPherson 1985 pp. 172–3
- Secret Military Handbrook 23/1/17 Supplies pp. 38–49 Water pp. 50–3 Notes pp. 54–5
- Moore 1920, p.68
- Woodward 2006 p. 72
- Falls 1930 Vol. 1 p. 348
- Falls 1930 Vol. 1 p. 326
- Bruce 2002, pp. 92–3
- Downes 1938, p. 618
- Falls 1930 Vol. 1 pp. 289–99
- Falls 1930 Vol. 1 pp. 299–303
- Blenkinsop et al. 1925, p. 185
- Powles 1922, pp. 90–3
- Pugsley 2004 p. 138
- Woodward 2006 p. 71
- Keogh 1955, p. 102
- Moore 1920, p. 67
- Gullett 1941 p. 294
- Falls 1930 Vol. 1 p. 327
- Keogh 1955 p. 114
- Falls 1930 Vol. 1 pp. 274, 343–4
- Falls 1930 Vol. 1 p. 328
- Falls 1930 Vol. 1 p. 274
- 11th Light Horse Regiment War Diary AWM4,10-16-19
- Bostock 1982 p. 68
- McPherson 1985 p. 174
- Falls 1930 Vol. 1 p. 329
- Cutlack 1941 p. 61
- Duguid 1919 pp. 42, 45
- McPherson 1985 p. 173
- Bou 2009 p. 162
- Erickson 2001 p. 163
- Keogh 1955 p. 115
- Downes 1938 p. 621
- Keogh 1955 p. 113
- Falls 1930 Vol. 1 pp. 348–9
- Massey 1919 p. 16
- German and Turkish sources in Falls 1930 Vol. 1 p. 349 note 2
- Erickson 2007 pp. 99–100
- Falls 1930 Vol. 1 p. 321 and note 1, p. 349 note 2
- Cutlack 1941 p. 57 note
- Erickson 2007 pp. 101–2
- Falls 1930 Vol. 1 p. 331
- Powles 1922 p. 97
- Moore 1920 p. 70
- Falls 1930 Vol. 1 p. 331 note
- 3rd LHB War Diary Order No. 21 p. 1
- Erickson 2007 p. 99
- Falls 1930 Vol. 1 pp. 328–9, 332 and note
- Bruce 2002, pp.43–4, 92–3
- Powles 1922 p. 87
- Moore 1920 p. 65
- Falls 1930 Vol. 1 pp. 328–9
- Falls 1930 Vol. 1 pp. 315, 337
- Blenkinsop 1925 pp. 185–6
- Woodward 2006 p. 73
- Downes 1938 p. 620
- Falls 1930 Vol. 1 pp. 328, 445
- Fletcher 2004 p. 34
- Falls 1930 Vol. 1 p. 328 note
- Woodward 2006 p. 77
- Keogh 1955 p. 119
- Cutlack 1941 p. 62
- Downes 1938 pp. 621–2
- Hill 1978 p. 108
- Keogh p. 115
- Downes 1938 pp. 620–1
- Falls 1930 Vol. 1 p. 330
- Falls 1930 Vol. 1 p. 330 note
- Falls 1930 Vol. 1 p. 333
- Powles 1922 p. 99
- Imperial Mounted Division War Diary AWM4-1-56-2part1 April 1917
- Falls 1930 Vol. 1 pp. 330, 332
- Downes 1938 p. 622
- Powles 1922 p. 100
- Falls 1930 Vol. 1 p. 332
- Falls 1930 Vol. 1 pp. 333–4
- Falls 1930 Vol. 1 p. 334
- Woodward 2006 p. 74
- Falls 1930 Vol. 1 pp. 334–5
- Falls 1930 Vol. 1 p. 335 note, 337
- Falls 1930 Vol. 1 p. 335 note, p. 337
- Falls 1930 Vol. 1 p. 335 note
- Falls 1930 Vol. 1 pp. 335–7
- Falls 1930 Vol. 1 p. 337 note
- Falls 1930 Vol. 1 p. 335
- Falls 1930 Vol. 1 p. 337
- Falls 1930 Vol. 1 pp. 337–8
- Falls 1930 Vol. 1 pp. 336–7
- Falls 1930 Vol. 1 p. 330–3, 336–7
- Woodward 2006 pp. 74–5
- Falls 1930 Vol. 1 p. 343
- Falls 1930 Vol. 1 p. 336
- Falls 1930 Vol. 1 pp. 333, 337
- Woodward pp. 74–5
- Falls 1930 Vol. 1 pp. 336, 340–1, 343
- Falls p. 341
- Falls p. 343
- Falls 1930 Vol. 1 p. 341
- Falls 1930 Vol. 1 p. 342
- Falls 1930 Vol. 1 pp. 342–3
- Falls 1930 Vol. 1 p. 341 note
- Falls 1930 Vol. 1 p. 338
- Falls 1930 Vol. 1 pp. 338–9
- Falls 1930 Vol. 1 pp. 339, 342
- Falls 1930 Vol. 1 p. 339
- Keogh 1955 p. 117
- Falls 1930 Vol. 1 pp. 337, 339–40
- Falls 1930 Vol. 1 pp. 336, 343
- Falls 1930 Vol. 1 p. 347
- Falls 1930 Vol. 1 pp. 343–4
- Keogh 1955 pp. 117–8
- Powles 1922 pp. 101–2
- Bostock 1982 p. 71
- Falls 1930 Vol. 1 p. 344
- Falls 1930 Vol. 1 pp. 344–5
- Powles 1922 p. 102
- Falls 1930 Vol. 1 p. 345
- Falls 1930 Vol. 1 pp. 345–6
- Falls 1930 Vol. 1 pp. 346
- Powles 1922 pp. 104–5
- Powles 1922 p. 105
- Keogh 1955 p. 118
- Cutlack 1941 pp. 61–2
- German and Turkish sources in Falls p. 350
- Falls 1930 Vol. 1 pp. 346–7
- Falls 1930 Vol. 1 p. 348 note
- Hughes 2004 p. 34
- Falls 1930 Vol. 1 p. 353
- Falls 1930 Vol. 2 p. 36
References
- "11th Light Horse Regiment War Diary". First World War Diaries AWM4, 10-16-19. Canberra: Australian War Memorial. April 1917.
- "3rd Light Horse Brigade War Diary". Canberra: Australian War Memorial. April 1917.
- "Imperial Mounted Division General Staff War Diary". First World War Diaries AWM4, 1-56-2 Part 1. Canberra: Australian War Memorial. April 1917.
- Great Britain, Army, Egyptian Expeditionary Force (1918). Handbook on Northern Palestine and Southern Syria (1st provisional 9 April ed.). Cairo: Government Press. OCLC 23101324.CS1 maint: multiple names: authors list (link)
- Blenkinsop, Layton John; Rainey, John Wakefield, eds. (1925). History of the Great War Based on Official Documents Veterinary Services. London: H.M. Stationers. OCLC 460717714.
- Bostock, Harry P. (1982). The Great Ride: The Diary of a Light Horse Brigade Scout, World War 1. Perth: Artlook Books. OCLC 12024100.
- Bou, Jean (2009). Light Horse: A History of Australia's Mounted Arm. Australian Army History. Port Melbourne: Cambridge University Press. ISBN 9780521197083.
- Cutlack, Frederic Morley (1941). The Australian Flying Corps in the Western and Eastern Theatres of War, 1914–1918. Official History of Australia in the War of 1914–1918. Volume VIII (11th ed.). Canberra: Australian War Memorial. OCLC 220900299.
- Downes, Rupert M. (1938). "The Campaign in Sinai and Palestine". In Butler, Arthur Graham (ed.). Gallipoli, Palestine and New Guinea. Official History of the Australian Army Medical Services, 1914–1918. Volume 1 Part II (2nd ed.). Canberra: Australian War Memorial. pp. 547–780. OCLC 220879097.
- Duguid, Charles Scotty's Brother; Department of Repatriation Australia (1919). Desert Trail: With the Light Horse through Sinai to Palestine. Adelaide: W. K. Thomas & Co. OCLC 220067047.
- Erickson, Edward J. (2001). Ordered to Die: A History of the Ottoman Army in the First World War: Forward by General Hüseyiln Kivrikoglu. No. 201 Contributions in Military Studies. Westport Connecticut: Greenwood Press. OCLC 43481698.
- Erickson, Edward J. (2007). John Gooch; Brian Holden Reid (eds.). Ottoman Army Effectiveness in World War I: A Comparative Study. No. 26 of Cass Series: Military History and Policy. Milton Park, Abingdon, Oxon: Routledge. ISBN 978-0-203-96456-9.
- Falls, Cyril; G. MacMunn (1930). Military Operations Egypt & Palestine from the outbreak of war with Germany to June 1917. Official History of the Great War Based on Official Documents by Direction of the Historical Section of the Committee of Imperial Defence. Volume 1. London: H.M. Stationery Office. OCLC 610273484.
- Fletcher, David (2004). British Tank Mark I, 1916. New Vanguard. 100. Oxford: Osprey Publishing. ISBN 978-1-841-76689-8.
- Grainger, John D. (2006). The Battle for Palestine, 1917. Woodbridge: Boydell Press. ISBN 978-1-843-83263-8.
- Hill, Alec Jeffrey (1978). Chauvel of the Light Horse: A Biography of General Sir Harry Chauvel, GCMG, KCB. Melbourne: Melbourne University Press. ISBN 978-0-522-84146-6.
- Hughes, Matthew, ed. (2004). Allenby in Palestine: The Middle East Correspondence of Field Marshal Viscount Allenby June 1917 – October 1919. Army Records Society. 22. Phoenix Mill, Thrupp, Stroud, Gloucestershire: Sutton Publishing. ISBN 978-0-7509-3841-9.
- Keogh, E. G.; Joan Graham (1955). Suez to Aleppo. Melbourne: Directorate of Military Training by Wilkie & Co. OCLC 220029983.
- McPherson, Joseph W. (1985). Barry Carman; John McPherson (eds.). The Man Who Loved Egypt: Bimbashi McPherson. London: Ariel Books BBC. ISBN 978-0-563-20437-4.
- Massey, William Thomas (1919). How Jerusalem Was Won: Being the Record of Allenby's Campaign in Palestine. London: Constable and Company. OCLC 2056476.
- Moore, A. Briscoe (1920). The Mounted Riflemen in Sinai & Palestine: The Story of New Zealand's Crusaders. Christchurch: Whitcombe & Tombs. OCLC 561949575.
- Powles, C. Guy; A. Wilkie (1922). The New Zealanders in Sinai and Palestine. Official History New Zealand's Effort in the Great War. Volume III. Auckland: Whitcombe & Tombs. OCLC 2959465.
- Pugsley, Christoper (2004). The Anzac Experience New Zealand, Australia and Empire in the First World War. Auckland: Reed Books. ISBN 9780790009414.
- Woodward, David R. (2006). Hell in the Holy Land: World War I in the Middle East. Lexington: The University Press of Kentucky. ISBN 978-0-8131-2383-7.