Aichi D3A
The Aichi D3A Type 99 Carrier Bomber (Allied reporting name "Val")[2] is a World War II carrier-borne dive bomber. It was the primary dive bomber of the Imperial Japanese Navy (IJN) and was involved in almost all IJN actions, including the attack on Pearl Harbor.
| D3A | |
|---|---|
 | |
| Aichi D3A1 from carrier Akagi. | |
| Role | Carrier-based dive bomber |
| Manufacturer | Aichi Kokuki KK |
| First flight | January 1938 |
| Introduction | 1940[1] |
| Retired | 1945 |
| Primary user | Imperial Japanese Navy |
| Number built | 1,495 (479 D3A1) (1016 D3A2) |
| Developed into | Yokosuka D3Y Myōjo |
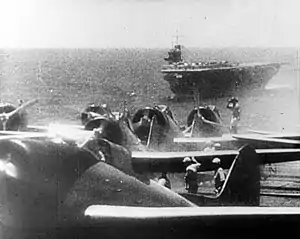
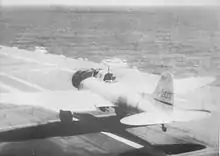
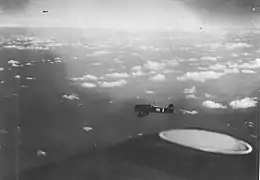


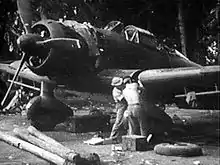

The Aichi D3A was the first Japanese aircraft to bomb American targets in the war, commencing with Pearl Harbor and U.S. bases in the Philippines, such as Clark Air Force Base. They sank more Allied warships than any other Axis aircraft.[3][4][5]
Design and development
In mid-1936, the Japanese Navy issued the 11-Shi specification for a monoplane carrier-based dive bomber to replace the existing D1A biplane then in service.[1] Aichi, Nakajima, and Mitsubishi all submitted designs, with the former two subsequently being asked for two prototypes each.
The Aichi design started with low-mounted elliptical wings inspired by the Heinkel He 70 Blitz. It flew slowly enough that the drag from the landing gear was not a serious issue, so fixed gear was used for simplicity.[6] The aircraft was to be powered by the 529 kW (709 hp) Nakajima Hikari 1 nine-cylinder radial engine.
The first prototype was completed in December 1937, and flight trials began a month later, after which it was designated as D3A1. Initial tests were disappointing. The aircraft was underpowered and suffered from directional instability in wide turns, and in tighter turns it tended to snap roll. The dive brakes vibrated heavily when extended at their design speed of 200 knots (370 km/h), and the Navy was already asking for a faster diving speed of 240 knots (440 km/h).[7][8]
The second aircraft was extensively modified before delivery to try to address the problems. Power was increased by replacing the Hikari with the 626 kW (839 hp) Mitsubishi Kinsei 3 in a redesigned cowling, and the vertical tail was enlarged to help with the directional instability. The wings were slightly larger in span and the outer sections of the leading edges had wash-out to combat the snap rolls, and strengthened dive brakes were fitted. These changes cured all of the problems except the directional instability, and it was enough for the D3A1 to win over the Nakajima D3N1.[9][8]
In December 1939, the Navy ordered the aircraft as the Navy Type 99 Carrier Bomber Model 11 (kanjō bakugekiki, usually abbreviated to 艦爆 kanbaku.[10]). The production models featured slightly smaller wings and increased power in the form of the 746 kW (1,000 hp) Kinsei 43 or 798 kW (1,070 hp) Kinsei 44. The directional instability problem was finally cured with the fitting of a long dorsal fin-strake which started midway down the rear fuselage, and the aircraft actually became highly maneuverable.[11][8]
In June 1942, an improved version of D3A1, powered by a 969 kW (1,299 hp) Kinsei 54, was tested and designated as D3A2 or the Model 12. The extra power reduced range, so the design was further modified with additional fuel tanks to bring the total tankage to 900 L (240 US gal), giving it the range needed to fight effectively over the Solomon Islands. Known to the Navy as the Model 22, it began to replace the Model 11 in front-line units in autumn 1942, and most Model 11s were then sent to training units. While some late production models of D3A1 were fitted with a propeller spinner, it became a standard with D3A2.[8]
Equipment
The pilot position was equipped with a Type 95 telescopic gunsight in the earlier models and a Type 99 in the later models, which were used for aiming the bomb during the dive. The observer/navigator position was equipped with a Type 97 Mk1 drift sight, which was a long vertical tube located in the front-left of the observer's seat. In addition, the observer position was equipped with a drift meter that was mounted on the floor in the front-right of the observer's seat. The observer also operated a Type 96 Mk2 radio set that was mounted in front of the observer's seat and behind the pilot's seat. On top of the radio set was a Type 3 reflector compass for precise navigation.[12]
Armament was two fixed forward-firing 7.7 mm (0.303 in) Type 97 machine guns, and one flexible 7.7 mm (.303 in) Type 92 machine gun at the rear end of cockpit, which was operated by the observer. Normal bomb load was a single 250 kg bomb (e.g., Type 99 No 25 semi-AP or Type 98 No 25 land bomb) carried under the fuselage, swung out under the propeller on release by a trapeze. Two additional 60 kg bombs (e.g., Type 99 No 6 semi-AP or Type 2 No 6 land bomb) could be carried on wing racks located under each wing outboard of the dive brakes.[8][13]
Initially, D3A dive bombers were painted in silver. During the summer of 1941, the paint finish changed to light olive grey. The color changed again in early 1942 to dark green.[8]
Operational history
An individual D3A dive bomber was commanded by the senior ranking crew member aboard, which could be the observer rather than the pilot.[8] This was in contrast to US Navy, where the pilot was almost always the commander of a dive bomber. For example, Petty Officer First Class Kiyoto Furuta was serving as a pilot to Lieutenant Takehiko Chihaya during the Attack on Pearl Harbor,[8] and later on to Lieutenant Keiichi Arima during the two carrier battles of the Solomon Islands campaign,[14] both of whom were observers.
The D3A1 first saw combat operation in November 1939, one month prior to its official acceptance as the Navy Type 99 dive bomber. Nakajima sent several examples to 14th Air group operating at Haikou on Hainan island in South China. These D3A1 were commanded by Lieutenant Sadamu Takahashi and supported the Imperial Japanese Army in the capture of Nanning, which was intended to cut the supplies coming from French Indochina. After the capture of Nanning, they continued to be operated in the area in 1940. In May 1940, 12th Air Group became the second front-line unit to be equipped with the new D3A1 dive bombers. They first participated in the capture of Yichang and conducted anti-shipping operations on Yangtze river, west of Yichang, in order to cut the Chinese supplies coming from Chongqing. In September, D3A1 from the 12th Air Group started to fly missions against Chongqing, which was the Chinese capital at the time. After the invasion of Indochina in autumn 1940, 14th Air Group operated at Hanoi and flew missions against Kunming and Burma Road.[8]
The D3A1 commenced carrier qualification trials aboard the aircraft carriers Akagi and Kaga during 1940, while a small number of aircraft made their combat debut from land bases over China.[11] Starting with the attack on Pearl Harbor, the D3A1 took part in all major Japanese carrier operations in the first 10 months of the war. They achieved their first major success against the Royal Navy during their Indian Ocean raid in April 1942. D3A1 dive bombers scored over 80% hits[15] with their bombs during attacks on two heavy cruisers and an aircraft carrier during the operation.
Before the Indian Ocean raid, the established doctrine regarding attack against ships was to arm all D3A1 dive bombers with semi-AP bombs. On 5 April 1942, an IJN carrier force attacked Colombo on Ceylon with half of its complement, while the other half was kept in reserve for strikes against ships. Since a second strike against Colombo was deemed necessary, the dive bombers of reserve force were rearmed from semi-AP bombs to land bombs. When British heavy cruisers were spotted soon afterwards, the reserve force was sent with a portion of D3A1 dive bombers armed with land bombs. In the subsequent attack, land bombs unintentionally proved very effective in suppressing the anti-aircraft fire from the ships. As a result, the doctrine was modified in order to intentionally equip the first few D3A1 dive bombers with land bombs. This new method was already implemented for the attack that sunk HMS Hermes just four days later, and continued to be used from then on.[8]
During 1942, dive bombing attacks by D3A1 and D3A2 bombers significantly contributed to sinking of three US fleet carriers: Lexington at the Battle of the Coral Sea, Yorktown at the Battle of Midway and Hornet at the Battle of the Santa Cruz Islands. In addition, they damaged carrier Enterprise both at the Battle of the Eastern Solomons and at the Battle of the Santa Cruz Islands.[16][14] D3A dive bombers also operated from land bases during most of the Solomon Islands campaign, such as in Guadalcanal campaign, Operation I-Go, Operation SE and Operation RO.[14][17][18]
During the course of the war, D3A dive bombers often combined their attacks upon enemy warships with the IJN Nakajima B5N Kate torpedo bomber; consequently enemy vessels were often sunk by a combination strike of bombs and torpedoes. However, there were occasions when just the D3A's would make the attacks, or at least score the sinking hits. Discounting the Pearl Harbor strike, which also used the B5N for level bombing and torpedo attacks, D3A dive bombers were credited with sinking the following Allied warships:[19]
- USS Peary, American destroyer, 19 February 1942 – Australia (Darwin)[20]
- USS Pope, American destroyer, 1 March 1942 – Java Sea
- USS Edsall, American destroyer, 1 March 1942- Indian Ocean
- USS Pecos, American oiler, 1 March 1942- Indian Ocean
- HMS Cornwall, British heavy cruiser, 5 April 1942 – Indian Ocean
- HMS Dorsetshire, British heavy cruiser, 5 April 1942 – Indian Ocean
- HMS Hector, British armed merchant cruiser, 5 April 1942 – Indian Ocean
- HMS Tenedos, British destroyer, 5 April 1942 – Indian Ocean
- HMS Hermes, British aircraft carrier, 9 April 1942 – Indian Ocean
- HMAS Vampire, Australian destroyer, 9 April 1942 – Indian Ocean
- USS Sims, American destroyer, 7 May 1942 – Pacific Ocean
- USS De Haven, American destroyer, 1 February 1943 – Pacific Ocean (Ironbottom Sound)
- USS Aaron Ward, American destroyer, 7 April 1943 – Pacific Ocean (Ironbottom Sound)
- USS Brownson, American destroyer, 26 December 1943 – Pacific Ocean[21]
- USS Abner Read, American destroyer, sunk by kamikaze 1 November 1944 – Pacific Ocean[22]
- USS William D. Porter, American destroyer, sunk by kamikaze 10 June 1945 – Japan (Okinawa)
As the war progressed, there were instances when the dive bombers were pressed into duty as fighters in the interceptor role, their maneuverability being enough to allow them to survive in this role.[23] When the Yokosuka D4Y Suisei became available, the D3A2s ended up with land-based units or operating from the smaller carriers, which were too small to handle the fast-landing Suisei. When American forces recaptured the Philippines in 1944, land-based D3A2s took part in the fighting, but were hopelessly outdated and losses were heavy. By then, many D3A1s and D3A2s were operated by training units in Japan, and several were modified with dual controls as Navy Type 99 Bomber Trainer Model 12s (D3A2-K). During the last year of the war, the D3A2s were pressed back into combat for kamikaze missions.[24]
Surviving aircraft
One D3A is currently under restoration at the Planes of Fame Museum in Chino, California.[25] There are two unrestored D3As on display at the National Museum of the Pacific War in Fredericksburg, Texas.[26][27]
Specifications (D3A2 Model 22)
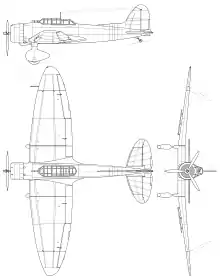
Data from Japanese Aircraft of the Pacific War[28]
General characteristics
- Crew: 2
- Length: 10.195 m (33 ft 5 in)
- Wingspan: 14.365 m (47 ft 2 in)
- Height: 3.847 m (12 ft 7 in)
- Wing area: 34.9 m2 (376 sq ft)
- Empty weight: 2,570 kg (5,666 lb)
- D3A1: 2,408 kg (5,309 lb)
- Gross weight: 3,800 kg (8,378 lb)
- D3A1: 3,650 kg (8,050 lb)
- Powerplant: 1 × Mitsubishi Kinsei 54 14-cylinder air-cooled radial piston engine, 970 kW (1,300 hp) for take-off
- 1,200 hp (890 kW) at 3,000 m (9,800 ft)
- 1,100 hp (820 kW) at 6,200 m (20,300 ft)
- Other engines
- 710 hp (530 kW) Nakajima Hikari I - 1st prototype
- 840 hp (630 kW) Mitsubishi Kinsei 3 - 2nd prototype
- 1,000 hp (750 kW) Mitsubishi Kinsei 43 - D3A1 Model 11 (early production)
- 1,070 hp (800 kW) Mitsubishi Kinsei 44 - D3A1 Model 11 (late production)
- Propellers: 3-bladed metal constant-speed propeller
Performance
- Maximum speed: 430 km/h (270 mph, 230 kn) at 6,200 m (20,300 ft)
- D3A1: 387 km/h (240 mph; 209 kn) at 3,000 m (9,800 ft)
- Cruise speed: 296 km/h (184 mph, 160 kn) at 3,000 m (9,800 ft)
- Range: 1,352 km (840 mi, 730 nmi)
- D3A1: 1,472 km (915 mi)
- Service ceiling: 10,500 m (34,400 ft)
- D3A1: 9,300 m (30,500 ft)
- Time to altitude: 3,000 m (9,800 ft) in 5 minutes 48 seconds
- D3A1: 3,000 m (9,800 ft) in 6 minutes 27 seconds
- Wing loading: 108.9 kg/m2 (22.3 lb/sq ft)
- D3A1: 104.6 kg/m2 (21.4 lb/sq ft)
- Power/mass: 3.9 kg/kW (6.4 lb/hp)
- D3A1: 4.9 kg/kW (8 lb/hp)
Armament
- Guns: 2x forward-firing 7.7 mm (0.303 in) Type 97 aircraft machine guns in the forward fuselage upper decking + 1x 7.7 mm (0.303 in) Type 92 machine gun on a flexible mount in the rear cockpit
- Bombs: 1x 250 kg (550 lb) under the fuselage and 2x 60 kg (130 lb) bombs under the wings
See also
Aircraft of comparable role, configuration, and era
- ANBO VIII
- Blackburn Skua
- Breda Ba.65
- Curtiss SB2C Helldiver
- Douglas SBD Dauntless
- Fairey Barracuda
- Junkers Ju 87
- Loire-Nieuport LN.401
- Saab 17
- Vultee A-31 Vengeance
- Yokosuka D3Y
- Yokosuka D4Y
Related lists
References
- Notes
- Chant 1999, p. 16.
- Note: This code name was applied mid-to-late 1943; more often the D3A was referred to as the "Type 99 navy dive bomber" by Allied forces.
- Angelucci and Matricardi 1978, p. 142.
- Worth 2001, p. 170.
- Casey 1977, p. 87.
- Francillon 1979, p. 272.
- Francillon 1979, pp. 272–273.
- Tagaya 2011.
- Francillon 1969, p. 24.
- Parshall and Tully 2007, p. 80.
- Air International December 1987, p. 289.
- Mikesh (2004)
- Air International December 1987, p. 288.
- Lundstrom 2005b.
- Francillon 1979, p. 274.
- Lundstrom 2005a.
- 江間 1992.
- Hata 2011.
- Brown 1990, pp. 60–125.
- Roscoe 1953, p. 96
- Parkin 1995, p. 198.
- Parkin 1995, p. 251.
- Francillon 1969, p. 25.
- Air International December 1987, p. 290.
- "Restoration Projects". Planes of Fame Museum. Retrieved: 7 December 2010.
- Taylan, Justin. "D3A2 Model 22 Val Manufacture Number 3357 Tail 582–248". Pacific Wrecks. Pacific Wrecks Inc. Retrieved 19 August 2016.
- Taylan, Justin. "D3A2 Model 22 Val Manufacture Number 3105". Pacific Wrecks. Pacific Wrecks Inc. Retrieved 19 August 2016.
- Francillon, Rene (1979). Japanese Aircraft of the Pacific War. London: Putnam & Company Limited. pp. 271–276. ISBN 0 370 30251 6.
- Bibliography
- Angelucci, Enzo and Paolo Matricardi. World Aircraft: World War II, Volume II (Sampson Low Guides). Maidenhead, UK: Sampson Low, 1978. ISBN 0-562-00096-8.
- Brown, David. Warship Losses of World War Two. London: Arms and Armour, 1990. ISBN 0-85368-802-8.
- Casey, Louis S. Naval Aircraft. Secaucus, New Jersey: Chartwell Books Inc., 1977. ISBN 0-7026-0025-3.
- Chant, Christopher. Aircraft of World War II – 300 of the World's Greatest Aircraft 1939–45. London: Amber Books Ltd., 1999. ISBN 0-7607-1261-1.
- Eden, Paul. "The Encyclopedia of Aircraft of WWII".London:Amber Books Lt., 2007. ISBN 1-904687-83-0.
- Fleischer, Seweryn and Zygmunt Szeremeta. Aichi D3A Val, Nakajima B5N Kate (in Polish). Warszawa, Poland: Wydawnictwo Militaria, 2001. ISBN 83-7219-118-2.
- Francillon, René J. Japanese Aircraft of the Pacific War. London: Putnam & Company Ltd., 1970 (2nd edition 1979). ISBN 0-370-30251-6.
- Francillon, René J. Japanese Bombers of World War Two, Volume One. Windsor, Berkshire, UK: Hylton Lacy Publishers Ltd., 1969. ISBN 0-85064-022-9.
- Hata, Ikuhiko; Izawa, Yasuho; Shores, Christopher (2011). Japanese Naval Air Force Fighter Units and their aces, 1932-1945. London, UK: Grub Street. ISBN 9781906502843.
- Kinzey, Bert. Attack on Pearl Harbor: Japan awakens a Sleeping Giant. Blacksburg, Virginia: Military Aviation Archives, 2010. ISBN 978-0-9844665-0-4.
- Lundstrom, John B. (2005a). The First Team: Pacific Naval Air Combat from Pearl Harbor to Midway (New ed.). Annapolis, Maryland: Naval Institute Press. ISBN 1-59114-471-X.
- Lundstrom, John B. (2005b). First Team and the Guadalcanal Campaign: Naval Fighter Combat from August to November 1942 (New ed.). Annapolis, Maryland: Naval Institute Press. ISBN 1-59114-472-8.
- "Pacific Predator... the Aichi Type 99". Air International, Vol. 33, No. 6, December 1987, pp. 285–290. Bromley, UK: Fine Scroll. ISSN 0306-5634.
- Mikesh, Robert C. Japanese Aircraft Equipment: 1940-1945. Schiffer Publishing, 2004. ISBN 0764320971.
- Parkin, Robert S. Blood on the Sea: American Destroyers Lost in World War II. New York: Sarpedon Publishing, 1995. ISBN 1-885119-17-8.
- Parshall, Jonathan and Anthony Tully. Shattered Sword: The Untold Story of the Battle of Midway. Washington D.C.: Potomac Books Inc., 2007. ISBN 978-1-57488-924-6.
- Richards, M.C. and Donald S. Smith. "Aichi D3A ('Val') & Yokosuka D4Y ('Judy') Carrier Bombers of the IJNAF". Aircraft in Profile, Volume 13, 1974, pp. 145–169. Windsor, Berkshire, UK: Profile Publications Ltd. ISBN 0-85383-022-3.
- Roscoe, Theodore. United States Destroyer Operations in World War II. Annapolis, Maryland: United States Naval Institute, 1953. ISBN 0-87021-726-7.
- Smith, Peter C. Aichi D3A1/2 Val . Ramsbury, Marlborough, Wiltshire, UK: The Crowood Press Ltd., 1999. ISBN 1-86126-278-7.
- Tagaya, Osamu. Aichi 99 Kanbaku 'Val' Units of World War 2. Botley, UK: Osprey Publications, 2011. ISBN 1-84176-912-6.
- Worth, Richard. Fleets of World War II. New York: Da Capo Press, 2001. ISBN 978-0-306-81116-6.
- 江間, 保. 急降下爆撃隊―日本海軍のヘルダイバー. 今日の話題社, 1991. ISBN 4875651384
External links
| Wikimedia Commons has media related to Aichi D3A. |