Second Battle of Heligoland Bight
The Second Battle of Heligoland Bight, also the Action in the Helgoland Bight and the Zweiten Seeschlacht bei Helgoland, was an inconclusive naval engagement fought between British and German squadrons on 17 November 1917 during the First World War.
| Second Battle of Heligoland Bight | |||||||
|---|---|---|---|---|---|---|---|
| Part of the First World War | |||||||
 HMS Calypso at the battle, during which she was severely damaged, drawn by William Lionel Wyllie | |||||||
| |||||||
| Belligerents | |||||||
|
|
| ||||||
| Commanders and leaders | |||||||
|
Sir William Pakenham |
| ||||||
| Strength | |||||||
|
1 battlecruiser 2 large light cruisers 8 light cruisers 10 destroyers |
2 battleships 4 light cruisers 8 destroyers 14 minesweepers | ||||||
| Casualties and losses | |||||||
|
22 men killed, 43 wounded 1 light cruiser damaged |
21 men killed, 40 wounded, 22 prisoners of war 1 minesweeper sunk 1 light cruiser damaged | ||||||
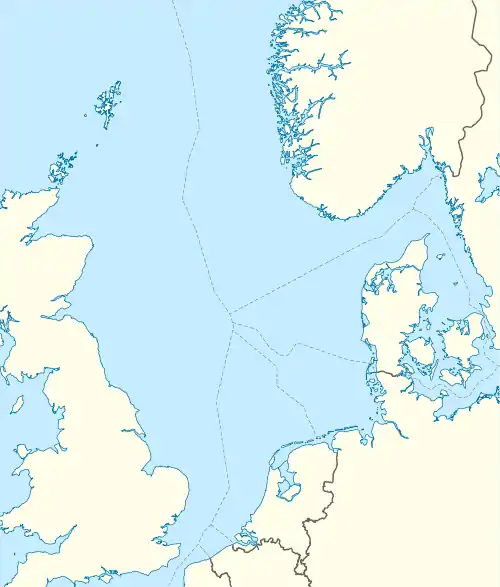 Heligoland Bight Location of the engagement | |||||||
Background
British minelaying
The British used sea mining defensively to protect sea lanes and trade routes and offensively to impede the transit of German submarines and surface ships in the North Sea, the danger of which was illustrated on 17 October 1917 by the sortie of the German Brummer-class cruisers SMS Brummer and SMS Bremse (the Action off Lerwick) against the Scandinavian Convoy. (During 1917, six U-boats were sunk by British mines and in two years, the German minesweeping counter-effort suffered the loss about 28 destroyers and 70 minesweepers and other ships.)[1]
The Germans had been forced into minesweeping up to 150 nmi (170 mi; 280 km) into the Heligoland Bight and in the southern Baltic Sea, covered by light cruisers and destroyers, with occasional distant support by battleships.[1] After the Action off Lerwick, several proposals for attacks on the German minesweepers and escorts were canvassed at the Admiralty.[2] On 31 October, the British sent a large force of cruisers and destroyers into the Kattegat, which sank Kronprinz Wilhelm, an armed merchant ship and nine trawlers.[3][4]
German test trips
The prolific British laying of mines and net barrages outside the main German mine belts between Horns Reef and Terschelling, close to the bases of the High Seas Fleet (Hochseeflotte) forced the Kaiserliche Marine into surveying the British minefields, to find routes through them for transit into and back from the North Sea. Test trips were carried out, being substantial operations with ships to find the mines, minesweepers, torpedo boats (usually a continental term for destroyers), U-boats, barrier breakers and light cruisers, with air reconnaissance by Zeppelins and seaplanes. The Test trips were also protected by battleships on routes known to be free of mines.[3]
Prelude
North Sea operations
On 20 October, the British code breakers of Room 40, part of the Naval Intelligence Division of the Admiralty, decrypted orders to the submarine SM UB-61 to scout to the north of Bergen to find the new route of the Scandinavian Convoy. Agent reports from Copenhagen disclosed an imminent German attack by seven light cruisers and 36 destroyers.[5] During the week ending 11 November, British light cruisers, destroyers and a battlecruiser escort, conducted an abortive sweep along the fringe of the Heligoland Bight minefields.[3] By mid-November the Admiralty had obtained enough intelligence to intercept one of the big German minesweeping operations, provided that the ships based at Rosyth, in Scotland, could sail in time. The Admiralty decided that an offensive operation should begin on 17 November.[2]
Test trip, 17 November
.png.webp)
The Germans planned a Test trip for 17 November 1917, comprising the 2nd and 6th Auxiliary Mine Sweeper Half-Flotillas, the 12th and 14th Torpedo Boat Half-Flotillas, Barrier Breaking Division IV and light cruisers of Scouting Group Division II, commanded by Rear-Admiral (Konteradmiral) Ludwig von Reuter from the 6th Mine Sweeper Half-Flotilla. The Kaiser-class battleships, SMS Kaiser and SMS Kaiserin from Squadron IV, each with ten 12 in (300 mm) guns, led by Captain (Kapitän zur See) Kurt Graßhoff in Kaiserin, were to act as covering force for the group. The battleships were to reach a point west of Heligoland by 7.00 a.m. while the Test trip group rendezvoused in the Heligoland Bight about half-way between Horns Reef and Terschelling. With poor weather grounding Zeppelins and making it impossible for light cruisers embark seaplanes, after they had alighted on the sea, the Test trip relied on reconnaissance patrols by two land-based seaplanes from Borkum on the German coast, just east of the Netherlands, for reconnoitring ahead of the group.[6]
British plan

The German Test trip had been revealed by the code breakers of Room 40, allowing the British to plan an ambush.[7] On 16 November, orders for an attack on the Test trip were sent to Admiral Sir David Beatty, Commander-in-Chief of the British Grand Fleet. On 17 November 1917 a force of cruisers under Vice Admiral Trevylyan Napier was sent to attack the German minesweepers as they were mineweeping.[8]
Battle
The action began at 7:30 a.m., roughly 65 nmi (75 mi; 120 km) west of Sylt, when Courageous sighted German ships. She opened fire at 7:37 a.m. Admiral Reuter, the German commander, with four light cruisers and eight destroyers, advanced towards the British ships, to cover the withdrawal of the minesweepers, all of which escaped except for the trawler Kehdingen (1906) which was sunk.[lower-alpha 1] The battle developed into a stern chase as the German forces, making skilful use of smoke-screens, withdrew south-east at their best speed, under fire from the 1st Cruiser Squadron, the 1st Light Cruiser Squadron and the 6th Light Cruiser Squadron. Repulse was detached from the 1st Battle Cruiser Squadron and came up at high speed to join the battle. Both sides were hampered in their manoeuvres by the presence of naval minefields.
At about the same time, the light cruisers came under fire from two German Kaiser-class battleships, SMS Kaiser and SMS Kaiserin which had come up in support of Reuter's ships; Caledon was struck by a 30.5 cm (12.0 in) shell, which did little damage; shortly afterwards, the British ships gave up the chase as they reached the edge of more minefields. A shell went through the upper conning tower of the light cruiser Calypso, killing the conning tower crew and mortally wounding the Captain, Herbert Edwards, on the bridge and knocking unconscious the navigator, Lieutenant-Commander M. F. F. Wilson. All personnel on the lower bridge were killed and the gunner officer, Lieutenant H. C. C. Clarke took command, which was made more difficult because the shell also cut all electrical communications and reduced the rate of fire.[9][lower-alpha 2] The battle cruiser Repulse briefly engaged the German ships at about 10:00 a.m., achieving a hit on the light cruiser SMS Königsberg that started a serious fire.[10]
Aftermath
Analysis
In 1984, Patrick Beesly wrote that the British operation was daring but that Napier was unjustly blamed for its failure to pursue the German ships with sufficient vigour. Room 40 was well informed about the positions of German minefields and the British fields which the Germans were trying to clear. The information had been added to Room 40's naval charts but the information was denied to Napier who made decisions based on the charts he did have. Admiralty reluctance to disclose that their information was derived from the decoding of wireless intercepts had led to the naval commander being ill-informed. The Admiralty did at least supply operational intelligence to the Naval commanders, after Beatty had made an emergency request when he was at sea. Napier was informed in ninety minutes, by the Admiralty that German capital ships had sailed at 8:30 a.m. and the location of German cruisers, leading to Königsberg receiving severe damage. At the least, Room 40 had prevented the British operation degenerating from fiasco to disaster.[7]
Casualties
In 1920, Admiral Reinhard Scheer wrote that the German suffered casualties of 21 men killed, ten seriously wounded and thirty men slightly wounded.[11] An Admiralty communiqué listed British casualties as one officer and 21 men killed, four officers and 39 men wounded; 22 prisoners were taken.[12]
Victoria Cross
Able Seaman John Carless of Walsall in Caledon was awarded a posthumous Victoria Cross for his bravery in continuing to man a gun despite mortal wounds from shell-splinters.[13]
Orders of battle
British forces
1st Cruiser Squadron: Vice Admiral Trevylyan Napier CB, MVO
- Courageous (flag; Capt Arthur Bromley)
- Glorious (Capt Charles B. Miller CB)
- Attached destroyers (13th Destroyer Flotilla)[15]
- Ursa (Cdr John Tovey)
- Nerissa (Lt. Cdr. Montague G. B. Legge DSO)
- Urchin (Lt Cdr Guy P. Bowles)
- Umpire (Lt Cdr Roger V. Alison DSO)
6th Light Cruiser Squadron: Rear Admiral Edwyn Alexander-Sinclair CB MVO
- Cardiff (flag; Capt. Claud H. Sinclair)
- Ceres (Capt. the Hon. Herbert Meade DSO)
- Calypso (Capt. Herbert L. Edwards †)
- Caradoc (Capt. William M. Kerr)
- Attached destroyers (13th Destroyer Flotilla)[15]
- Valentine (flotilla leader; Cdr. Charles A. Fremantle)
- Vimiera (Cdr. Dashwood F. Moir)
- Vanquisher (Lt Cdr. Kenneth A. Beattie)
- Vehement (Lt. Vernon Hammersley-Heenan)
1st Light Cruiser Squadron: Commodore Walter Cowan CB, MVO, DSO
- Caledon (Cdre Cowan)
- Galatea (Capt. Charles Forbes DSO)
- Royalist (Capt. the Hon. Mathew R. Best MVO, DSO)
- Inconstant (Capt. Francis A. Marten)
- Attached destroyers (13th Destroyer Flotilla)[15]
- Vendetta (Cdr. Charles Ramsey)
- Medway (Lt. Cdr. Charles H. Neill James)
1st Battle Cruiser Squadron (detachment: Rear Admiral Richard Phillimore CB, MVO)
- Repulse (flag; Capt. William Boyle)[lower-alpha 4]
Other forces at sea in support (none of which engaged)
- Battle Cruiser Force (Vice Admiral Sir William Pakenham KCB, KCVO): Lion (flag), New Zealand, Princess Royal, Tiger; attached light forces (13th Destroyer Flotilla): Champion (flotilla cruiser), Nepean, Obdurate, Oriana, Petard, Telemachus, Tower, Tristram, Verdun.
- 1st Battle Squadron (Admiral Sir Charles Madden): Revenge (flag), Royal Oak, Resolution, Emperor of India, Benbow, Canada; attached destroyers (12th Destroyer Flotilla): Saumarez (flotilla leader), Valhalla (flotilla leader), Noble, Nonsuch, Napier, Paladin, Penn, Prince, Mischief, Munster, Narborough.
German forces
![]()
2nd Scouting Group: Rear Admiral Ludwig von Reuter
- Königsberg (FKpt Karl Feldmann)
- Pillau (FKpt Gerhard von Gaudecker)
- Frankfurt (FKpt Otto Seidensticker)
- Nürnberg (KptzS Walther Hildebrand)
7th Torpedo-Boat Flotilla: KKpt Hermann Cordes[lower-alpha 5][lower-alpha 6]
- S62 (KptLt Max Fink; flotilla leader)
- G87 (OLtzS Wolfgang Komorowski)
- 14th half-flotilla (KptLt Richard Beitzen)
- G92 (KptLt Arthur von Killinger; half-flotilla leader)
- G93 (KptLt Georg Reimer)
- V83 (Kpt Lt Wedig von Keyserlingk)
- 12th half-flotilla (KKpt Rudolf Lahs)
Minesweepers
- 6th Minesweeper Half-Flotilla [6. Minensuchhalbflottille] (KptLt d'Ottilié): M66, M7, A36, T74, M53, M4, M3, M1
- 4th Auxiliary Minesweeper Half-Flotilla [4. Hilfsminensuchhalbflottille] (KptLt d R Joachim Löwe): A63 A68, A69, A74, A41, A52
- 2nd Auxiliary Minesweeper Half-Flotilla (KptLt d R Klose): fishing vessels
- 6th Auxiliary Minesweeper Half-Flotilla (KptLt d R Wilke): fishing vessels
- 4th Barrier-Breaker Group [IV. Sperrbrechergruppe] (KptLt d R Hillebrand): two vessels
- Group S, North Sea Outpost Flotilla (LtzS Heinrich Woldag)NO: armed trawlers Fritz Reuter and KehdingenGE
4th Battle Squadron (detachment): KptzS Kurt Graßhoff
- Kaiserin (KptzS Kurt Graßhoff)
- Kaiser (KptzS Max Loesch)
- Attached torpedo-boats (anti-submarine escort)
- S18 (KptLt Wildemann)
- S24 (KptLt Paschen)
Other forces at sea in support (none of which were engaged)
- Battleships Friedrich der Grosse, König Albert; battlecruisers: Hindenburg, Moltke)
Notes
- Two of the German destroyers were detached but rejoined during the battle
- There is some dispute as to whether it was a 15 cm (5.9 in) or a 30.5 cm (12.0 in) shell which damaged Calypso; since she was hit at 9:40 a.m., before the German battleships opened fire, the former is the more likely.
- The principal source for the British order of battle is Newbolt, Naval Operations volume V, page 168–169, footnote 2.[14] Additional organizational details are taken from The Admiralty (1917) Supplement to the Monthly Naval List, November 1917 (London: Harrison and Sons). Commanding officers are from The Admiralty (1917) Monthly Navy List, November 1917.
- Repulse, which was faster and of shallower draft than the other British battle cruisers, was detached to support the 1st Light Cruiser Squadron at about 8:00 a.m.; she came into action around 9:00 a.m. and achieved a 15-inch hit on Königsberg at 9:58 a.m. at the end of the engagement.[16]
- German large torpedo boats (großer torpedoboote) were of similar size and function to the destroyers in the Royal Navy and are often referred to as such.
- The principal source for the German order of battle is Gladisch, pp. 56–57. Commanding officers are from Gladisch, Scheer op. cit., German Wikipedia articles on the cruisers, Dave Alton, Commanding Officers of German Capital Ships 1914-19 (accessed 29 May 2013) and Ehrenrangliste der Kaiserlich-Deutschen Marine 1914–18 [1930] (Konteradmiral a. D. Albert Stoelzel).[17]
Footnotes
- Beesly 1984, p. 268.
- Newbolt 2003, pp. 164–165.
- Harkins 2015, p. 32.
- Halpern 1995, pp. 376–377; Newbolt 2003, pp. 164–165.
- Beesly 1984, p. 279.
- Harkins 2015, pp. 32–33.
- Beesly 1984, p. 280.
- Halpern 1995, pp. 376–377.
- Newbolt 2003, p. 175.
- Newbolt 1931, pp. 175–176; Burt 1986, p. 302.
- Scheer 1920, p. 308.
- Harkins 2015, pp. 38–39.
- Carless, John Henry, Commonwealth War Graves Commission
- Newbolt 1931, pp. 168–169.
- Harkins 2015, p. 42.
- Newbolt 2003, p. 176.
- Stoelzel 1930.
References
- Beesly, P. (1984) [1982]. Room 40: British Naval Intelligence, 1914–1918 (repr. Oxford University Press ed.). London: Hamish Hamilton. ISBN 978-0-19-281468-5.
- Burt, R. A. (1986). British Battleships of World War One. Annapolis, MD: Naval Institute Press. ISBN 978-0-87021-863-7.
- Halpern, P. G. (1995) [1994]. A Naval History of World War I (pbk. UCL Press, London ed.). Annapolis: Naval Institute Press. ISBN 1-85728-498-4.
- Harkins, H. (2015). Light Battle Cruisers and the Second Battle of the Heligoland Bight: Lord Fisher's Oddities. Glasgow: Centurion Publishing. ISBN 978-1-903630-52-5.
- Newbolt, H. J. (1931). Naval Operations. History of the Great War Based on Official Documents by Direction of the Historical Section of the Committee of Imperial Defence. V (1st ed.). London: Longmans, Green & Co. OCLC 220475309.
- Newbolt, H. J. (2003) [1931]. Naval Operations (with accompanying map case). History of the Great War Based on Official Documents by Direction of the Historical Section of the Committee of Imperial Defence. V (2nd facs. repr. Naval & Military Press and Imperial War Museum ed.). London: Longmans, Green & Co. ISBN 978-1-84342-493-2. Retrieved 11 November 2020 – via Archive Foundation.
- Stoelzel, Albert (1930). Ehrenrangliste der Kaiserlich-Deutschen Marine 1914–18 [Honor Rank List of the Imperial German Navy 1914–18]. Berlin: Marine-Offizier-Verband. OCLC 62432982.
Further reading
- Goldrick, J. (2018). After Jutland: The Naval War in Northern European Waters June 1916 – November 1918 (ePub ed.). Annapolis, MD: Naval Institute Press. ISBN 978-1-68247-328-3.
- Hurd, A. S. (2003) [1929]. The Merchant Navy. History of the Great War Based on Official Documents by Direction of the Historical Section of the Committee of Imperial Defence. III (facs. repr. Imperial War Museum Department of Printed Books and Naval & Military Press, Uckfield ed.). London: John Murray. ISBN 978-1-84342-567-0.
- Marder, A. J. (1969). From the Dreadnought to Scapa Flow: The Royal Navy in the Fisher Era, 1904–1919: 1917, Year of Crisis. IV. London: Oxford University Press. OCLC 1072069754.
- Massie, Robert K. (2003). Castles of Steel: Britain, Germany and the Winning of the Great War at Sea. London: Pimlico. ISBN 978-1-84413-411-3.
- O'Hara, V.; Dickson, W. David; Worth, R., eds. (2013). To Crown the Waves: The Great Navies of the First World War. Annapolis, MD: Naval Institute Press. ISBN 978-1-61251-269-3.
- Scheer, R. (1920). Germany's High Sea Fleet in the World War (Eng. trans. ed.). London: Cassell. pp. 304–309. OCLC 495246260. Retrieved 11 November 2020 – via Archive Foundation.
External links
 Media related to Battle of Heligoland Bight (1917) at Wikimedia Commons