Action of 19 August 1916
The Action of 19 August 1916 was one of two attempts in 1916 by the German High Seas Fleet to engage elements of the British Royal Navy, following the mixed results of the Battle of Jutland, in the First World War. The lesson of Jutland for Germany had been the vital need for reconnaissance, to avoid the unexpected arrival of the British Grand Fleet during a raid. On this occasion four Zeppelins were deployed to scout the North Sea between Scotland and Norway for signs of British ships and four more scouted immediately ahead of German ships. Twenty-four German submarines participated off the English coast, in the southern North Sea and off the Dogger Bank.[1]
| Action of 19 August 1916 | |||||||
|---|---|---|---|---|---|---|---|
| Part of the First World War | |||||||
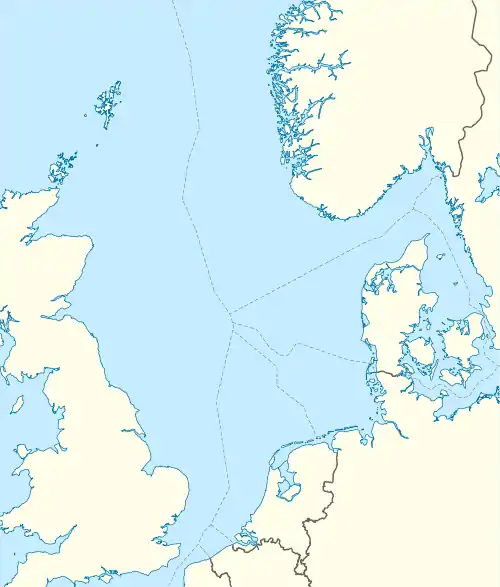
 Map of the North Sea | |||||||
| |||||||
| Belligerents | |||||||
|
|
| ||||||
| Commanders and leaders | |||||||
|
|
| ||||||
| Strength | |||||||
|
29 battleships 6 battlecruisers 5 armoured cruisers 26 light cruisers 70 destroyers 1 minelayer 1 seaplane carrier 1 submarine |
18 battleships 2 battlecruisers 7 light cruisers 56 torpedo boats 2 Zeppelins 3 submarines | ||||||
| Casualties and losses | |||||||
|
39 killed 2 light cruisers sunk | 1 battleship damaged | ||||||
 Action of 19 August 1916 The battle location in the North Sea | |||||||
Background
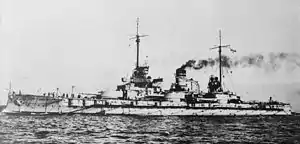
Although Jutland had been officially claimed as a success, the German commander Admiral Reinhard Scheer felt it important that another raid should be mounted as quickly as possible, to maintain morale in his severely battered fleet. It was decided that the raid should follow the pattern of previous ones, with the battlecruisers carrying out a dawn artillery bombardment of an English town, in this case Sunderland. Only two battlecruisers were still serviceable after Jutland, Moltke and Von der Tann, so the force was bolstered by three battleships, Bayern, Markgraf and Grosser Kurfürst. The remainder of the High Seas Fleet, comprising 16 dreadnought battleships, was to carry out close support 20 mi (17 nmi; 32 km) behind. The fleet set sail at 9:00 p.m. on 18 August from the Jade river.[2]
Attack
Intelligence
Information about the upcoming raid was obtained by British Intelligence in Room 40 through intercepted and decoded radio messages. Admiral Sir John Jellicoe, commander of the British fleet, was on leave so had to be recalled urgently and boarded the light cruiser Royalist at Dundee to meet his fleet in the early hours of 19 August off the river Tay. In his absence, Admiral Cecil Burney took the fleet to sea on the afternoon of 18 August. Vice-Admiral David Beatty left the Firth of Forth with his squadron of six battlecruisers to meet the main fleet in the Long Forties. The Harwich Force of 20 destroyers and 5 light cruisers commanded by Commodore Tyrwhitt was ordered out, as were 25 British submarines which were stationed in likely areas to intercept German ships. The battlecruisers together with the 5th Battle Squadron of five fast battleships were stationed 30 mi (26 nmi; 48 km) ahead of the main fleet to scout for the enemy. The assembled fleet now moved south seeking the German fleet, but suffered the loss of one of the light cruisers screening the battlecruiser group, HMS Nottingham, which was hit by three torpedoes from submarine U-52 at 6:00 a.m. and sank.[3]
Finding the opposition
.jpg.webp)
At 6:15 a.m. Jellicoe received information from the Admiralty that one hour earlier the enemy had been 200 mi (170 nmi; 320 km) to his south east. However, the loss of the cruiser caused him to first head north for fear of endangering his other ships. No torpedo tracks or submarines had been seen, so it was unclear whether the cause had been a submarine or entering an unknown minefield. He did not resume a south-easterly course until 9:00 a.m. when William Goodenough, commanding the light cruisers, advised that the cause had been a submarine attack.[4] Further information from the admiralty indicated that the battlecruisers would be within 40 mi (35 nmi; 64 km) of the main German fleet by 2:00 p.m. and Jellicoe increased to maximum speed. Weather conditions were good, and there was still plenty of time for a fleet engagement before dark.[5]
The German force had received reassurances about Jellicoe's position, when a zeppelin had spotted the Grand Fleet heading north away from Scheer, at the time it had been avoiding the possible minefield. Unfortunately for the British, the Zeppelin L 13 sighted the Harwich force approximately 75 mi (65 nmi; 121 km) east-north-east of Cromer, mistakenly identifying the cruisers as battleships. This was precisely the sort of target Scheer was seeking, so he changed course at 12:15 p.m. also to the south-east and away from the approaching British fleet. No further reports were received from zeppelins about the British fleet, but it was spotted by a U-boat just 65 mi (56 nmi; 105 km) north of Scheer. Scheer turned for home at 2:35 p.m. abandoning his potential target. By 4:00 p.m. Jellicoe had been advised that Scheer had abandoned the operation and so turned north himself.[4]
Other engagements
A second cruiser attached to the battlecruiser squadron, HMS Falmouth, was hit by two torpedoes from U-66 at 4:52 p.m. Falmouth managed to raise steam and made slowly for Humber, escorted by four destroyers, in the early hours a tug arrived and took the ship in tow. Taking the shortest route to the Humber put the ship on a bearing which took it along the Flamborough Head U-boat line. At noon, the ship, now escorted by eight destroyers, was hit by two torpedoes fired by U-63 (commander: Otto Schultze). Falmouth remained afloat for another eight hours then sank 5 nmi (5.8 mi; 9.3 km) south of Flamborough Head.[6] By 5:45 p.m. the Harwich force had sighted German ships but was too far behind to attack before nightfall and abandoned the chase. The British submarine HMS E23 (Lieutenant-Commander R. R. Turner) managed to hit the German battleship SMS Westfalen north of Terschelling at 5:05 a.m. on 19 August but the ship was able to reach port.[7]
Aftermath
On 13 September, the British held a conference on Iron Duke to discuss recent events and to obtain a directive from the Government about rules of engagement. It was decided that it was unsafe to conduct fleet operations south of latitude 55.5° North (approximately level with Horns reef and where the battle of Jutland had taken place). Jellicoe took the view that a destroyer shortage precluded operations further south but that it was feasible to operate west of Longitude 4° East should there be a good opportunity of engaging the German fleet in daylight. The fleet should not sail further south than the Dogger Bank until a complete destroyer screen was available, except in exceptional circumstances, such as the chance to engage the High Seas Fleet with a tactical advantage or to intercept a German invasion fleet.[8] On 23 December, the Admiralty endorsed the conclusions of the meeting due to the effect of submarines and mines on surface ship operations.[9][10] Scheer was unimpressed by the Zeppelin reconnaissance, only three had spotted anything and of their seven reports four had been wrong.[11]
This was the last occasion on which the German fleet travelled so far west into the North Sea. On 6 October, the German government resumed attacks against merchant vessels by submarine, which meant the U-boat fleet was no longer available for combined attacks against surface vessels.[11] From 18 to 19 October, Scheer led a brief sortie into the North Sea which British intelligence gave advance warning; the Grand Fleet declined to prepare an ambush, staying in port with steam raised, ready to sail. The German sortie was abandoned after a few hours when SMS München was hit by a torpedo fired by E38 (Lieutenant-Commander J. de B. Jessop) and it was feared other submarines might be in the area. Scheer suffered further difficulties when in November he sailed with Moltke and a division of dreadnoughts to rescue U-20 and U-30, which had become stranded on the Danish coast. British submarine J1 (Commander J. Laurence) managed to hit the battleships Grosser Kurfürst and Kronprinz. The failure of these operations reinforced the belief, created at Jutland, that the risks were too great for such tactics, because of the danger from submarines and mines.[12]
References
Citations
- Roskill 1980, pp. 196–197.
- Bennett 2005, p. 226.
- Marder 1978, pp. 287–291.
- Massie 2003, p. 683.
- Roskill 1980, pp. 197–198.
- Newbolt 2003, pp. 45–47.
- Marder 1978, pp. 292, 295, 297.
- Marder 1978, p. 303.
- Roskill 1980, pp. 198–199.
- Marder 1978, pp. 301–303.
- Massie 2003, pp. 683–684.
- Bennett 2005, pp. 227–228.
Bibliography
- Bennett, Geoffrey (2005). Naval Battles of the First World War. London: Pen & Sword Military Classics. ISBN 978-1-84415-300-8.
- Marder, Arthur J. (1978) [1965]. From the Dreadnought to Scapa Flow, The Royal Navy in the Fisher Era, 1904–1919: Jutland and After, May 1916 – December 1916. III (2nd, rev. enl. ed.). London: Oxford University Press. ISBN 978-0-19-215841-3.
- Massie, Robert K. (2003). Castles of Steel: Britain, Germany and the Winning of the Great War at Sea. New York: Random House. ISBN 978-0-345-40878-5.
- Newbolt, H. (2003) [1928]. Naval Operations. History of the Great War based on Official Documents. IV (facs. repr. Naval & Military Press and Imperial War Museum ed.). London: Longmans, Green. ISBN 978-1-84342-492-5.
- Roskill, Captain Stephen Wentworth (1980). Admiral of the Fleet Earl Beatty – The Last Naval Hero: An Intimate Biography. London: Collins. ISBN 978-0-689-11119-8.
Further reading
- Corbett, J. S. (2009) [1940]. Naval Operations. History of the Great War based on Official Documents. III (2nd repr. ed.). London: Longmans, Green. ISBN 978-1-84342-492-5. Retrieved 16 December 2017.