Wood carving
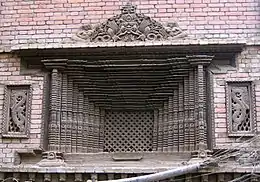
Wood carving is a form of woodworking by means of a cutting tool (knife) in one hand or a chisel by two hands or with one hand on a chisel and one hand on a mallet, resulting in a wooden figure or figurine, or in the sculptural ornamentation of a wooden object. The phrase may also refer to the finished product, from individual sculptures to hand-worked mouldings composing part of a tracery.
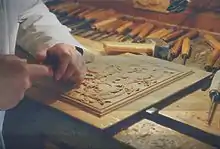
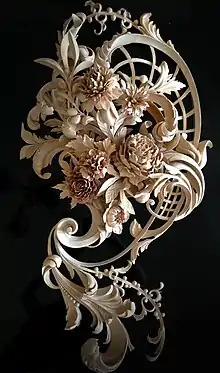
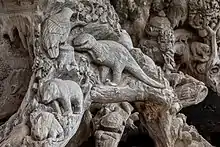


The making of sculpture in wood has been extremely widely practised, but doesn't survive undamaged as well as the other main materials like stone and bronze, as it is vulnerable to decay, insect damage, and fire. It therefore forms an important hidden element in the art history of many cultures.[1] Outdoor wood sculptures do not last long in most parts of the world, so it is still unknown how the totem pole tradition developed. Many of the most important sculptures of China and Japan, in particular, are in wood, and so are the great majority of African sculpture and that of Oceania and other regions. Wood is light and can take very fine detail so it is highly suitable for masks and other sculpture intended to be worn or carried. It is also much easier to work on than stone.
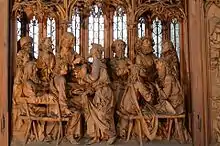
Some of the finest extant examples of early European wood carving are from the Middle Ages in Germany, Russia, Italy and France, where the typical themes of that era were Christian iconography. In England, many complete examples remain from the 16th and 17th century, where oak was the preferred medium.
Methods and styles
- Chip carving
- Relief carving
- Scandinavian flat-plane
- Dievdirbys
- Lovespoon
- Treen
- Whittling
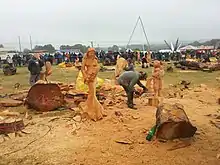
- Chainsaw carving
- Florentine carving
Techniques
Pattern, Blocking, Detailing, Surfacing, and Smoothening
Tools
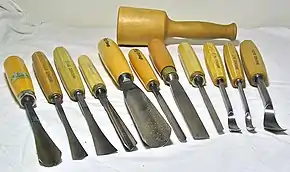
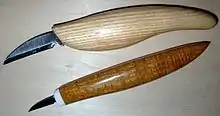 Carving knives
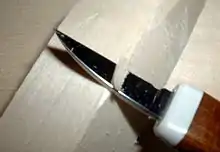 Carving knife used to round a corner of a piece of wood
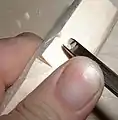 V-Tool used to part lines and cut V-shaped channels
Basic tool set
- the carving knife: a specialized knife used to pare, cut, and smooth wood.
- the gouge: a tool with a curved cutting edge used in a variety of forms and sizes for carving hollows, rounds and sweeping curves.[2]
- the coping saw: a small saw that is used to cut off chunks of wood at once.
- the chisel: large and small, whose straight cutting edge is used for lines and cleaning up flat surfaces.[2]
- the V-tool: used for parting, and in certain classes of flat work for emphasizing lines.
- the U-Gauge: a specialized deep gouge with a U-shaped cutting edge.
- sharpening equipment, such as various stones and a strop: necessary for maintaining edges.
A special screw for fixing work to the workbench, and a mallet, complete the carvers kit, though other tools, both specialized and adapted, are often used, such as a router for bringing grounds to a uniform level, bent gouges and bent chisels for cutting hollows too deep for the ordinary tool.[2]
| Term | Definition |
|---|---|
| Gouge | Carving tool with a curved cutting edge. The most used category of carving tools. |
| Sweep | The curvature of the cutting edge of a carving gouge. A lower number (like #3) indicates a shallow, flat sweep while a high number (like #9) is used for a deeply curved gouge. |
| Veiner | A small deep gouge with a U-shaped cutting edge. Usually #11 sweep. |
| Fluter | A larger #11 sweep gouge with a U-shaped cutting edge. |
| Sloyd knife | A whittling knife having a strong, blade slightly shorter than the handle (around 5 inches), suitable for marking or carving. |
| Chisel | A carving tool with a straight cutting edge (usually termed #1 sweep) at right angles (or square too) the sides of the blade. |
| Skew chisel | A chisel with the edge at a "skew" or angle relative the sides of the blade. Often termed #2 sweep in the Sheffield list or #1s in continental lists. |
| V-tool | A carving tool with a V-shaped cutting edge.[3] Used for outlining and decorative cuts. Referred to as 'the carvers pencil' by old-time professional carvers. |
| Parting tool | |
| Long bent | A gouge, chisel or V tool where the blade is curved along its entire length. Handy for deep work. |
| Short bent | A gouge, chisel or V tool where the blade is straight with a curve at the end, like a spoon. Use for work in deep or inaccessible areas. Spoon gouges were often referred to as 'tracery tools' which indicates their use in the type of decorative carving found in churches |
| Spoon | |
| Fishtail | A gouge or chisel with a straight, narrow shank that flares out at the end to form a "fishtail" shaped tool. The narrow shaft of the tool allows for clearance in tight areas. |
| Back bent | A spoon gouge with a reverse bent end. Used for undercuts and reeding work. |
| Palm tools | Short (5"), stubby tools used with one hand while the work is held in the other. Great for detail and small carving. |
| Full-size tools | 10" to 11" tools used with two hands or a mallet. |
| Tang | The tapered part of the blade that is driven into the handle. |
| Bolster | A flared section of the blade near the tang that keeps the blade from being driven further into the handle. |
| Ferrule | A metal collar on the handle that keeps the wood from splitting when the tool is used with a mallet. Some tools have an external, visible ferrule while others have an internal ferrule.Some old, small detail tools have neither bolster nor ferrule as their light use makes them unnecessary. |
| Rockwell hardness | A scale that indicates the hardness of steel. A Rockwell range of 58 to 61 is considered optimum for fine woodworking edge tools. |
Selection
The nature of the wood being carved limits the scope of the carver in that wood is not equally strong in all directions: it is an anisotropic material. The direction in which wood is strongest is called "grain" (grain may be straight, interlocked, wavy or fiddleback, etc.). It is smart to arrange the more delicate parts of a design along the grain instead of across it.[2] Often, however, a "line of best fit" is instead employed, since a design may have multiple weak points in different directions, or orientation of these along the grain would necessitate carving detail on end grain, (which is considerably more difficult). Carving blanks are also sometimes assembled, as with carousel horses, out of many smaller boards, and in this way, one can orient different areas of a carving in the most logical way, both for the carving process and for durability. Less commonly, this same principle is used in solid pieces of wood, where the fork of two branches is utilized for its divergent grain, or a branch off of a larger log is carved into a beak (this was the technique employed for traditional Welsh shepherd's crooks, and some Native American adze handles). The failure to appreciate these primary rules may constantly be seen in damaged work, when it will be noticed that, whereas tendrils, tips of birds beaks, etc., arranged across the grain have been broken away, similar details designed more in harmony with the growth of the wood and not too deeply undercut remain intact.[2]
Probably the two most common woods used for carving[4] in North America are basswood (aka tilia or lime) and tupelo; both are hardwoods that are relatively easy to work with. Chestnut, butternut, oak, American walnut, mahogany and teak are also very good woods; while for fine work Italian walnut, sycamore maple, apple, pear, box or plum, are usually chosen.[2] Decoration that is to be painted and of not too delicate a nature is often carved in pine,[2] which is relatively soft and inexpensive.[5]
Sculpture
A wood carver begins a new carving by selecting a chunk of wood the approximate size and shape of the figure he or she wishes to create or if the carving is to be large, several pieces of wood may be laminated together to create the required size. The type of wood is important. Hardwoods are more difficult to shape but have greater luster and longevity. Softer woods may be easier to carve but are more prone to damage. Any wood can be carved but they all have different qualities and characteristics. The choice will depend on the requirements of carving being done: for example, a detailed figure would need a wood with a fine grain and very little figure as a strong figure can interfere with 'reading' fine detail.
Once the sculptor has selected their wood, he or she begins a general shaping process using gouges of various sizes. The gouge is a curved blade that can remove large portions of wood smoothly. For harder woods, the sculptor may use gouges sharpened with stronger bevels, about 35 degrees, and a mallet similar to a stone carver's. The terms gouge and chisel are open to confusion. Correctly, a gouge is a tool with a curved cross-section and a chisel is a tool with a flat cross-section. However, professional carvers tend to refer to them all as 'chisels'. Smaller sculptures may require the woodcarver to use a knife, and larger pieces might require the use of a saw. No matter what wood is selected or tool used, the wood sculptor must always carve either across or with the grain of the wood, never against the grain.
Once the general shape is made, the carver may use a variety of tools for creating details. For example, a “veiner” or “fluter” can be used to make deep gouges into the surface, or a “v-tool” for making fine lines or decorative cuts. Once the finer details have been added, the woodcarver finishes the surface. The method chosen depends on the required quality of the surface finish. The texture left by shallow gouges gives 'life' to the carving's surface and many carvers prefer this 'tooled' finish. If a completely smooth surface is required general smoothing can be done with tools such as “rasps,” which are flat-bladed tools with a surface of pointed teeth. “Rifflers” are similar to rasps, but smaller, usually double-ended, and of various shapes for working in folds or crevasses. The finer polishing is done with abrasive paper. Large grained paper with a rougher surface is used first, with the sculptor then using finer grained paper that can make the surface of the sculpture slick to the touch.
After the carving and finishing is completed, the artist may seal & colour the wood with a variety of natural oils, such as walnut or linseed oil which protects the wood from dirt and moisture. Oil also imparts a sheen to the wood which, by reflecting light, helps the observer 'read' the form. Carvers seldom use gloss varnish as it creates too shiny a surface, which reflects so much light it can confuse the form; carvers refer to this as 'the toffee apple effect'. Objects made of wood are frequently finished with a layer of wax, which protects the wood and gives a soft lustrous sheen. A wax finish (e.g. shoe polish) is comparatively fragile though and only suitable for indoor carvings.
Traditions
The making of decoys and fish carving are two of the artistic traditions that use wood carvings.
Gallery
 A wooden Bodhisattva from the Song Dynasty (960–1279)
 Japanese wooden mask depicting demon.
_1.jpg.webp) Wooden portrait of Minamoto no Yoritomo, 13-14th century
Wooden portrait of Minamoto no Yoritomo, 13-14th century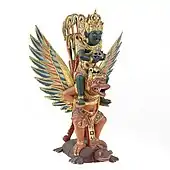
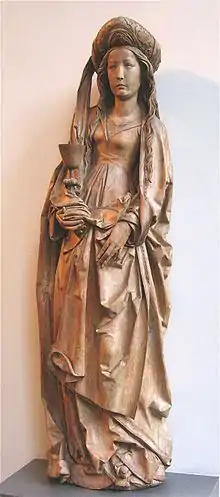 Tilman Riemenschneider's Saint Barbara from Germany
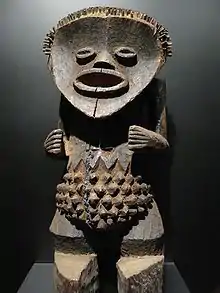
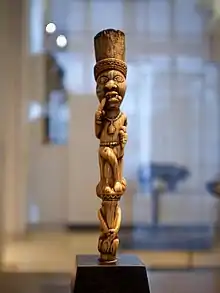 Yombe-sculpture, 19th century
 Wooden Krishna, India
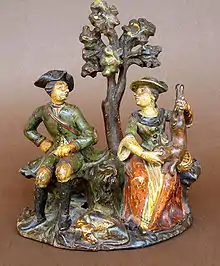 Carved gallant genre scene with figurines from Val Gardena, 18th century
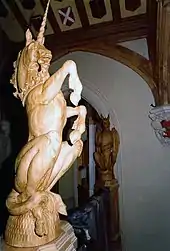 Carving of a unicorn by G&H Studios, Somerset, England
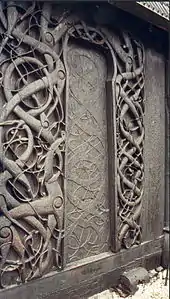 The eponymous carving on the Urnes stave church is an example of the Urnes style, Norway
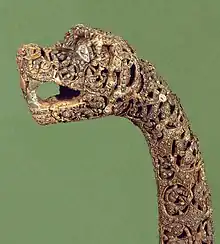 A dragon's head from the Oseberg ship
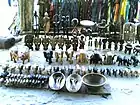 Carvings for sale on a beach
 Old choir stalls. National Sculpture Museum in Valladolid
_preekstoel_2015_03.JPG.webp) Pulpit in Church of St Peter and St Paul in Mechelen
Pulpit in Church of St Peter and St Paul in Mechelen
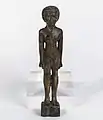 Wooden Female Figure from the Hunt Museum collection.
See also
- List of woodcarvers
- Chainsaw carving
- History of wood carving
- Woodcut
- Woodturning
- Woodworking
- Wood carving in the Marquesas Islands
- Woodcarved Catholic saints in the Parish Church of Ortisei, northern Italy
- National Wood Carvers Association
- Woodcarving events:
- Arborglyph, carvings made in the bark of living trees
References
- See for example Martin Robertson, A shorter history of Greek art, p. 9, Cambridge University Press, 1981, ISBN 0-521-28084-2, ISBN 978-0-521-28084-6 Google books
-
 One or more of the preceding sentences incorporates text from a publication now in the public domain: Crallan, Franklyn Arden (1911). "Wood-Carving". In Chisholm, Hugh (ed.). Encyclopædia Britannica. 28 (11th ed.). Cambridge University Press. pp. 791–797.
 - "12 top tips for using a V-tool". WoodworkersInstitute.com. 14 May 2010. Retrieved 30 January 2013.
- Woods suitable for carving. Woodcraft Guild, June 2012. Accessed 2016-11-18.
- Best types of wood to use for carving. Langevin Forest. (Accessed 2016-11-18.)
 This article incorporates public domain material from websites or documents of the National Archives and Records Administration.