2nd Infantry Division (United Kingdom)
The 2nd Infantry Division was an infantry division of the British Army, which was formed numerous times over a 203-year period. It was formed originally in 1809 by Lieutenant-General Arthur Wellesley for service in the Peninsula War (part of the Coalition Wars of the Napoleonic Wars). After that war came to an end in 1814, it was disbanded, only to be re-raised the following year when the War of the Seventh Coalition broke out. The division fought at the Battle of Waterloo and played an important role in defeating the final French attack of the day. The division marched into France becoming part of the Army of Occupation and was the only British force allowed to march through the French capital of Paris. In December 1818, the division was disbanded once again.
| 2nd Division 2nd Infantry Division 2nd Armoured Division | |
|---|---|
 The divisional insignia used from 1940 until the division was disbanded. | |
| Active | Raised and disbanded numerous times between 1809 and 2012 |
| Country | |
| Branch | |
| Engagements | Napoleonic Wars Crimean War Second Boer War First World War Second World War |
| Insignia | |
| Identification symbol |  The divisional insignia that was adopted during the First World War. |
During the mid to late 19th Century, several formations bearing the name 2nd Division were formed. However, only two such formations were considered part of the division's lineage by Everard Wyrall, the compiler of the division's First World War history. The first was formed in 1854 to take part in the Crimean War against the Russian Empire. It played an important role in the Battle of Inkerman and was engaged throughout the Siege of Sevastopol. In 1856, after the conclusion of hostilities, it was stood down. The second was raised in 1899 for the Second Boer War. It took part in all the notable battles that made up the Relief of Ladysmith, before advancing into Boer territory. At the end of 1900, when conventional warfare ended, the division was broken-up so its forces could be reassigned to mobile columns or garrison towns in an effort to combat the Boer guerrilla tactics.
1902 saw the division reformed, but this time as a permanent formation and not on an ad hoc basis for a particular emergency. It was based out of Aldershot in southern England prior to the First World War and during the inter-war period. In 1914, the division deployed to France a few weeks after the start of the war, as part of the British Expeditionary Force. It served on the Western Front and suffered heavy casualties. During the Second World War, the division again went to France in the opening stages of the war. In the subsequent Battle of France, it was forced back to the port of Dunkirk and evacuated to the United Kingdom. It then served in Burma, where it ended the war. In the post-war years, it formed part of the British Army of the Rhine in Germany and was temporarily transformed into an armoured division. At the end of 1982, the armoured division was disbanded in Germany, and the 2nd Division was reformed in York, England, in 1983. Following the end of the Cold War and the decrease in the size of the British Army, the division was again disbanded; only to be re-raised in the mid-1990s. The division moved to Scotland at the turn of the millennium and was finally disbanded in 2012.
Napoleonic Wars
Peninsular War
During the French Revolutionary Wars and early in the Napoleonic Wars, the largest permanent organised structure within the British Army was the brigade. These consisted of two or more battalions grouped together and were commanded by a major-general. The brigade suited the small size of the army and the operations that it conducted. When needed, larger forces were organised on an ad hoc basis. This included multiple brigades grouped into 'lines' or 'columns', with the most senior major-general in command. As the army and its operations grew, it implemented divisions—a single formation of two or more brigades, usually commanded by a lieutenant-general. The division concept was not new and had been used by other European armies towards the end of the Seven Years' War (1756-1763). On 18 June 1809, Lieutenant-General Arthur Wellesley, commander of British forces in Spain and Portugal during the Peninsula War, ordered the creation of four divisions: the 1st, the 2nd, the 3rd, and the 4th.[1]
Major-General Rowland Hill was given command of the newly formed 2nd division, which was around 3,900 men strong. It first saw action at the Battle of Talavera (27–28 July 1809), and suffered 888 casualties over two days of fighting.[2][lower-alpha 1] The division, now 10,000-strong and including embedded Portuguese troops, was present at the Battle of Bussaco on 27 September 1810, but did not see combat.[5] By October, it had manned redoubts in the Torres Vedra defensive line, near Alhandra. While French forces skirmished with the division's pickets, the main position was not engaged.[6] In November, Hill, who was suffering from fever, was replaced by Major-General William Stewart; one of the division's brigade commanders.[7] Detached from Wellesley's main force, the division missed most of the major battles during the 1811-12 period and acquired the nickname: the "Observing Division".[8] However, the division was involved in several notable battles during that period. At the Battle of Albuera, Stewart received criticism for his handling of the division and ignoring orders. As the division moved to take position alongside engaged Spanish forces, Stewart ordered his lead brigade to strike the flank of the attacking French. Stewart ignored a request by the brigade commander to establish their own flank guard, thus leaving themselves vulnerable. The brigade conducted the move, opened fire, and forced the French to break and retreat. Historian Charles Oman wrote that under cover of a blinding hailstorm, 800 Polish lancers had approached. The lancers charged into the British flank, inflicting 1,248 casualties, or 75 percent of the brigade's strength. Total divisional losses in the battle amounted to 2,868.[9] On 28 October 1811, the division (with attached Spanish cavalry) took part in the Battle of Arroyo dos Molinos, where it captured Arroyo dos Molinos, scattered the garrison and took around 1,300 prisoners with a loss of 101 men.[10] On 19 May 1812, at the Battle of Almaraz, 900 men of the division entered Fort Napoleon by surprise. After a fierce, closely fought battle, they forced the garrison to retreat. The fort's guns were used to subdue the garrison of the nearby Fort Ragusa, which was occupied and secured an important river crossing over the Tagus. Around 400 French casualties were inflicted, with 189 British casualties including 37 killed.[11] In late 1812, while it covered the retreat of coalition forces, the division failed to destroy a bridge fully. This allowed French forces to cross the Tagus faster than anticipated.[12]
The following year, on 21 June, the division fought at the Battle of Vittoria, where it formed part of the British right flank and suffered 1,110 casualties.[13] In July, the division briefly took part in the Siege of Pamplona, before it fought numerous engagements during the Battle of the Pyrenees. The most notable was the Battle of Maya. During the morning of 25 July 1813, French forces attacked to the south of the division's position. This attracted Stewart's attention, and he left to investigate without leaving instructions or informing anyone where he had gone. Oman wrote Stewart "must also be given the discredit of the very inadequate arrangements that had been made for the defence" of the Maya pass. French troops, who had made use of the terrain, advanced undetected towards the division, attacked, and overran five light infantry companies. The division then conducted several piecemeal counterattacks. In the afternoon, Stewart returned and organised a withdrawal to a new position, fended off new attacks, and ended the day in a strong position that blocked the pass despite having lost possession of it. Despite this, Hill ordered Stewart to withdraw after dark. The fighting had cost 1,320 casualties and included Stewart, who was wounded. Oman wrote he was a "splendid fighting man if a careless and tiresome subordinate".[14] A further 516 casualties were suffered over the rest of July and into August.[15][lower-alpha 2] The division next defended the Pyrenees passes at Roncesvalles over the following months, before it fought in several engagements during the advance into France. These included the Battle of Nivelle, a bloody engagement at Saint Pierre that cost 903 casualties, and fighting at Orthez and Aire-sur-l'Adour with relatively few casualties.[17] The division played no further major role in the campaign, which came to a conclusion after the capture of Toulouse on 12 April 1814. Meanwhile, the Emperor of the French Napoleon had abdicated following the capture of Paris on 31 March. With the War of the Sixth Coalition over, the division was broken up. The troops marched to Bordeaux, where they either returned to the United Kingdom or were transported to North America to take part in the ongoing War of 1812.[18]
Waterloo
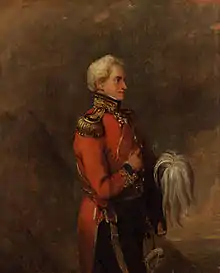
At the end of the war, British and Hanoverian troops moved into the Southern Netherlands (previously Austrian Netherlands), as part of an Anglo-Dutch effort to secure the territory while they awaited a political outcome at the Congress of Vienna. Lieutenant-General Sir Henry Clinton arrived in late 1814 to command and train these forces.[19] On 11 April 1815, after the outbreak of the War of the Seventh Coalition upon Napoleon's return to power, elements of this force became the 2nd Division under Clinton's command. This force comprised one brigade of British light infantry and riflemen, one brigade of the King's German Legion (KGL), and one brigade of recently raised Hanoverian Landwehr.[20]
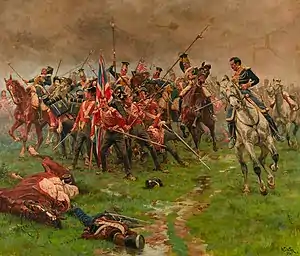
At the Battle of Waterloo, on 18 June 1815, the division formed part of Rowland Hill's 2nd Corps. The division's 6,450 men started the day in reserve and protected the right flank of the British position.[21][22] During the afternoon, when French skirmishers attacked British cannons, the division's light infantry brigade (under the command of Major-General Frederick Adam) moved forward to drive them back and protect the guns.[23] Afterwards, it and the KGL brigade advanced to a position behind Hougoumont, an important tactical strongpoint in front of the British line. Formed into infantry squares and under fire from French skirmishers, the brigades assisted in the châteaus' defence, and fired at French cavalry attacking other British forces. The KGL brigade also fended off several direct cavalry attacks.[24][25] At around 19:30, the final French attack began when the Imperial Guard's Middle Guard advanced on the British right flank and engaged the British Foot Guard regiments. Adam responded by wheeling his brigade left into a line to face the French flank. His troops, particularly the 52nd (Oxfordshire) Regiment of Foot, fired volleys into the French in a fierce firefight, and then charged. This, in conjunction with the British foot guards, halted the French attack and caused the Middle Guard to retreat. With Hanoverian troops covering their flank, Adam's brigade advanced after the French prior to a general advance by the Anglo-Dutch army.[26][27] With the French in retreat, the Hanoverian and KGL troops cleared the woods around Hougoumont, while other elements of the Hanoverian brigade advanced.[28] Adam's brigade, with one Hanoverian battalion in support, advanced towards the inn La Belle Alliance, the centre of the French position. Near the inn, Imperial Guard units, including elements of the Old Guard, had formed a square as a rearguard. Adam's troops engaged them and forced them to retreat. They halted at dusk and the close of the battle in which the division had suffered 1,563 casualties.[29][30][31]
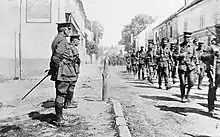
Following the battle, the division marched into France with the rest of the coalition force. It arrived at Saint-Denis, on the outskirts of Paris, on 1 July.[32] On 7 July, Adam's brigade entered Paris and marched along the Champs-Élysées, the only British troops to enter the capital.[33] In October, the Army of Occupation was formed and included the 2nd Division. By the end of the year, the German elements of the division had left, and a newly formed British brigade had replaced them. Clinton remained in command of the division until it and the Army of Occupation were disbanded in December 1818, when they left France for the United Kingdom.[34]
Victorian Era
Everard Wyrall, the official historian of the 2nd Division during the First World War, described the division's lineage as including the Peninsular War, the Battle of Waterloo, the Crimean War, and the Second Boer War.[35] Outside of this lineage, other 2nd Divisions were raised during the 19th Century, each on an ad hoc basis. A 1,250 strong 2nd Division was organised in 1851 under Colonel George Mackinnon, during the Eighth Xhosa War.[36] In 1857, an expeditionary force was formed from the Indian Army for service in the Second Opium War, with a 2nd Division commanded by Major-General Robert Napier.[37] Major-General George Jackson Carey took command of a 2nd Division, which was around 10,000-men strong and had been formed in September 1871 solely for training manoeuvers in England.[38] In 1879, Major-General Edward Newdegate commanded a 2,400-man strong 2nd Division during the Anglo-Zulu War.[39] During the 1882 Anglo-Egyptian War, Lieutenant-General Edward Bruce Hamley commanded another newly established 2nd Division.[40]
Crimean War
.png.webp)
On 28 March 1854, in support of the Ottoman Empire, the United Kingdom and the Second French Empire declared war on the Russian Empire. Anglo-French forces landed at Gallipoli, to be in a position to defend Constantinople if needed.[41] In mid-June, the British force advanced to Varna, Ottoman Bulgaria. At Varna, they were reorganised into divisions, and the expeditionary force suffered from a cholera outbreak.[42][43][44] Sir George de Lacy Evans was given command of the division, which was around 3,500 men strong, on 20 June. Historian Clive Ponting described him as "the only British commander with even the remotest experience of European war", for his service in the Peninsular War and Spanish Carlist Wars of the 1830s.[45][46][47] During this period, British strategic policy was to destroy the Russian Black Sea Fleet based at Sevastopol to end the war and carry-out long-term British goals. This French also adopted this immediate goal.[48]
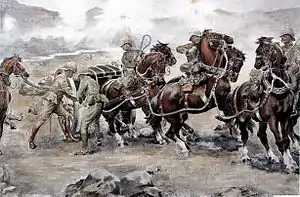
On 14 September, the Anglo-French expeditionary landed north of Sevastopol. They marched south and encountered the Russians at the Alma River, which blocked further progress. Communication between the British and French was poor, and the British expeditionary force's commander did not communicate the overall battle plan.[49] On 20 September, the division formed the right wing of the British advance with the French on their left. In the afternoon, the division attacked across the river, fended off a counterattack, and pushed the Russians from their positions, suffering 498 casualties during the day including de Lacy Evans who was wounded.[45][50][51] The advance resumed on 23 September, and the expeditionary force surrounded the Russian port in October. This began the Siege of Sevastopol.[52] On 26 October, the division fended off a Russian attack, and inflicted around 270 casualties for 100 of their own. During this action, De Lacy Evans was injured when he fell from his horse, and Major-General John Pennefather, one of his brigade commanders, replaced him.[53] On 5 November, under heavy fog, the 2nd Division was assailed by an overwhelming Russian force and played an important role during the Battle of Inkerman. Pennefather ordered the division to counterattack, and they inflicted heavy losses on the Russians that saw close range bayonet fighting. The division continued to fight throughout the day following subsequent Russian attacks and suffered heavy casualties. While the battle ended in an Allied victory, it created the conditions that dragged the siege on through the winter into 1855.[54][55][56] After the city had been subjected to several major cannonades, the division launched several failed attacks on Russian defensive positions, leading up to, and including the Battle of the Great Redan in 1855.[57][58] This marked the division's final effort of the campaign. The expeditionary force remained in the Crimea until the war ended in 1856, after which the army demobilised.[59][60]
Second Boer War
Following the Franco-Prussian War (1870–71), the British Army reviewed and attempted to implement a similar organisation of corps and divisions as used by the Prussian Army. This resulted in a mobilisation scheme in 1875 that called for 24 divisions spread across eight army corps. However, these formations did not exist, and the scheme looked for scattered units to coalesce in a time of crisis.[61][62][lower-alpha 3] War broke out on 11 October 1899, after tensions rose between the United Kingdom and the South African Republic and the Orange Free State, .[63] In response, and to reinforce the outnumbered British military presence in southern Africa, the British Government mobilised the Natal Field Force in the United Kingdom. This force, also known as the First Army Corps, corresponded with the I Corps of the 1875 mobilisation scheme, and contained the 1st, the 2nd and the 3rd Divisions.[64][65]
On mobilisation, the 2nd Division consisted of the Highland and the 4th Brigade, and was commanded by Major-General Francis Clery. Prior to the division arriving in southern Africa, the Boers invaded the British Cape and Natal colonies, and besieged Kimberley and Ladysmith respectively.[66] As there was no strategic plan in place for the use of the First Army Corps, it was used piecemeal as it arrived. The Highland Brigade was assigned to the Kimberley relief column, while the 4th Brigade was dispatched to Natal to relieve Ladysmith. Clery, promoted to Lieutenant-General, arrived at Frere, south of the Ladysmith, on 2 December.[67][68]
The 2nd Division swelled to include four brigades, seven mounted infantry companies, engineers and artillery. This force totalled 16,000 men and 44 artillery pieces.[66][70] Clery intended to use this force to push across the Tugela River, punch through the entrenched Boer positions on the opposite bank, and relieve Ladysmith.[71] At the subsequent Battle of Colenso, this effort was defeated.[72] Prior to the fighting, an artillery battery had moved close to the river and the Boer positions. This resulted in many of the crew being rendered casualties, once the Boer onslaught commenced. General Redvers Buller, commander of the First Army Corps, was present at the battle and had left Clery to command. However, once the artillery became endangered, Buller asserted himself. He ordered the guns retrieved, and the withdrawal of the division.[73] In the fighting, Clery's command suffered 1,127–1,138 casualties.[74][75] In January 1900, the force was reorganised so that the 2nd Division comprised just the 2nd and 5th Brigades.[76] On 6 January, the division bombarded Boer positions at Colenso.[77] Two days later, the 2nd and the 5th Divisions took part in the second attempt to relieve Ladysmith. On 18 January, the division crossed the river near Springfield and outflanked Colenso to the west. The division fought two subsequent actions: one the next day, the other on 22 January.[78][79] The advance resulted in defeat at the Battle of Spion Kop, although the division did not take part in the battle.[80] On 5 February, at the Battle of Vaal Krantz, the 2nd Division established a bridgehead across the Tugela. Buller denied further exploitation, and the Boers seized the high ground and penned the division against the river. The position was held, under artillery fire, until 7 February when the division was withdrawn after suffering 290 casualties.[81][82] The division next saw action on 17 February at the Battle of the Tugela Heights, where it captured a strategically important hill with the loss of 170 men. Further actions were fought on 24 and 26–27 February.[83] This battle saw the Boers defeated, and the siege of Ladysmith lifted.[84]
The division rested in Natal until May, then spearheaded Buller's Corps advance to the South African Republic capital of Pretoria. The division arrived near Johannesburg, south of Pretoria, in the first week of July and linked up with the main British force that had already arrived following their advance from Kimberley.[85] The division moved east and fought an action on 8 August and then occupied Amersfoort.[86] Four days later, the division took the surrender of a 182-strong Boer commando unit.[86] Along with the rest of the main British force, it advanced farther east in pursuit of Boer commandos who had retreated.[87] This marked the end of the conventional stage of warfare, as the Boers adopted guerrilla warfare tactics.[88] During this period, the main British force had employed looting and burning farms as a tactic; Buller forbade his troops from doing similar.[89] The division moved back to guard the lines of communication, and was then spread out between Ladysmith and Heidelberg, near Johannesburg, during September. By the end of 1900, the field divisions had been broken-up to disperse the troops to garrison towns and create more mobile forces to counter the new Boer tactics.[90]
Reform period
In response to the lessons learnt from the war, which included the army's failings in the opening months, the Secretary of State for War St John Brodrick set-out to reform the standing army.[91] He intended to create six army corps, with three composed of permanent standing formations that consisted of the army's regulars. They would be ready for immediate dispatch in light of an imperial crisis or in the event of European war.[92] In 1902, three corps were formed that would allow up to nine divisions to be created. This included the 2nd Division formed on 1 April 1902. It consisted of the 3rd and the 4th Brigades. It was based in Aldershot, with Major-General Charles Douglas in command. The division was part of the 1st Army Corps, of only two divisions (the 3rd Division would be mobilised in the event of war).[93][94] In 1907, the Haldane Reforms further restructured the regular army into six infantry divisions, which would form the basis of any British Expeditionary Force (BEF) that would be dispatched to Europe in the case of war. This included the 2nd Division, which then consisted of the 4th (Guards), the 5th, and the 6th Brigades. With the exception of the guards brigade, which was based in London, the division remained at Aldershot.[95]
First World War
1914
On 28 July 1914, the First World War began. On 4 August, Germany invaded Belgium, and the United Kingdom entered the war against the German Empire.[96] The same day, reservists were called-up and ordered to join the division to bring it up to full strength.[97] The war establishment of each of the BEF's divisions was 18,179 men.[98] This process took until 9 August. Three days later, the majority of the division embarked ships at Southampton and began landing at Le Havre the following day. By 21 August, the division had fully arrived in France and had assembled on the Belgian border along with the rest of the BEF.[97]
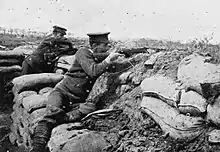
The next day, the BEF advanced into Belgium with the French Fifth Army.[99] The divisional reconnaissance elements made contact with German forces on 23 August, on the outskirts of Mons. This resulted in the division's first casualties and first Victoria Cross of the war.[100] While II Corps saw the brunt of the fighting during the Battle of Mons, the division entrenched around 8 kilometres (5.0 mi) south of the city and contended with shellfire and false reports of German movements. At nightfall, following a strategic reverse, the division and the BEF were ordered to retreat; a move known as the Great Retreat.[101] Forced to abandon large quantities of supplies, the division withdrew and fought several rearguard actions, most notably at Landrecies, France, on 25 August; the Rearguard Affair of Le Grand Fayt the following day;[102] and the Rearguard Actions of Villers-Cotterêts on 1 September.[103] After a 236-mile (380 km) retreat, the division arrived at Fontenay, near Paris, on 5 September. Due to a strategic change in the Anglo-French and German dispositions, the BEF was ordered to counterattack during the First Battle of the Marne.[104] With the exception of skirmishing, the division saw little fighting. They advanced after the retreating Germans, who had been defeated largely by the French.[105] The division fought several actions against German rearguards, notably on 8 and 10 September.[106] The division then fought in the First Battle of the Aisne, which saw the first trench networks begun. It suffered 843 casualties, with upwards of 1,000 additional men missing.[107] During the First Battle of Ypres, which now saw both sides entrenched within extensive networks, the division fought numerous actions. In five weeks of battle, the division suffered 5,769 casualties and was reduced to 11,500 men.[108] This brought the division's total casualties in 1914 to 10,069.[109] For the rest of the year, the division rested, refitted, undertook training, manned and repaired trenches, and engaged in mutual artillery bombardments. Notably, George V and the future Edward VIII, reviewed the division on 3 December. The latter stayed with the division later in the month for two days and reviewed troops in the trenches.[110]
1915
During February 1915, the division launched minor attacks and captured several German positions.[111] Trench raids followed, until the 2nd Division took part in the Battle of Neuve Chapelle in March, and suffered over 600 casualties. Trench raids sandwiched the division's activities in the Battle of Festubert (part of the Second Battle of Artois), in May, and the Battle of Loos (September–October).[112] The bloody fighting of the former saw minor advances made, heavy casualties inflicted on the Germans, and a further 5,446 divisional casualties.[113] At Loos, the division deployed chemical weapons for the first time. However, due to light wind, the gas clouds hung along the division's line. The first day's attack had mixed results, and ranged from an attack that stalled as soon as the men left their trenches, to sections of the German first line of trenches being captured. Afterwards, minor attacks were launched and German counterattacks fended off. By the end of the battle, the division had lost 3,400 men with the majority inflicted on the first day.[114]
1916
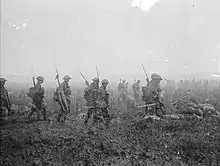
In early 1916, the division played a minor defensive role during the German attack on Vimy Ridge.[115] The next major action came during the summer of 1916, when the division fought in the Battle of the Somme, in particular the Battles of Delville Wood, Guillemont and Ancre.[116] The division entered the battle on 26 July, to retake Deville Wood that had been captured and then lost to a German counterattack. In a two-day battle, the division cleared the wood. It fended off several German counterattacks over the following days.[117] On 30 July, the division launched an attack to capture Guillemont and the nearby Falfemont Farm, with mixed results. After five days of fighting, by 31 July, the division had suffered over 3,000 casualties and reported that only one battalion was ready for further offensive operations.[118] The division remained on the line, subject to heavy shelling and trench raids, before it renewed efforts to take Guillemont on 8 August. This effort, with the 55th (West Lancashire) Division, lasted through 9 August and failed.[119] The division was relieved and moved to a different sector of the front. It engaged in mutual bombardments and trench raids.[120] In the final engagement of the Somme fighting, the Battle of Ancre that started on 12 November, the division assisted in the Capture of Beaumont-Hamel suffering almost 3,000 casualties. With the conclusion of the Somme battle, the division was withdrawn from the line for rest and to train.[121]
1917
During the opening months of 1917, the division conducted trench raids and minor attacks in the Ancre Valley.[122] On 16 March, the Germans undertook a planned retreat to the Hindenburg Line, and the division advanced after them.[123] In April, the division took part in the Battle of Arras, the British part of the Nivelle Offensive.[124] This included significant fighting between 27–29 April, in the Battle of Arleux, and between 3–4 May in the Battle of the Scarpe.[125] After a period of rest and training, the division returned to the frontline and re-engaged in trench warfare. In October, the new additions to the divisions were put through intensive musketry training to bring them up the standard of the remaining pre-war regulars.[126] The division started to enter the trenches on the front, during the Battle of Cambrai, on 27 November. On the tenth day of the battle, on 30 November, the division fought in a defensive action against a determined German counterattack. Results of the fighting were mixed: some units held their positions, and others were forced back up to 300 yards (270 m). Notably, one battery of eight machine-guns fired 70,000 rounds during the fighting, and another two batteries fired 100,000 between them. The division suffered around 2,000 casualties during the day, with a notable example of the entire D Company of the 13th Battalion, Essex Regiment being killed or taken prisoner.[127] For the remainder of the year, the division manned the front and engaged in trench warfare.[128] Total casualties for 1917 amounted to 8,770.[129]
1918
By 1918, the number of front line infantry within the British Army in France had decreased because of casualties and a lack of eligible replacements, leading to a manpower crisis. To consolidate manpower and to increase the ratio of machine guns and artillery support available to the infantry, the number of battalions in a division was reduced from twelve to nine; with each brigade being reduced from four to three battalions.[130][131] This reduced the establishment of a division from 18,825 men to 16,035.[132] For the 2nd division, this change took place in February when three battalions were disbanded. The troops from one were redistributed to other units within the division, while the others left. Major-General Cecil Pereira, the division's commander during this period, stated, "The old soldiers who have survived many a fight are very hard hit by this."[133] During the opening months of the year, the division again manned the frontline. Its last week in the line, which ended 20 March, saw the division suffer 3,000 casualties from the German use of gas.[134]
On 21 March, Germany launched Operation Michael. This attack, which became the opening salvo of their spring offensive, aimed to deliver a single, decisive, war winning blow. The Germans intended to strike the southern British flank, to separate the British and French armies and then move north to engage the bulk of the British forces in France in a battle of annihilation. The aim was to inflict such a defeat upon the British that the country would abandon the war, which in turn would force the French to sue for peace.[135] As a result, the greatly weakened division reentered the line on 21 March and engaged in heavy fighting through April. When the division was relieved on 4 April, it had suffered 4,000 casualties and been reduced to a fighting strength of around 6,000.[136] Wyrall wrote, "fighting divisions with such fine records as that held by the 2nd Division were not allowed long out of the line", consequently the division returned to the frontline by 15 April, and was soon engaged in more back and forth fighting.[137] By 6 June, the German offensive had ended. The division rebuilt its strength, trained, and tutored newly arrived American troops.[138] On 8 August, the Allied armies launched the Battle of Amiens that led to the start of the Hundred Days Offensive, the culminating offensive of the war.[139] On 21 August, the division took part in the Third Battle of Albert, part of the Second Battle of the Somme, and liberated several villages.[140] This was followed by fighting at Arras, between 2–3 September, followed by an advance to the Canal du Nord.[141] Over the course of the rest of the month, the division took part in preliminary operations for the Battle of Havrincourt and then the Battle of the Canal du Nord. In October, this was followed by the Second Battle of Cambrai, which saw the division liberate the village of Forenville.[142] Divisional casualties reached 3,900, from the start of the Hundred Day Offensive.[143] The Battle of the Selle followed, between 17–25 October, and the division reached the outskirts of Forêt de Mormal. Wyrall noted some of the division's old hands had last marched through this forest in 1914.[144] The division carried out its last trench raid of the war on 1 November, before it moved into reserve and ended the war near Le Quesnoy, France.[145][146] Casualties in the final year of the war amounted to 10,201.[129] The historian Don Farr wrote the division had "an excellent reputation" and continued "to be rated as one of the BEF's best" throughout the war.[109]
Inter-war period
After the conclusion of fighting, the division advanced into Germany to join the occupation force, the British Army of the Rhine. It entered Germany on 9 December and arrived between Düren and Cologne on 27 December.[145] On 17 February 1919, the division was demobilised. The six regular army battalions within the division, along with the artillery and one engineer unit, were ordered home. The division was re-designated as the Light Division, and the 2nd Division ceased to exist.[147] On 28 June 1919, the division was reformed in Aldershot, with the same brigades as before the First World War.[148] In 1923, a memorial was erected in Aldershot to commemorate the war's casualties. The design included the First World War insignia, with the memorial resting on a central red star flanked by two white stars.[149][150]
Second World War
Battle of France and home defense
On 3 September 1939, the United Kingdom declared war on Germany in response to their invasion of Poland. The division landed at Cherbourg on 21 September 1939 and arrived on the Franco-Belgian border on 3 October. The division, along with the three other divisions of the BEF, was based east of Lille.[151][152] During the rest of the year and into 1940, the division trained and assisted in the construction of field fortifications. The general and historian David Fraser wrote the regular formations of the BEF were well-trained in small arms, but lacked tactical skill. While the formations were mobile, they lacked specialist weapons, ammunition, spare parts, and communication equipment because of the budget cuts of the inter-war period.[153]

On 10 May 1940, Germany invaded Belgium. In response, Anglo-French armies moved into Belgium per the Allied Dyle Plan. The division reached the River Dyle without issue and fought its first action on 15 May. Despite a tactical success, strategic developments forced the BEF to withdraw the next day. The division retreated 40 miles (64 km) within 27 hours.[154][155] As the strategic situation grew worse, several divisions were ordered to form a cordon around the BEF's line of retreat. The La Bassée Canal and the River Aa, in France, were the only defensible positions that covered the BEF's southern and western flank. The 2nd Division defended part of the canal and engaged in several actions on 25-26 May.[156][157] On 26 May, with the BEF completely surrounded, the decision was made to evacuate from Dunkirk, the only remaining port in British hands.[158] The 2nd Division was ordered to maintain its position at the canal, to allow other formations to retreat.[159] The author Hugh Sebag-Montefiore wrote this was "the most difficult assignment handed to any unit in the BEF" and that the difficulty of this task "can be gauged by the small number of soldiers who returned home".[160] On 28 May, the division was engaged heavily and came under air and tank attack.[159] The fighting on that day provided the division with the dubious honour of having the highest casualties in a single battalion within the BEF. After the fighting had ended, 97 members of the division were murdered in the Le Paradis massacre.[161] Lionel Ellis, the author of the British official history of the BEF in France, wrote the division "had indeed sacrificed itself to keep open the line of retirement", delayed the Germans, and ensured French formations were not trapped.[162] During the night 28/29 May, the division withdrew into the Dunkirk perimeter, from where it evacuated.[163][164] The division had been reduced from 13,000 men to 2,500 by the end of the campaign.[165]
On returning to England, the division was dispatched to Yorkshire. Through April 1942, the division was assigned to the defence of the county. It was also rebuilt, trained, and assisted in coastal defence duties.[166][167] On 15 April, the 16,000-strong division left the United Kingdom. It had been intended for the division to reinforce the British Eighth Army in the North African Western Desert. However, in May, the convoy was ordered to sail for British India because of increasing civil tension there.[152][168]
India and Burma
The division arrived in July 1942, and was based initially at Poona before it established itself at Ahmednagar.[152][169] In Asia, the Burma campaign was the primary theatre of operations where British forces were engaged against those of the Empire of Japan, following their entry into the war in December 1941. Because of the logistical issues at the time, the division could not be employed in Burma. Instead, the division formed part of the British strategic reserve in Asia. It spent 1942 through 1944 training at its Ahmednagar base. It dispatched one brigade at a time to conduct jungle warfare training near Belgaum, and also sent troops to Bombay to undertake combined operations. Amphibious warfare training took place for the division's role in Operation Anakim, a proposed landing at Rangoon as part of a larger effort to retake Burma. However, developments around the theater resulted in continued postponements of this operation.[169][170][171] Following the First Battle of El Alamein, in July 1942 in the Western Desert, the division was offered as a reinforcement to ensure Axis forces did not enter the Middle East, but no move took place as a result of the successful Second Battle of El Alamein.[172] In 1943, the division made preliminary preparations for a move to Tehran, Iran, but ultimately did not go.[170]
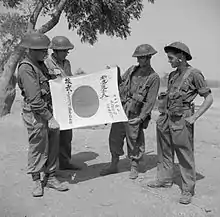
In March 1944, Japan invaded India, and then besieged Imphal and Kohima. The division was transported 2,000 miles (3,200 km) across India and launched a counterattack on 12 April. In conjunction with the 33rd Indian Infantry Brigade, the division broke the Japanese siege of Kohima and forced them to retreat.[173] The division suffered 2,125 casualties.[174] Advancing towards Imphal, the division fought several actions with Japanese forces. On 20 June, the division linked up with British Indian forces who had advanced from Imphal, which ended that siege. In the course of this fighting, the division assisted in the destruction of the Japanese 31st Division. The 2nd Division then advanced 150 miles (240 km) into Burma and captured several important airfields that were required for the supply effort for the advance to Mandalay. At the end of 1944, the division had reached Shwebo, north of Mandalay. In the opening three months of 1945, the division took part in the Battle of Meiktila and Mandalay. While the main advance proceeded to Rangoon, the division cleared bypassed Japanese positions near Mandalay. With the Japanese positions cleared, the division was transported to Calcutta, so it could be used in Operation Dracula—an amphibious assault on Rangoon. However, the city was liberated by other forces and the 2nd Division did not depart for the port.[175] The division was assigned next to Operation Zipper, a planned amphibious landing in Malaya that aimed to liberate Singapore. However, the surrender of Japan forestalled this endeavour. The division ended the war based at Poona, India.[176]
The post-war and Cold War period
At Poona, the division was joined by the British 36th Infantry Division. In August 1945, the 2nd Division absorbed the 36th Division, and the latter then ceased to exist. The 5th Infantry Brigade left the division and was dispatched to Japan as part of the British Commonwealth Occupation Force. In November, the 2nd Division arrived in Malaya. It occupied Singapore and key locations throughout Malaya in an effort to maintain law and order, which had broken down following the Japanese surrender. The division remained in Malaya until 1946, when it was disbanded.[177][178][179] During this period, the Kohima War Cemetery was established and dedicated to the division.[180]
At the end of the Second World War, the United Kingdom was allocated an occupation zone in northwest Germany and formed a new British Army of the Rhine (BAOR) to administer its occupation forces.[181][182] The 53rd (Welsh) Infantry Division was part of this army until February 1947. At that point, it was renumbered to the 2nd Infantry Division. Some troops from Malaya, who had been part of the prior 2nd Division, were shipped to Germany to bring the new division up to strength.[179][178][183] Following the creation of West Germany in 1949, the BAOR ceased being an occupation force and became part of the British contribution to the defence of Western Europe from the Soviet Union.[181][182] Britain reaffirmed this role at the 1954 London and Paris Conferences, with the promise to commit four divisions to the defence of Europe.[184] While the BAOR fluctuated in size, including the number of divisions, the 2nd Infantry Division remained part of the army through to the 1980s.[181] The division was headquartered at Düsseldorf, and later at Bunde. In 1958, the "infantry" designation was dropped from the division's title.[179] The same year, a memorial to the division's Second World War casualties was installed at the Royal Garrison Church in Aldershot.[185]
By the 1970s, the United Kingdom had to reconcile its decreased resources with its commitments, as well as the increased threat from the Soviet Union.[186] In 1974, following the general election, Roy Mason became Secretary of State for Defence. He authored the Mason Review, a Government white paper that outlined a new defence policy. It reaffirmed the Soviet Union as the primary threat to British national security and the need to concentrate British forces in Western Europe.[187] Mason argued for proposed changes that would "maintain as far as possible the present combat capability of the Army in Europe ... while reducing the overall number of men".[188] This would be achieved by headquarter units being disbanded and included the elimination of "the brigade level of command" with battalions being "commanded directly by smaller-sized divisional headquarters". The overall aim was to have "fewer formation headquarters overall, and fewer but larger units".[189] This change would maintain the BAOR's ability to wage "a mobile and intense armoured battle" against invading Soviet forces.[190]
The historian David Isby wrote that Mason's reforms promised "an alleged 25 percent increase in combat power".[186] This increase would be achieved by a more efficient use of manpower, streamlined logistical elements, and an improved ratio of weapons and men.[191] The historian Marc Donald DeVore argued the politically forced change coincided with a BAOR doctrinal change that started in the 1960s. The 1st Armoured Division pioneered the change in the early 1970s, which sought to fight a mobile defensive battle by defending key attack routes that Soviet armoured forces would more than likely take. The Soviet forces would then be lured into a killing zone where they would suffer disproportionate losses at the hands of British anti-tank guided missile equipped infantry and tanks in hull-down defensive positions. The British would keep moving, fighting this aggressive delaying battle from the East German border.[192] The restructure increased the BAOR to four divisions, each with two armoured regiments and three mechanised infantry battalions.[186] It was believed that an attritional battle, using the four divisions, would allow the BAOR to resist a Soviet advance and buy enough time for one of several contingencies to be implemented: a diplomatic solution achieved; the arrival of reinforcements to allow further conventional warfare to be maintained; or a threat made, warning of the use of tactical nuclear weapons.[193] On 1 September 1976, as part of this reform, the 2nd Division was re-designated as the 2nd Armoured Division.[194]
2nd Armoured Division, 1976–1982
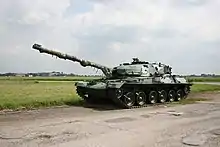
The 2nd Armoured Division was the first of the four BAOR divisions to be reorganised. After the process was completed, it was 8,600 men strong, and equipped with 132 Chieftain tanks (with 12 additional tanks in reserve). In a time of war, the division would be reinforced to a wartime strength of 14,000 men.[195] The divisional headquarters was based in Lübbecke, West Germany, and its signal regiment was in Bünde.[179][196] The 2nd Armoured Division maintained the 2nd Division's insignia, originally designed during the Second World War, and used throughout the Cold War.[179][197] In addition to tanks, the division had three mechanised infantry battalions, with the troops carried in FV432 armoured personnel carriers; an armoured reconnaissance regiment equipped with FV101 Scorpions and FV107 Scimitars; self-propelled artillery; an anti-tank battery equipped with Swingfire anti-tank missiles; anti-aircraft units equipped with Blowpipe missiles; an aviation regiment equipped with scout helicopters; and support services: divisional engineers, medical, provost; transport, ordnance, and field workshop units.[195] The actual units that comprised the division were not fixed. During the Cold War, the British Army rotated units through the BAOR. For example, infantry battalions would generally serve a four-year tour with the army, before they were rotated to another theatre; armoured units could serve up to eight years.[198] Elements of the division could also be rotated elsewhere from Germany, while remaining part of the division. For example, the 2nd Armoured Division Engineer Regiment was deployed to Northern Ireland in December 1979.[199]
With the removal of the brigade level, it was intended that the division could form up to five battlegroups with each based around the headquarters of either the armoured regiments or the infantry battalions. These groups were to be formed for a specific task and allocated the required forces needed. The reforms envisioned that the divisional commander would oversee these battlegroups, but early training found this to be impractical. To compensate, the divisional headquarters was increased to 750 men (war time strength) including two brigadiers, who would each command a flexible task force that would be formed by the GOC.[200] The 2nd Armoured Division's task forces were Task Force Charlie and Task Force Delta. The task forces would allow the GOC to tailor their forces to meet unforeseen events and execute the killing area doctrine.[201] These task forces were not a reintroduction of a brigade command structure, and they had no logistical responsibilities. In structuring the division in this manner, it allowed a reduction of 700 men.[200] The historian David Stone commented the system was "designed to allow the commander maximum flexibility and take precise account of the operational or tactical task to be achieved".[202]
In November 1976, the BAOR held Exercise Spearpoint 76. It was designed to test the 2nd Armoured Division and included troops from Denmark and the United States.[203] The exercise demonstrated the improvement of the new organisation, but highlighted that the divisional headquarters would become inefficient as combat fatigue took over if there was prolonged combat.[204] Following the exercise, further refinements to the organisation took place into 1977, and additional armour and infantry units were transferred, bringing the formation up to strength.[194] The Task Force concept lasted until the end of the decade, when it was replaced with brigade commands as it had not met expectations.[186][202] The division then comprised the 4th and the 12th Armoured Brigades.[205][206]
In 1981, John Nott, the Secretary of State for Defence for the government elected in 1979, authored the 1981 Defence White Paper. It, like the Mason Review, aimed to balance the British military in line with the nation's financial resources.[207] Nott's paper called for the BAOR to be restructured from four armoured divisions of two brigades, into a force of three divisions of three brigades. The intent was to save manpower and money, with the loss of one division. Nott called for a new division to be formed in the United Kingdom, which would be made up primarily of Territorial Army personnel. The new formation would reinforce the BAOR on the outbreak of war.[208] In July 1981, the 2nd Armoured Division was chosen as the formation to be disbanded. In December 1982, the division ceased to exist and its assets were dispersed to other BAOR formations.[205][197]
End of the Cold War and into the 21st Century
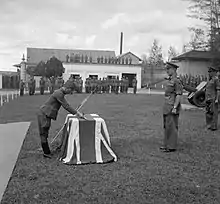
On 1 January 1983, the 2nd Infantry Division was reformed, based at Imphal Barracks, in York, England.[197][209] The reformed division was assigned the territorial 15th Brigade at Alanbrooke Barracks, Topcliffe, North Yorkshire; the territorial 49th Brigade, based in Nottingham; the regular army 24th Brigade, at Catterick Garrison; and the 29th Engineer Brigade, based in Newcastle upon Tyne.[197] On 24 June 1987, Elizabeth II unveiled a memorial to the division at York Minster.[210]
Following the end of the Cold War, the division was disbanded in early 1992 as part of the British Government's Options for Change plan.[211] In 1994, the division was re-established in York as a training formation and replaced the existing Eastern District.[212][213][214] In 1998, the division was 28,500-men strong. As part of the 1998 Strategic Defence Review, the British Army restructured their forces within the United Kingdom to cut additional costs. In line with this, in April 2000, the 2nd Division absorbed Scotland District. The division headquarters was then moved to Craigiehall, near Edinburgh.[215] The division then comprised the 15th (North East) Brigade based in York; the 42nd (North West) Brigade based in Preston; the 51st (Scottish) Brigade based in Stirling; and the 52nd Infantry Brigade based in Edinburgh. Elements of the division were also based in Chester. The division was around 2,100 men strong in 2002 and was responsible for the administration and training of soldiers in the north of England and in Scotland. If war broke out, it was to expand to 16–18,000 men, in line with the army's combat formations of that time.[216] In April 2012, as part of a further restructure, the division was disbanded.[217]
Insignia
In 1916, during the First World War, British Army divisions adopted formation signs. The design the 2nd Division chose, represented "The Second Division of the First Corps". This was indicated via two white stars (the division) either side of a single larger red star, which represented I Corps.[218] In 1940, during the Second World War, a new insignia was adopted. Major-General Charles Loyd, who had taken command of the division in 1939, designed it. He had previously commanded the 1st (Guards) Brigade prior to his appointment to the division, and they had used a single key as a brigade insignia. Loyd updated that design for his new command, by adding a second key.[219][220][221] It has also been highlighted that the insignia resembles the coat of arms of the Archbishop of York, and could reference troop recruitment in that area.[167]
See also
- List of commanders of the British 2nd Division
- List of orders of battle for the British 2nd Division
- List of Victoria Cross recipients from the British 2nd Division
- List of British divisions in World War I
- List of British divisions in World War II
- British Army Order of Battle (September 1939)
- Outline of the British Army at the end of the Cold War
- British Army Structure In 2010
Notes
Footnotes
- Historian Ian Fletcher suggested the division was formed in May 1809, and fought at the Second Battle of Porto.[3] Historian Charles Oman detailed the British order of battle at Porto, and noted the entire force comprised eight brigades and no divisions. Oman stated that it was after that battle, when divisions were formed.[4] Historian Philip Haythornthwaite stated that the divisions were formed on 18 June 1809.[1]
- A separate 2nd Division, under the command of Major-General John Mackenzie, operated during this period as part of Lieutenant-General John Murrary's independent Army on the Tarragona.[16]
- This was how the 1st, 2nd, and 3rd Division had been formed in 1871. Regular, reserve, militia, and yeomanry units from across the UK converged on Aldershot to form the divisions. The military were also accompanied by volunteers.[38]
Citations
- Haythornthwaite 2016, The Divisional System.
- Oman 1903, pp. 455, 511–512, 525, 531–535, 544–545, 645, 650–651.
- Fletcher 1994, pp. 32–33.
- Oman 1903, pp. 324ff. and 640–641.
- Oman 1908, pp. 359–362, 387, 545, 550.
- Oman 1908, pp. 437–442.
- Reid 2004, p. 42.
- Bamford 2013, p. 205.
- Oman 1911, pp. 383–383, 399–400, 631.
- Oman 1911, pp. 602–605.
- Oman 1914, pp. 326–328.
- Oman 1922, p. 99.
- Oman 1922, pp. 400, 419, 422, 439–440, 758.
- Oman 1922, pp. 469, 529, 626–627, 629–638.
- Oman 1922, pp. 769–772.
- Oman 1922, p. 762.
- Oman 1930, pp. 118 and 167, 175–176, 227 369, 384, 553, 558.
- Oman 1930, pp. 496 and 513.
- Glover 2015, pp. 11–22, 31.
- Glover 2015, pp. 35–46.
- Siborne 1900, p. 347.
- Glover 2015, pp. 35–46, 165.
- Glover 2015, p. 128.
- Siborne 1900, pp. 340–342, 467–470.
- Glover 2014, pp. 151–153.
- Siborne 1900, pp. 473, 529, 531–536.
- Glover 2014, pp. 189–191.
- Glover 2014, p. 194.
- Siborne 1900, pp. 553, 556, 558, 564–565.
- Glover 2014, pp. 192–194.
- Glover 2015, p. 165.
- Siborne 1900, pp. 659, 683, 688, 696, 704, 716, 732, 748.
- Moorsom 1860, pp. 270–271.
- Glover 2015, pp. 199–200.
- Wyrall 1921a, pp. xi–xii.
- Davis 1906, p. 67.
- Butler 1926, pp. 192–194.
- Verner 1905, p. 55.
- Creswicke 1900a, p. 59.
- Verner 1905, pp. 236–237.
- Royle 2004, pp. 127–129.
- Barthorp 1980, p. 155.
- Bowden 1991, p. 16.
- Ponting 2006, p. 72.
- Arnold 2002, p. 62.
- Ponting 2006, pp. 53, 145.
- "No. 21564". The London Gazette. 22 June 1854. p. 1932.
- Lambert 2016, pp. 119–121.
- Ponting 2006, pp. 89, 94.
- Ponting 2006, p. 94.
- "No. 21606". The London Gazette. 8 October 1854. p. 3050. and "No. 21606". The London Gazette. 8 October 1854. p. 3053.
- Ffrench Blake 2006, pp. 169–170.
- Ffrench Blake 2006, p. 82.
- Warner 2001, pp. 75–79.
- Ffrench Blake 2006, pp. 86–94, 98–101.
- Raugh 2004, p. 187.
- Warner 2001, pp. 150–152.
- Richards 2006, p. 152.
- Ffrench Blake 2006, pp. 143–144, 150–151.
- Demchak 2011, p. 127.
- Furse 1883, pp. 9–11.
- "Memorandum Of The Secretary Of State Relating To The Army Estimates, 1887–8: Mobilization". Parliamentary Debates (Hansard). House of Commons. 19 December 1979. Retrieved 29 October 2019.
- Raugh 2004, p. 51.
- Dunlop 1938, p. 72.
- Creswicke 1900b, Chart of Staff Appointments Made at the Commencement of the War.
- Creswicke 1900b, pp. 52, 66, 136, 160.
- Kochanski 2013, p. 61.
- "No. 27126". The London Gazette. 13 October 1899. p. 6179.
- Creswicke 1900b, p. 200.
- Maxwell 1911, p. 310.
- Creswicke 1900b, pp. 160, 190.
- Conan Doyle 1901, pp. 190–192.
- Maxwell 1911, pp. 312–314.
- Maxwell 1911, p. 314.
- Pakenham 1992, p. 250.
- Conan Doyle 1901, p. 248.
- Maxwell 1911, p. 320.
- Davis 1906, p. 228.
- Conan Doyle 1901, pp. 254–255.
- Pakenham 1992, pp. 298, 308, 311, 320.
- Conan Doyle 1901, pp. 267–276.
- Creswicke 1900a, p. 93; Creswicke 1900b, p. 123.
- Conan Doyle 1901, pp. 284–285, 289, 291.
- Conan Doyle 1901, pp. 292–294.
- Conan Doyle 1901, pp. 389, 431–433, 495–496.
- Conan Doyle 1901, p. 496.
- Conan Doyle 1901, pp. 497–501.
- Pakenham 1992, p. 408.
- Pakenham 1992, p. 480.
- Creswicke 1901, pp. 98, 138.
- Satre 1976, p. 117.
- Satre 1976, p. 121.
- "No. 27434". The London Gazette. 6 May 1902. p. 3254., "No. 27442". The London Gazette. 13 June 1902. p. 3900., "No. 27676". The London Gazette. 13 May 1904. p. 3083., and "No. 27626". The London Gazette. 15 December 1903. p. 8268.
- Dunlop 1938, pp. 218–219.
- Dunlop 1938, p. 245.
- Cook & Stevenson 2005, p. 121.
- Wyrall 1921a, pp. xii–xiv, 19.
- Becke 2007, pp. 126–127.
- Wyrall 1921a, p. 21.
- Wyrall 1921a, p. 23.
- Wyrall 1921a, pp. 24–26.
- Wyrall 1921a, pp. 27–40.
- Wyrall 1921a, pp. 46–47.
- Wyrall 1921a, pp. 51–56.
- Wyrall 1921a, pp. 56–60.
- Wyrall 1921a, pp. 62–65, 68–69.
- Wyrall 1921a, pp. 74, 89, 97.
- Wyrall 1921a, pp. 101, 110, 131, 139, 151, 159, 169.
- Farr 2007, p. 49.
- Wyrall 1921a, pp. 169–173.
- Wyrall 1921a, pp. 178–183.
- Wyrall 1921a, pp. 180, 196.
- Wyrall 1921a, p. 213.
- Wyrall 1921a, pp. 223–243.
- Wyrall 1921a, pp. 253–254.
- Wyrall 1921a, p. 263.
- Wyrall 1921a, pp. 270–273, 279–280, 282.
- Wyrall 1921a, pp. 283–285.
- Wyrall 1921a, pp. 286–287, 290–293.
- Wyrall 1921a, pp. 294–304.
- Wyrall 1921a, p. 326.
- Wyrall 1921b, pp. 357–365, 377.
- Wyrall 1921b, pp. 390–391.
- Wyrall 1921b, p. 405.
- Wyrall 1921b, pp. 418–420, 428, 437, 444.
- Wyrall 1921b, pp. 448, 454.
- Wyrall 1921b, pp. 478, 484–485, 498, 500.
- Wyrall 1921b, p. 515.
- Wyrall 1921b, p. 711.
- Perry 1988, pp. 26–28.
- Morrow 2005, p. 239.
- Perry 1988, p. 26.
- Wyrall 1921b, p. 523.
- Wyrall 1921b, p. 543.
- Tucker & Roberts 2005, pp. 716–718.
- Wyrall 1921b, pp. 543, 550, 560, 587, 590.
- Wyrall 1921b, pp. 590–591.
- Wyrall 1921b, pp. 600–601.
- Messenger 2008, p. xx.
- Wyrall 1921b, pp. 605, 615, 622, 624, 629.
- Wyrall 1921b, pp. 635, 643.
- Wyrall 1921b, pp. 645, 647, 654, 656, 669.
- Wyrall 1921b, p. 675.
- Wyrall 1921b, pp. 676, 688–689.
- Becke 2007, p. 47.
- Wyrall 1921b, pp. 691–692.
- Wyrall 1921b, p. 695.
- "War Office, Monthly Army List, May 1921". War Office. 1921. p. 30. Retrieved 27 August 2020.
- Cole 1950, p. 6.
- "British Army 2nd Division World War I Memorial". Historic England. Retrieved 3 January 2021.
- Ellis 1954, pp. 15–17.
- Joslen 2003, p. 40.
- Fraser 1999, pp. 28–29.
- Ellis 1954, pp. 23, 39, 46, 63.
- Fraser 1999, pp. 30, 55–57.
- Fraser 1999, pp. 63–64.
- Ellis 1954, pp. 146, 175–176.
- Fraser 1999, pp. 67–69.
- Ellis 1954, pp. 189–190.
- Sebag-Montefiore 2006, p. 279.
- Sebag-Montefiore 2006, p. 297.
- Ellis 1954, pp. 190–191.
- Ellis 1954, pp. 210.
- Rissik 2012, p. 21.
- Collier 1961, p. 74.
- Rissik 2012, p. 161.
- Jeffreys 2005, p. 24.
- Swinson 1966, pp. 2–3.
- Luto 2013, p. 2.
- Swinson 1966, pp. 2–5.
- Kirby et al. 2004, pp. 130, 235.
- Playfair et al. 2004, pp. 365–366.
- Luto 2013, pp. 1–3.
- Kirby & Addis 1962, p. 526.
- Luto 2013, pp. 4–7.
- Luto 2013, pp. 7–8.
- Luto 2013, pp. 8–9.
- Messenger 1994, p. 155.
- Lord & Watson 2003, p. 28.
- "Kohima War Cemetery". Commonwealth War Graves Commission. Retrieved 16 January 2021.
- Isby 1988, p. 336.
- Speiser 2016, p. 1.
- "Balfour, Philip". Liddell Hart Centre for Military Archives. Archived from the original on 19 September 2012. Retrieved 9 June 2020.
- Rees 2013, p. 57.
- Imperial War Museam. "Memorial: 1st and 2nd Infantry Divisions". Imperial War Museum. Retrieved 16 January 2021.
- Isby 1988, p. 332.
- Taylor 2010, pp. 6–7.
- Mason 1975, p. I-22.
- Mason 1975, p. I-23.
- Mason 1975, pp. III=8–9.
- Dodd 1977, p. 373.
- DeVore 2009, p. 279.
- DeVore 2009, p. 282.
- Kneen & Sutton 1996, p. 183.
- Dodd 1977, p. 374.
- Stone 1998, p. 225.
- Horseman & Shaw 1983, p. 126.
- Hansen 1970, p. 27.
- "Baor Units (Ulster Service)". Parliamentary Debates (Hansard). House of Commons. 19 December 1979. Archived from the original on 29 October 2019. Retrieved 29 October 2019.
- Dodd 1977, p. 375.
- DeVore 2009, pp. 281–282.
- Stone 1998, p. 224.
- Dodd 1977, p. 372.
- Dodd 1977, p. 378.
- Kneen & Sutton 1996, p. 185.
- Stone 1998, p. 222.
- Taylor 2010, p. 7.
- Nott 1981, p. 17.
- Blaker, Peter (1981). "1(BR) Corps, Written Answers (Commons), HC Deb 20 July 1981 vol 9 cc57-8W". House of Commons Library: Historic Hansard. Archived from the original on 11 November 2019. Retrieved 28 October 2019.
- Imperial War Museam. "Memorial: 2nd Division Memorial". Imperial War Museum. Retrieved 16 January 2021.
- Tanner 2014, p. 13.
- Kohima Museum. "The 2nd Division". Kohima Museum. Retrieved 16 January 2021.
- "Cordingley, Patrick Anthony John (Oral History)". Imperial War Museum. Archived from the original on 21 October 2020. Retrieved 21 October 2020.
- Vox Militaris 1995, p. 155.
- "Land Command Restructuring". Parliamentary Debates (Hansard). House of Commons. 16 January 1998. Retrieved 17 January 2021., "UK Land Command". Parliamentary Debates (Hansard). House of Commons. 22 April 1998. Retrieved 17 January 2021., and "2nd Division". Parliamentary Debates (Hansard). House of Commons. 19 July 1999. Retrieved 17 January 2021.
- Heyman 2002, Chapter 2 - Army Organisations.
- Taylor 2011, p. 5.
- Wheeler-Holohan 1920, p. 35.
- Chappell 1987, p. 36.
- Cole 1950, p. 47.
- Young & Davies 1965, p. 39.
Sources
- Arnold, Guy (2002). Historical Dictionary of the Crimean War. Historical Dictionaries of War, Revolution, and Civil Unrest. 19. Cambridge: The Scarecrow Press. ISBN 978-0-81084-276-2.
- Bamford, Andrew (2013). Sickness, Suffering, and the Sword: The British Regiment on Campaign, 1808-1815. Norman, Oklahoma: University of Oklahoma Press. ISBN 978-0-80614-343-9.
- Barthorp, Michael (1980). The Armies of Britain, 1485-1980. London: National Army Museum. OCLC 252418281.
- Becke, Archibald Frank (2007) [1935]. Order of Battle of Divisions Part 1: The Regular British Divisions. Uckfield: The Naval & Military Press. ISBN 978-1-84734-738-1.
- Bowden, Mark (1991). Pitt Rivers: The Life and Archaeological Work of Lieutenant-General Augustus Henry Lane Fox Pitt River DCL, FRS, FSA. Cambridge: Cambridge University Press. ISBN 978-0-52140-077-0.
- Butler, Lewis (1926). The Annals of the King's Royal Rifle Corps. III. London: John Murray. OCLC 81665440.
- Chappell, Mike (1987). British Battle Insignia 1939–1940. Men-At-Arms. II. Oxford: Osprey Publishing. ISBN 978-0-85045-739-1.
- Cole, Howard N. (1950). Heraldry in War: Formation Badges, 1939-1945 (3rd ed.). Aldershot: Wellington Press. OCLC 224096091.
- Collier, Richard (1961). The Sands of Dunkirk. New York: Dutton. OCLC 974413933.
- Conan Doyle, Arthur (1901). The Great Boer War (5th ed.). London: George Bell & Sons. OCLC 26467440.
- Cook, Chris; Stevenson, John (2005). The Routledge Companion to Britain in the Nineteenth Century, 1815–1914. Oxon: Routledge. ISBN 978-0-415-34582-8.
- Creswicke, Louis (1900a). South Africa and the Transvaal War. I. Edinburgh: T. C. & E. C. Jack. OCLC 154231374.
- Creswicke, Louis (1900b). South Africa and the Transvaal War. II. Edinburgh: T. C. & E. C. Jack. OCLC 154231374.
- Creswicke, Louis (1901). South Africa and the Transvaal War. VI. Edinburgh: T. C. & E. C. Jack. OCLC 154231374.
- Davis, John (1906). The History of the Second Queen's Royal Regiment: Now the Queen's (Royal West Surrey) Regiment. V. London: Eyre and Spottiswoode. OCLC 834944368.
- Demchak, Chris C. (2011). Wars of Disruption and Resilience: Cybered Conflict, Power, and National Security. Athens, Georgia: The University of Georgia Press. ISBN 978-0-82034-137-8.
- DeVore, Marc Ronald (2009). Armed Forces, States and Threats: Civil-Military Institutions and Military Power in Modern Democracies (PDF) (PhD). Massachusetts: Massachusetts Institute of Technology. Retrieved 29 October 2019.
- Dodd, Norman (1977). "British New Look Divisions Tested in Exercise Spearpoint" (PDF). Militaire Spectator (August 1977): 373–379. Retrieved 29 October 2019.
- Dunlop, John K. (1938). The Development of the British Army 1899–1914. London: Methuen. OCLC 59826361.
- Ellis, Lionel F. (1954). Butler, J. R. M. (ed.). The War in France and Flanders 1939–1940. History of the Second World War, United Kingdom Military Series. London: Her Majesty's Stationery Office. OCLC 1087882503.
- Farr, Don (2007). The Silent General: Horne of the First Army. Solihull: Helion & Company. ISBN 978-1-87462-299-4.
- Ffrench Blake, R.L.V. (2006) [1971]. The Crimean War. Barnsley: Pen & Sword Military. ISBN 978-1-844-15449-4.
- Fletcher, Ian (1994). Wellington's Regiments: The Men and Their Battles from Roliça to Waterloo, 1808-1815. Stroud: Spellmount. ISBN 978-1-87337-606-5.
- Fraser, David (1999) [1983]. And We Shall Shock Them: The British Army in the Second World War. London: Cassell Military. ISBN 978-0-304-35233-3.
- Furse, George Armand (1883). Mobilisation and Embarkation of an Army Corps. London: William Clowes and Sons. OCLC 561112902.
- Glover, Gareth (2014). Waterloo: Myth and Reality. Barnsley: Pen & Sword Books. ISBN 978-1-78159-356-1.
- Glover, Gareth (2015). Waterloo: The Defeat of Napoleon's Imperial Guard: Henry Clinton, the 2nd Division and the End of a 200-year-old Controversy. Barnsley: Pen & Sword Books. ISBN 978-1-84832-744-3.
- Hansen, Richard H., ed. (March 1970). "British Army in Europe". Army Digest. 25 (3): 22–29.
- Haythornthwaite, Philip (2016). Picton's Division at Waterloo. Barnsley: Pen & Sword Books. ISBN 978-1-78159-102-4.
- Heyman, Charles (2002). The British Army: A Pocket Guide, 2002–2003. Barnsley: Pen & Sword Books. ISBN 978-0-850-52867-1.
- Horseman, Martin; Shaw, Jennifer, eds. (1983). "2nd Infantry Division re-formed at York". Armed Forces. Ian Allan Ltd. and the Royal United Services Institute for Defence Studies (April 1983). OCLC 923901878.
- Isby, David C. (1988). "Developments in the Front-Line States: The United Kingdom". In Simon, Jeffrey (ed.). NATO-Warsaw Pact Force Mobilization. Washington: National Defense University Press. pp. 317–352. OCLC 18522267.
- Jeffreys, Alan (2005). The British Army in the Far East 1941-45. Battle Orders. Oxford: Osprey. ISBN 978-1-841-76790-1.
- Joslen, H. F. (2003) [1990]. Orders of Battle: Second World War, 1939–1945. Uckfield: Naval and Military Press. ISBN 978-1-84342-474-1.
- Kirby, S.W.; Addis, C.T.; Meiklejohn, J.F.; Roberts, M.R.; Wards, G.T.; Desoer, N.L. (2004) [1958]. Butler, J. R. M. (ed.). India's Most Dangerous Hour. History of the Second World War, United Kingdom Military Series. II. London: Naval & Military Press. ISBN 978-1-84574-061-0.
- Kirby, S.W.; Addis, C.T. (1962). Butler, J. R. M. (ed.). The Decisive Battles. History of the Second World War, United Kingdom Military Series. III. London: Her Majesty's Stationery Office. OCLC 769331015.
- Kneen, J. M.; Sutton, D. J. (1996). Craftsmen of the Army: The Story of the Royal Electrical and Mechanical Engineers 1969–1992. II. London: Leo Cooper. ISBN 978-0-850-52549-6.
- Kochanski, Halik (2013). "Chapter 4: Wolseley and the South African War". In Gooch, John (ed.). The Boer War: Direction, Experience and Image. Abingdon, Oxon: Routledge. pp. 56–72. ISBN 978-0-714-65101-9.
- Lambert, Andrew (2016) [2011]. The Crimean War: British Grand Strategy against Russia, 1853–56 (2nd ed.). London: Routledge. ISBN 978-1-409-41011-9.
- Lord, Cliff; Watson, Graham (2003). The Royal Corps of Signals: Unit Histories of the Corps (1920–2001) and its Antecedents. West Midlands: Helion. ISBN 978-1-874-62207-9.
- Luto, James (2013). Fighting with the Fourteenth Army in Burma: Original War Summaries of the Battle Against Japan 1943–1945. Pen and Sword. ISBN 978-1-783-03031-6.
- Mason, Roy (1975). "CAB 129/181/21: C (75) 21 Statement on the Defence Estimates 1975". The National Archives. Retrieved 28 October 2019.
- Maxwell, Herbert (1911). A Century of Empire, 1801-1900. III. London: Edward Arnold. OCLC 835801919.
- Messenger, Charles (1994). For Love of Regiment 1915–1994. A History of British Infantry. II. London: Pen & Sword. ISBN 978-0-85052-422-2.
- Messenger, Charles (2008). The Day We Won the War: Turning Point at Amiens, 8 August 1918. London: Weidenfeld & Nicolson. ISBN 978-0-297-85281-0.
- Moorsom, W.S. (1860). Historical Record of the Fifty-Second Regiment (Oxfordshire Light Infantry) from the Year 1755 to the Year 1858 (2nd ed.). London: Richard Bentley. OCLC 4319725.
- Morrow, John Howard (2005). The Great War: An Imperial History. Abingdon: Routledge. ISBN 978-0-415-20440-8.
- Nott, John (1981). "Cmnd. 8288: The United Kingdom Defence Programme The Way Forward" (PDF). London: Her Majesty's Stationery Office. Retrieved 11 November 2019.
- Oman, Charles (1903). A History of the Peninsular War. II Jan.-Sept. 1809. Oxford: Clarendon Press. OCLC 185228609.
- Oman, Charles (1908). A History of the Peninsular War. III Sept. 1809–Dec. 1810. Oxford: Clarendon Press. OCLC 185228609.
- Oman, Charles (1911). A History of the Peninsular War. IV Dec. 1810-Dec. 1811. Oxford: Clarendon Press. OCLC 699709225.
- Oman, Charles (1914). A History of the Peninsular War. V Dec. Oct. 1811 – Aug. 31, 1812. Oxford: Clarendon Press. OCLC 185228609.
- Oman, Charles (1922). A History of the Peninsular War. VI September 1, 1812 — August 5, 1813. Oxford: Clarendon Press. OCLC 185228609.
- Oman, Charles (1930). A History of the Peninsular War. VII August 1813-April 14, 1814. Oxford: Oxford University Press. OCLC 185228609.
- Pakenham, Thomas (1992). The Boer War. London: Abacus. ISBN 978-0-349-10466-9.
- Perry, Frederick William (1988). The Commonwealth Armies: Manpower and Organisation in Two World Wars. War, Armed Forces and Society. Manchester: Manchester University Press. ISBN 978-0-719-02595-2.
- Playfair, I. S. O.; Flynn, F. C.; Molony, C. J. C.; Gleave, T. P. (2004) [1960]. Butler, J. R. M. (ed.). The Mediterranean and Middle East: British Fortunes Reach their Lowest Ebb (September 1941 to September 1942). History of the Second World War United Kingdom Military Series. III. London: Naval & Military Press. ISBN 978-1-84574-067-2.
- Ponting, Clive (2006). The Crimean War: The Truth Behind the Myth. Sydney: Pimlico. ISBN 978-0-71263-653-7.
- Raugh, Harold E. (2004). The Victorians at War, 1815-1914: An Encyclopedia of British Military History. Santa Barbara, California: ABC-Clio. ISBN 978-1-57607-925-6.
- Rees, Wyn (2013) [2001]. "Chapter 3: Preserving the Security of Europe". In Croft, Stuart (ed.). Britain and Defence 1945-2000: A Policy Re-evaluation. Washington: Routledge. pp. 49–68. ISBN 978-0-582-30377-5.
- Reid, Stuart (2004). Wellington's Army in the Peninsula 1809–14. Oxford: Osprey Publishing. ISBN 978-1-84176-517-4.
- Richards, Donald (2006). Conflict in the Crimea: British Redcoats on Russian Soil. Barnsley: Pen & Sword Military. ISBN 978-1-84415-343-5.
- Rissik, David (2012) [1953]. The D.L.I. at War: The History of the Durham Light Infantry 1939-1945. Luton: Andrews. ISBN 978-1-78151-535-8.
- Royle, Trevor (2004) [2000]. Crimea: The Great Crimean War, 1854-1856. New York: Palgrave Macmillan. ISBN 978-1-403-96416-8.
- Satre, Lowell J. (1976). "St. John Brodrick and Army Reform, 1901-1903". Journal of British Studies. 15 (2): 117–139. JSTOR 175135.
- Sebag-Montefiore, Hugh (2006). Dunkirk: Fight to the Last Man. Cambridge, Massachusetts: Harvard University Press. ISBN 978-0-674-0-2439-7.
- Siborne, William (1900). The Waterloo Campaign (5th ed.). Westminster: Archibald Constable and Co. OCLC 672639901.
- Speiser, Peter (2016). The British Army of the Rhine: Turning Nazi Enemies into Cold War Partners. Urbana: University of Illinois Press. ISBN 978-0-252-04016-0.
- Stone, David (1998). Cold War Warriors: The Story of the Duke of Edinburgh's Royal Regiment (Berkshire and Wiltshire). London: Leo Cooper. ISBN 978-0-850-52618-9.
- Swinson, Arthur (1966). Kohima. London: Cassell. OCLC 251439194.
- Tanner, James (2014). The British Army since 2000. Oxford: Osprey Publishing. ISBN 978-1-78200-593-3.
- Taylor, Claire (2010). "A Brief Guide to Previous British Defence Reviews (SN/IA/5714)" (PDF). House of Commons Library: International Affairs and Defence Section. Retrieved 28 October 2019.
- Taylor, Claire (2011). "Defence Basing Review (SN06038)" (PDF). House of Commons Library: International Affairs and Defence Section. Retrieved 20 October 2020.
- Tucker, Spencer C. & Roberts, Priscilla (2005). The Encyclopedia of World War I: A Political, Social and Military History. Santa Barbara CA: ABC-CLIO. ISBN 978-1-85109-420-2.
- Verner, William Willoughby (1905). The Military Life of H. R. H. George, Duke of Cambridge. II. London: John Murray. OCLC 926919206.
- Vox Militaris (1995). "Land Command In: UKLF Out". The Army Quarterly. William Clowes & Sons. 125.
- Warner, Philip (2001) [1972]. The Crimean War: A Reappraisal. Ware, Hertfordshire: Wordsworth Editions Limited. ISBN 978-1-84022-247-0.
- Wheeler-Holohan, Vincent (1920). Divisional and Other Signs. New York: E. P. Dutton and Company. OCLC 9300443.
- Wyrall, Everard (1921a). The History of the Second Division, 1914–1918. I. London: Thomas Nelson and Sons. OCLC 1167884897. Retrieved 31 July 2014.
- Wyrall, Everard (1921b). The History of the Second Division, 1914–1918. II. London: Thomas Nelson and Sons. OCLC 1167884897. Retrieved 31 July 2014.
- Young, Geoffrey D. P.; Davies, David H. (1965). A Short History of the 5th Infantry Brigade. Aldershot: The Forces Press. OCLC 800929934.
Further reading
- Connnors, Brendan P (1965). A Short illustrated history of the Second Division 1809-1965. OCLC 660078373.
- Palmer, Eddie; Deakin, Maurice; Harby, Sid (2006). The War in Burma 1943-1945, incorporating the history of the 2nd and 36th Infantry Division. Fellowship of the Services, 365 (Matlock) Mess.
- Sale, Nigel (2014). Lie at the Heart of Waterloo: The Battle's Hidden Last Half Hour. Stroud, Gloucestershire: The History Press. ISBN 978-0-75096-276-6.
External links
- Imperial War Museam. "Memorial: 2nd Division". Imperial War Museum. Retrieved 3 January 2021.
- MOD. "2nd Division". Archived page from the British Army's website, briefly outlining the 2nd Division
- Various. "British Army of the Rhine Locations". The website includes photos and personal recollections from members of the 2nd Division, on various pages.
- War Memorials Online. "2nd Division". War Memorials Online. Retrieved 3 January 2021. This website includes photographs of the weathered memorial and faded central red star