Anglo-Iraqi War
The Anglo-Iraqi War was a British-led Allied military campaign during the Second World War against the Kingdom of Iraq under Rashid Ali, who had seized power in the 1941 Iraqi coup d'état, with assistance from Germany and Italy. The campaign resulted in the downfall of Ali's government, the re-occupation of Iraq by the British, and the return to power of the Regent of Iraq, Prince 'Abd al-Ilah, a British ally.
| Anglo-Iraqi War | |||||||
|---|---|---|---|---|---|---|---|
| Part of the Second World War (Mediterranean and Middle East theatre) | |||||||
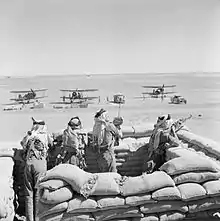
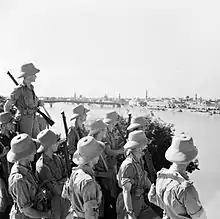 British soldiers at Baghdad, 11 June 1941 | |||||||
| |||||||
| Belligerents | |||||||
|
| ||||||
| Commanders and leaders | |||||||
| Strength | |||||||
| |||||||
| Casualties and losses | |||||||
Background
Mandatory Iraq
The Kingdom of Iraq (also referred to as Mesopotamia) was governed by Great Britain under a League of Nations mandate, the British Mandate of Mesopotamia, until 1932 when Iraq became nominally independent.[25] Before granting independence, Britain concluded the Anglo-Iraqi Treaty of 1930. The treaty included permission to establish military bases for British use and provide the facilities for the unrestricted movement of British forces through the country, upon request to the Iraqi government.[26][27] The conditions of the treaty were imposed by the British to ensure control of Iraqi petroleum. Many Iraqis resented these conditions because Iraq was still under the control of the British Government.[28]
After 1937, no British troops were left in Iraq and the government had become solely responsible for internal security.[29] The Royal Air Force (RAF) had been allowed to retain two bases; RAF Shaibah, near Basra and RAF Habbaniya (Air Vice-Marshal Harry George Smart, also air officer commanding RAF Iraq Command), between Ramadi and Fallujah.[30][31] The bases protected British petroleum interests and were a link in the air route between Egypt and India.[30] At the beginning of the Second World War, RAF Habbaniya became a training base, protected by No. 1 Armoured Car Company RAF, Iraq Levies and locally raised Iraqi troops, the RAF Iraq Levies.[32][33]
In September 1939, the Iraqi Government broke off diplomatic relations with Nazi Germany.[29] In March 1940, the nationalist and anti-British Rashid Ali replaced Nuri as-Said as Prime Minister of Iraq. Rashid Ali made covert contacts with German representatives in Ankara and Berlin, though he was not yet an openly pro-Axis supporter.[34] In June 1940, when Fascist Italy joined the war on the side of Germany, the Iraqi government did not break off diplomatic relations.[29] The Italian Legation in Baghdad became the chief centre for Axis propaganda and for fomenting anti-British feeling. In this, they were aided by Amin al-Husseini, the Grand Mufti of Jerusalem, who had been installed by the British, in 1921. The Grand Mufti had fled from the British Mandate of Palestine shortly before the war and later received asylum in Baghdad.[35] In January 1941, Rashid Ali resigned as prime minister and was replaced by Taha al-Hashimi amidst a political crisis and a possible civil war.[36]
Coup d'état
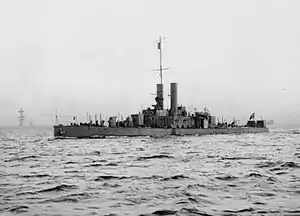
On 31 March, the Regent of Iraq, Prince 'Abd al-Ilah, learned of a plot to arrest him and fled Baghdad for RAF Habbaniya. From Habbaniya he was flown to Basra and given refuge on the gunboat HMS Cockchafer.[36] On 1 April, Rashid Ali and the Golden Square (four senior military commanders) seized power in a coup d'état. Rashid Ali proclaimed himself "Chief of the National Defence Government".[36] The Golden Square deposed Prime Minister Taha al-Hashimi[37] and Rashid Ali again became Prime Minister of Iraq. Ali did not overthrow the monarchy and named a new Regent to King Faisal II, Sherif Sharaf. Faisal and his family took refuge in the home of Mulla Effendi. The Golden Square also arrested pro-British citizens and politicians, but many managed to escape through Transjordan.
The Golden Square intended to refuse further concessions to Britain, retain diplomatic links with Fascist Italy, and exile prominent pro-British politicians. They thought Britain was weak and would negotiate with them.[38] On 17 April, Ali asked Germany for military assistance in the event of war with Britain.[39] Ali also tried to restrict British rights under Article 5 of the 1930 treaty when he insisted that newly arrived British troops be quickly transported through Iraq and to Palestine.[40]
Iraqi forces
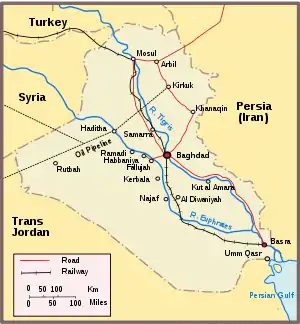
Before the war, the United Kingdom provided support to the Royal Iraqi Army (RIrA) and to the Royal Iraqi Air Force (RIrAF) through a small military mission based in Baghdad, commanded from 1938 by Major-General G. G. Waterhouse.[41][42] The RIrA was composed of approximately 60,000 men, most in four infantry divisions and one mechanized brigade.[15] The 1st and 3rd Divisions were stationed near Baghdad.[41][15] Also based within Baghdad was the Independent Mechanized Brigade, composed of a light-tank company, an armoured-car company, two battalions of motorised infantry, machine-gunners and an artillery brigade. The Iraqi 2nd Division was stationed in Kirkuk and the 4th Division in Al Diwaniyah, on the main rail line from Baghdad to Basra.[19] Unlike the modern use of the term "mechanized", in 1941 "mechanized" for the RIrA meant motorised (moving in lorries, fighting on foot).[19] The Iraqis fielded police units and about 500 irregulars under Arab guerrilla leader Fawzi al-Qawuqji, a ruthless fighter who did not hesitate to murder or mutilate prisoners. For the most part, Fawzi operated in the area between Rutbah and Ramadi, before being chased back into Syria.[43][44]
The RIrAF had 116 aircraft in seven squadrons and a training school; 50 to 60 of the aircraft were serviceable.[19][11] Most Iraqi fighter and bomber aircraft were at "Rashid Airfield" in Baghdad (formerly RAF Hinaidi) or in Mosul. Four squadrons and the Flying Training School were based in Baghdad. Two squadrons with close co-operation and general-purpose aircraft were based in Mosul. The Iraqis flew an assortment of aircraft types including Gloster Gladiator biplane fighters, Breda 65 fighter bombers, Savoia SM 79 medium bombers, Northrop/Douglas 8A fighter bombers, Hawker Hart (Hawker Nisr) biplane close co-operation aircraft, Vickers Vincent biplane light bombers, de Havilland Dragon biplane general purpose aircraft, de Havilland Dragonfly biplane general purpose aircraft and Tiger Moth biplane trainers. The RIrAF had another nine aircraft not allocated to squadrons and 19 aircraft in reserve.[19]
The Royal Iraqi Navy (RIrN) had four 100 long tons (100 t) Thornycroft gunboats, a pilot vessel and a minesweeper. All were armed and were based in the Shatt al-Arab waterways.[45]
British Force
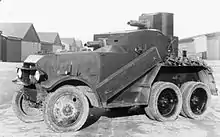
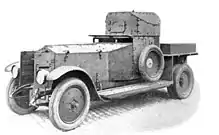
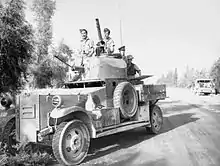
On 1 April 1941, the British forces in Iraq were small. Air Vice Marshal Harry Smart commanded British Forces in Iraq, a multi-service headquarters. Ground forces included Number 1 Armoured Car Company RAF and six companies of Assyrian Levies, composed of indigenous Eastern Aramaic speaking Christian Assyrians about 2,000 officers and other ranks strong, under the command of about twenty British officers.[46] The armoured-car company had 18 ancient Rolls Royce armoured cars built for the RAF in 1921 on converted chassis of World War I design.[47] The armoured car company had two large tanks (HMT 'Walrus' & 'Seal', based on Vickers Medium Dragon Mk 1 artillery tractors with Rolls-Royce turrets[48]) and a Carden-Lloyd Mk VI tankette.[49]
At RAF Habbaniya, No. 4 Flying Training School RAF (4FTS) had a miscellany of obsolescent bombers, fighters and trainers. Many of the 84 aircraft were unserviceable or were not fit for offensive use. At the start of hostilities, there were about 1,000 RAF personnel but only 39 pilots.[50] On 1 April, the British had three Gloster Gladiator biplane fighters used as officers' runabouts, thirty Hawker Audax biplane close co-operation aircraft, seven Fairey Gordon biplane bombers, 27 twin-engine Airspeed Oxford trainers, 28 Hawker Hart biplane light bombers (the bomber version of the Hawker Audax), twenty Hart trainers and a Bristol Blenheim Mk1 bomber. Audaxes could carry eight 20-pound bombs (9.1 kg) and twelve were modified to carry two 250 lb (110 kg) bombs. The Gordons could each carry two 250 lb bombs and the Oxfords were converted from carrying smoke bombs to carrying eight 20 lb bombs. The Hawker Harts could carry two 250 lb bombs. The Hawker trainers were unarmed and the Blenheim departed on 3 May. There was also an RAF Iraq Communications Flight at Habbaniya with three Vickers Valentia biplane flying boats.[51] At RAF Shaibah there was 244 Squadron with some Vickers Vincent bombers.[52] The naval forces available to support British actions in Iraq were part of the East Indies Station and included vessels from the Royal Navy (RN), the Royal Australian Navy (RAN), the Royal New Zealand Navy (RNZN) and the Royal Indian Navy (RIN).
British response
The British perspective was that relations with Rashid Ali's "National Defence Government" had become increasingly unsatisfactory. By treaty, Iraq was pledged to provide assistance to the United Kingdom in war and to permit the passage of British troops through its territory. There was a British Military Mission with the Iraq Army, and the Royal Air Force had stations at Habbaniya and at Shaibah.[53] From the outset, British Prime MinisterWinston Churchill advocated the non-recognition of Rashid Ali or his illegal "National Defence Government."[54]
On 2 April, Sir Kinahan Cornwallis, the new British Ambassador to Iraq, arrived in Baghdad.[39][53] He had much experience in Mesopotamia and had spent twenty years in the country as the advisor to King Faisal I. Cornwallis was highly regarded and he was sent to Iraq with the understanding that he would be able to hold a more forceful line with the new Iraqi government than had hitherto been the case. Unfortunately, Cornwallis arrived in Iraq too late to prevent the outbreak of war.[31]
On 6 April, AVM Smart requested reinforcements, but his request was rejected by the air officer commanding in the Middle East, Sir Arthur Longmore.[39] At this point in the Second World War, the situation developing in Iraq did not figure highly in British priorities. Churchill wrote, "Libya counts first, withdrawal of troops from Greece second. Tobruk shipping, unless indispensable to victory, must be fitted in as convenient. Iraq can be ignored and Crete worked up later."[55]
The British Chiefs-of-Staff and the Commander-in-Chief, India, General Claude Auchinleck, were in favour of armed intervention but the three local commanders-in-chief, already burdened by the Western Desert Campaign, East African Campaign and the Battle of Greece, suggested that the only force available was an infantry battalion in Palestine and the aircraft already in Iraq.[56][nb 7] The Government of India had a long-standing commitment to prepare an infantry division to protect the Anglo-Iranian oilfields and in July 1940, the leading brigade of the 5th Indian Infantry Division, was ordered to Iraq.[57] In August, the division was placed under the control of Middle East Command and diverted to the Sudan.[58] Since then, India Command had been investigating the move of troops by air from India to RAF Shaibah.
Operation Sabine
On 8 April, Winston Churchill contacted Leo Amery, Secretary of State for India, and asked him what force could be quickly sent from India to Iraq. Amery contacted General Auchinleck and Lord Linlithgow, Viceroy and Governor-General of India, the same day.[59] The response from India was that most of a brigade group due to set sail for Malaya on 10 April, could be diverted to Basra and the rest sent ten days later; 390 British infantry could be flown from India into RAF Shaibah and when shipping was available, the force could quickly be built up to a division.[11] On 10 April this offer was accepted by London, and the move of these forces was codenamed.[57] On the same day General Archibald Wavell, Commander-in-Chief of Middle East Command, informed London that he could no longer spare the battalion in Palestine and urged diplomacy and possibly a demonstration of air strength, rather than military intervention.[11]
On 10 April, Major-General William Fraser assumed control over Iraqforce, the land forces from India headed for Basra with orders to occupy the Basra-Shabai area to ensure the safe disembarkation of further reinforcements and to enable a base to be established in that area.[11][nb 8] The attitude of the Iraqi Army and local authorities was still uncertain and attempts might be made to oppose disembarkation. Fraser was closely to co-operate with the navy commander. If the landing was opposed, Fraser was to defeat the Iraqi forces and establish a base, but Fraser was not to infringe Iranian neutrality.[60] In early April, preparation for hostilities began at Habbaniya, aircraft were modified to carry bombs and light bombers such as the Audaxes were modified to carry larger bombs.[61]
On 12 April, Convoy BP7 left Karachi.[62] The convoy was composed of eight transports escorted by the Grimsby-class sloop HMAS Yarra. The forces transported by the convoy were under the command of Major-General Fraser, the commanding officer of the 10th Indian Infantry Division. The forces being transported consisted of two senior staff officers from the 10th Indian Division headquarters, the 20th Indian Infantry Brigade, the personnel of the Royal Artillery's 3rd Field Regiment;[11] but without their guns,[63] and certain ancillary troops.[60]
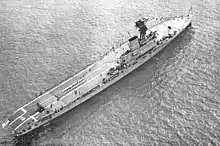
On 13 April, the Royal Navy force of four ships in the Persian Gulf were reinforced by the aircraft carrier HMS Hermes and two light cruisers, HMS Emerald and HMNZS Leander. HMS Hermes carried the Fairey Swordfish torpedo bombers of 814 Squadron.[62] The naval vessels which covered the disembarkation at Basra consisted of the aircraft carrier HMS Hermes, the light cruiser HMS Emerald, the light cruiser HMNZS Leander, the sloop HMS Falmouth, the gunboat HMS Cockchafer, the sloop HMS Seabelle, the minesweeper sloop HMIS Lawrence, and the sloop HMAS Yarra. On the morning of 15 April, Convoy BP7 was met at sea by HMS Seabelle from Basra. Later in the day the escort was reinforced by HMS Falmouth. On 17 April, the convoy was joined by HMIS Lawrence and then proceeded towards the entrance of the Shatt al-Arab. On 18 April, the convoy moved up the Shatt al-Arab and arrived at Basra at 0930 hrs. HMS Emerald was already in Basra.[4] On the same day, HMNZS Leander was released from support duties in the Persian Gulf. On 16 April, the Iraqi Government was informed that the British were going to invoke the Anglo-Iraq treaty to move troops through the country to Palestine. Rashid Ali raised no objection.
First arrivals in Basra
On 17 April, the 1st Battalion King's Own Royal Regiment (1st KORR) was flown into RAF Shaibah from Karachi in India.[35] Colonel Ouvry Roberts, the Chief Staff Officer of the 10th Indian Infantry Division, arrived with the 1st KORR.[64][65] By 18 April, the airlift of the 1st KORR to Shaibah was completed. The troop-carrying aircraft used for this airlift were 7 Valentias and 4 Atalantas supplemented by 4 DC-2s which had recently arrived in India.[4]
On 18 April, the 20th Indian Infantry Brigade landed at Basra.[11] Brigadier Donald Powell commanded this brigade. The 20th Indian Infantry Brigade included the 2nd battalion 8th Gurkha Rifles, 2nd battalion 7th Gurkha Rifles, and the 3rd battalion 11th Sikh Regiment. The landing of the force transported by Convoy BP7 was covered by infantry of the 1st KORR[66] which had arrived the previous day by air.[35] The landing was unopposed.[40]
By 19 April, the disembarkation of the force transported by Convoy BP7 at Basra was completed.[4] On the same day, seven aircraft[nb 9] were flown into RAF Habbaniya to bolster the air force there.[15] Following the landing of the 20th Indian Infantry Brigade, Rashid Ali requested that the brigade be moved quickly through the country and that no more troops should arrive until the previous force had left.[67] Sir Kinahan Cornwallis, the British Ambassador to Iraq, referred the issue to London and London replied that they had no interest in moving the troops out of the country and wanted to establish them within Iraq. Cornwallis was also instructed not to inform Rashid Ali who, as he had taken control of the country via a coup d'état, had no right to be informed about British troop movements.[61]
On 20 April, Churchill had written to Anthony Eden, the Foreign Secretary, and indicated that it should be made clear to Ambassador Cornwallis that the chief interest in sending troops to Iraq was the covering and establishment of a great assembly base near Basra. It was to be understood that what happened "up country", with the exception of Habbaniya, was at that time on an "altogether lower priority." Churchill went on to indicate that the treaty rights were invoked to cover the disembarkation, but that force would have been used if it had been required. Cornwallis was directed not to make agreements with an Iraqi government which had usurped its power. In addition, he was directed to avoid entangling himself with explanations to the Iraqis.[68]
Additional arrivals
On 29 April, having sailed from Bombay, the remaining elements of the 20th Infantry Brigade arrived at Basra on the three transports of Convoy BN1.[40][69] On 30 April, when Rashid Ali was informed that ships containing additional British forces had arrived, he refused permission for troops to disembark from them and began organising for an armed demonstration at RAF Habbaniya.[61] He did this while fully expecting German assistance would be forthcoming in the guise of aircraft and airborne troops.[66] Rashid Ali decided against opposing the landings at Basra.[40]
Also, on 29 April,[15] the British Ambassador, Sir Kinahan Cornwallis,[36] advised that all British women and children should leave Baghdad; 230 civilians were escorted by road to Habbaniya and during the following days, were gradually airlifted to Shaibah.[15] A further 350 civilians took refuge in the British Embassy and 150 British civilians in the American Legation.[70]
Reinforcement of Habbaniya
By the end of the month, Colonel Roberts and 300 of the 1st KORR had been flown from RAF Shaibah to RAF Habbaniya to reinforce the latter base.[15] Other than the 1st KORR, there were no trained British troops at Habbaniya bar the Number 1 Armoured Car Company RAF.[51]
Iraqi moves and escalation to war
At 03:00 hours on 30 April, RAF Habbaniya was warned by the British Embassy that Iraqi forces had left their bases, at Baghdad, and were heading west.[15] The Iraqi force was composed of between 6,000.[71]–9,000.[72] troops with up to 30 artillery pieces.[71] Within a few hours of RAF Habbaniya being warned, Iraqi forces occupied the plateau to the south of the base. Prior to dawn, reconnaissance aircraft were launched from RAF Habbaniya and reported that at least two battalions, with artillery, had taken up position on the plateau.[nb 10]
By 1 May, the Iraqi forces surrounding Habbaniya had swelled to an infantry brigade, two mechanised battalions, a mechanised artillery brigade with 12 3.7-inch mountain howitzers, a field artillery brigade with 12 18-pounder field guns and four 4.5-inch howitzers, 12 Crossley six-wheeled armoured cars, a number of Fiat light tanks, a mechanised machine gun company, a mechanised signal company, and a mixed battery of anti-aircraft and anti-tank guns. This totalled 9,000 regular troops along with an undetermined number of tribal irregulars and about 50 field guns.[73]
Iraqi demands
At 06:00 hours, an Iraqi envoy presented a message to the air officer commanding, Air Vice-Marshal Harry George Smart, stating that the plateau had been occupied for a training exercise.[74] The envoy also informed Smart that all flying should cease immediately[15] and demanded that no movements, either ground or air, take place from the base.[74] Smart replied that any interference with the normal training carried out at the base would be treated as an act of war.[15] Sir Kinahan Cornwallis, the British Ambassador located at the British Embassy in Baghdad and in contact with RAF Habbaniya via wireless, fully supported this action.[15]
British reconnaissance aircraft, already in the air, continued to relay information to the base; they reported that the Iraqi positions on the plateau were being steadily reinforced, they also reported that Iraqi troops had occupied the town of Fallujah.[15]
At 11:30 hours, the Iraqi envoy again made contact with Air Vice-Marshal Smart and accused the British of violating the Anglo-Iraqi treaty. Air Vice-Marshal Smart replied that this was a political matter and he would have to refer the accusation to Ambassador Cornwallis.[15] Meanwhile, Iraqi forces had now occupied vital bridges over the Tigris and Euphrates rivers as well as reinforcing their garrison at Ramadi; thus effectively cutting off RAF Habbaniya except from the air.[12]
Situation at RAF Habbaniya
During the morning, Smart and Roberts surveyed the situation, they determined that they were exposed to attack on two sides and dominated by Iraqi artillery; a single hit from an Iraqi gun might destroy the water tower or power station and, as a result, cripple resistance at Habbaniya in one blow – the base seemed at the mercy of the Iraqi rebels. The garrison did not have enough small arms and, apart from a few mortars, no artillery support.[75]
Air Vice-Marshal Smart controlled a base with a population of around 9,000 civilians[61] that was indefensible with the force of roughly 2,500 men currently available.[76] The 2,500 men included air crew and Assyrian Levies, who were prized by the British for their loyalty, discipline and fighting qualities.[77] There was also the possibility that the Iraqi rebels were waiting for dark before attacking. As a result, Air Vice-Marshal Smart decided to accept the tactical risks and stick to Middle East Command's policy of avoiding aggravation in Iraq by, for the moment, not launching a pre-emptive strike.[1]
Further exchanges
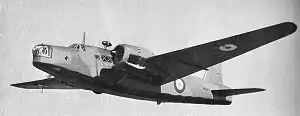
Further exchanges of messages took place between the British and Iraqi forces but none were able to defuse the situation. Air Vice-Marshal Smart again requested reinforcements and this time Air Officer Commanding[12] Sir Arthur Longmore[78] ordered 18 [nb 11] Vickers Wellington bombers to RAF Shaibah. The British Ambassador signalled the Foreign Office that he regarded the Iraqi actions as an act of war, which required an immediate air response. He also informed them that he intended to demand the withdrawal of the Iraqi forces and permission to launch air strikes to restore control, even if the Iraqi troops overlooking Habbaniya did withdraw it would only postpone aerial attacks.[12]
Decision to launch air strikes made
Also on 1 May, Ambassador Cornwallis received a response giving him full authority to take any steps needed to ensure the withdrawal of the Iraqi armed forces.[12] Churchill also sent a personal reply, stating: "If you have to strike, strike hard. Use all necessary force."[74] In the event that contact broke down between the British Embassy in Baghdad and the air base in Habbaniya, Air Vice-Marshal Smart was given permission to act on his own authority.[12]
Still in contact with the British Embassy and with the approval of Ambassador Cornwallis, Air Vice-Marshal Smart decided to launch air strikes against the plateau the following morning without issuing an ultimatum; as with foreknowledge the Iraqi force might start to shell the airbase and halt any attempt to launch aircraft.[12]
Battle
2 May
Most combat operations of the Anglo-Iraqi War centred on the Habbaniya area. Starting early on 2 May, British airstrikes were launched against the Iraqis from RAF Habbaniya.[12] While the largest number of British troops were ultimately assembled in the Basra area, an advance from Basra was not immediately practicable and did not get under way until after Rashid Ali's government was already collapsing. Initially, the Iraqi siege of RAF Habbaniya and the ability of the besieged British force there to withstand the siege was the primary focus of the conflict. Air Vice-Marshal Smart's decision to strike at the Iraqi positions with air power not only allowed his force to withstand the siege, but to neutralise much of Iraq's air power. While the relief force from Palestine arrived in Habbaniya after the siege was over, it did allow an immediate change over to the offensive.
Siege of Habbaniya
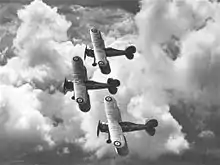
Air Vice-Marshal Smart's tactics to defend Habbaniya was to mount continuous bombing and strafing attacks with as many aircraft as possible.[79] At 05:00 on 2 May, 33 aircraft from Habbaniya,[12] out of the 56 operational aircraft based there,[80] and eight Wellington bombers, from Shaibah, began their attack.[12] A few of the Greek pilots being trained at Habbaniya also joined in the RAF attack.[6] Within minutes the Iraqis on the escarpment replied by shelling the base, damaging some planes on the ground. The Royal Iraqi Air Force (RIrAF) also joined in the fray over Habbaniya.[12] RAF attacks were also made against Iraqi air fields near Baghdad, which resulted in 22 aircraft being destroyed on the ground;[79] further attacks were made against the railway and Iraqi positions near Shaibah, with the loss of two planes.[12] Throughout the day, the pilots from Habbaniya flew 193 sorties[12] and claimed direct hits on Iraqi transports, armoured cars and artillery pieces;[81] however five aircraft had been destroyed and several others had been put out of service. On the base 13 people had lost their lives and a further 29 wounded, including nine civilians.[12]
By the end of the day, the Iraqi force outside of Habbaniya had grown to roughly a brigade.[82]
Iraqi forces, 2 May
The British attack on 2 May took the Iraqis completely by surprise. While the Iraqis on the escarpment carried live ammunition, many Iraqi soldiers were under the impression that they were on a training exercise. Rashid Ali and the members of the Golden Square were shocked by the fact that the British defenders at RAF Habbaniya were prepared to fight rather than negotiate a peaceful surrender. To compound the surprise and shock, many members of the Muslim Iraqi army were preparing for morning prayers when the attack was launched. When the news reached the Grand Mufti in Baghdad, he immediately declared a jihad against the United Kingdom. In addition, the flow of Iraq Petroleum Company oil to Haifa was completely severed.[83]
On 3 May, the British bombing of the Iraqis continued; troop and gun positions on the plateau were targeted as well as the supply line to Baghdad. The RIrAF base at Rashid was also attacked[82] and an Iraqi Savoia SM 79 bomber was intercepted and shot down heading for Habbaniya.[81] The following day further air attacks were carried out on RIrA troop positions and the RIrAF. A bombing raid was conducted by eight Wellington bombers on Rashid, which was briefly engaged by Iraqi fighters but no losses were suffered. Bristol Blenheims, escorted by Hurricanes, also conducted strafing attacks against airfields at Baghdad, Rashid and Mosul.[82]
On 5 May, due to a car accident, Air Vice-Marshal Smart was evacuated to Basra and then onward to India. Colonel Roberts assumed de facto command of the land operations at RAF Habbaniya after the departure of Smart.[84] Air Vice-Marshal John D'Albiac, from Greece, was to take command over aerial forces at Habbaniya[85] and of all RAF forces in Iraq. Further aerial attacks were conducted against the plateau during the day and following nightfall[82] Colonel Roberts ordered a sortie by the King's Own Royal Regiment (1st KORR) against the Iraqi positions on the plateau. The attack was supported by the Assyrian levies, some RAF armoured cars and two First World War-era 4.5-inch howitzers. The 4.5 in howitzers had been put in working order by some British gunners but had previously been decorating the entrance of the base's officers' mess.[64][86]
Iraqis abandon escarpment
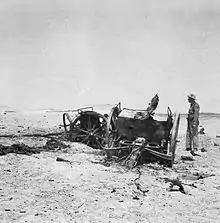
Late on 6 May, the Iraqis besieging Habbaniya pulled out. By dawn on Wednesday 7 May, RAF armoured cars reconnoitred the top of the escarpment and reported it to be deserted. The Iraqi force had abandoned substantial quantities of arms and equipment; the British garrison gained six Czechoslovakian-built 3.7 inch howitzers along with 2,400 shells, one 18-pounder gun, one Italian tank, ten Crossley armoured cars, 79 trucks, three 20 mm anti-aircraft guns with 2,500 shells, 45 Bren light machine-guns, eleven Vickers machine guns, and 340 rifles with 500,000 rounds of ammunition.[87]
The investment of Habbaniya, by Iraqi forces, had come to an end. The British garrison had suffered 13 men killed, 21 badly wounded, and four men were suffering battle fatigue. The garrison had inflicted between 500–1000 casualties on the besieging force and numerous more men had been taken prisoner. On 6 May alone, 408 Iraqi troops were captured.[87] The Chiefs-of-Staff now ordered that it was essential to continue to hit the Iraqi armed forces hard by every means available but avoiding direct attacks on the civilian population. The British objective was to safeguard British interests from Axis intervention in Iraq, to defeat the rebels and discredit Rashid's government.[10]
Iraqi reinforcements attacked
Meanwhile, Iraqi reinforcements were approaching Habbaniya. RAF armoured cars, reconnoitring ahead, soon discovered the village of Sin el Dhibban, on the Fallujah road, occupied by Iraqi troops. The 1st KORR and the Assyrian levies, supported by the RAF armoured cars, assaulted the position driving the Iraqis out and taking over 300 prisoners. The Iraqi force retreating from Habbaniya met with an Iraqi column moving towards Habbaniya from Fallujah in the afternoon. The two Iraqi forces met around 5 miles (8.0 km) east of Habbaniya on the Fallujah road. The reinforcing Iraqi column was soon spotted and 40 aircraft from RAF Habbaniya arrived to attack; the two Iraqi columns were paralysed and within two hours, more than 1,000 Iraqi casualties were inflicted and further prisoners were taken.[64][82] Later in the afternoon Iraqi aircraft carried out three raids on the airbase and inflicted some damage.[82]
Churchill praises Smart
Also on 7 May, apparently unaware of Smart's injury, Churchill sent the following message to Smart:
Your vigorous and splendid action has largely restored the situation. We are all watching the grand fight you are making. All possible aid will be sent. Keep it up![88]
Over the course of the next few days, the RAF, from Habbaniya and Shaibah, effectively eliminated the RIrAF. However, from 11 May, German Air Force (Luftwaffe) aircraft took the place of the Iraqi aircraft.[85][nb 12]
Axis intervention
During the time leading up to the coup d'état, Rashid Ali's supporters had been informed that Germany was willing to recognise the independence of Iraq from the British Empire. There had also been discussions on war material being sent to support the Iraqis and other Arab factions in fighting the British.
On 3 May, German Foreign Minister Joachim von Ribbentrop persuaded German dictator Adolf Hitler to secretly return Dr. Fritz Grobba to Iraq to head up a diplomatic mission to channel support to the Rashid Ali regime. The British quickly learned of the German arrangements through intercepted Italian diplomatic transmissions.[89]
Vichy France, which controlled neighbouring Syria, became keen to facilitate any agreement between Iraq, Italy and Germany.[90] Key Vichy figure Admiral Darlan was fully supportive of agreements with the Germans in order to promote long-term French aims, and had become increasingly incensed by British naval attacks on Vichy shipping, which sometimes brought the Royal Navy into direct confrontation with Vichy military forces.[91] It was therefore proposed that Axis access to Iraq would be facilitated via French-held Syria.[92]
On 6 May, in accordance with the Paris Protocols, Germany concluded a deal with the Vichy French government to release war materials, including aircraft, from sealed stockpiles in Syria and transport them to the Iraqis. The French also agreed to allow passage of other weapons and material as well as loaning several airbases in northern Syria, to Germany, for the transport of German aircraft to Iraq.[93] Between 9 May and the end of the month, about one-hundred German and about twenty Italian aircraft landed on Syrian airfields.[94] Darlan had actually ensured that the Protocols included a proposal that the French would launch an offensive against the British-held Iraqi oilfields and the oil would be made available to the Germans.[95]
Fliegerführer Irak
Also on 6 May, the Luftwaffe ordered Colonel Werner Junck to take a small force to Iraq, to operate out of Mosul. Between 10 and 15 May the aircraft arrived in Mosul via Vichy French airbases, in Syria, and then commenced regular aerial attacks on British forces. The arrival of these aircraft was the direct result of fevered consultations between Baghdad and Berlin in the days following RAF strikes on the Iraqi forces above Habbaniya. The Luftwaffe force, under the direction of Lieutenant General Hans Jeschonnek, was named "Flyer Command Iraq" (Fliegerführer Irak)[nb 13] and was under the tactical command of Colonel Junck. On 11 May, the first three Luftwaffe planes arrived at Mosul via Syria. At least 20 bombers were initially promised; however, in the end Junck's unit consisted of between 21 and 29 aircraft, all painted with Royal Iraqi Air Force markings.[7][20][89][nb 14]
Major Axel von Blomberg was sent to Iraq with Sonderstab F ("Special Staff F"), the German military mission commanded by General Hellmuth Felmy. He was to command a Brandenburgers Commando reconnaissance group in Iraq that was to precede Fliegerführer Irak.[97] He was also tasked with integrating Fliegerführer Irak with Iraqi forces in operations against the British.[89] On 15 May, he flew from Mosul to Baghdad. On its approach to Baghdad, the aircraft was engaged by Iraqi ground fire, and von Blomberg was killed.[98]
At this time, Germany and the Soviet Union were still allies (due to the Molotov–Ribbentrop Pact of 1939) and this was reflected in Soviet actions regarding Iraq. On 12 May, the Soviet Union recognised Rashid Ali's "National Defence Government."[99] An Iraqi-Soviet exchange of notes established diplomatic relations between the two governments.[100]
Vichy French supplies from Syria
On 13 May, the first trainload of supplies, from Syria, arrived in Mosul via Turkey. The Iraqis took delivery of 15,500 rifles, with six million rounds of ammunition, 200 machine guns, with 900 belts of ammunition, and four 75 mm field guns together with 10,000 shells. Two additional deliveries were made on 26 and 28 May, which included eight 155 mm guns, with 6,000 shells, 354 machine pistols, 30,000 grenades, and 32 trucks.[101]
On 14 May, according to Winston Churchill, the RAF was authorised to act against German aircraft in Syria and on Vichy French airfields.[102] On the same day, two over-laden Heinkel 111 bombers were left in Palmyra in central Syria because they had damaged rear wheels. British fighters entered French air space and strafed and disabled the damaged Heinkels.[101] On 15 May an attack was made on German aircraft on the ground at Damascus, killing a French officer in the process.[103]
By 18 May, Junck's force had been whittled down to 8 Messerschmitt Bf 110 fighters, 4 Heinkel He 111 bombers, and 2 Junkers Ju 52 transports. This represented roughly a 30 percent loss of his original force. With few replacements available, no spares, poor fuel, and aggressive attacks by the British, this rate of attrition did not bode well for Fliegerführer Irak. Indeed, near the end of May, Junck had lost 14 Messerschmitts and 5 Heinkels.[104] On 18 May four Vichy Morane 406s chased British aircraft flying above Syria, and another three Moranes attacked British Bristol Blenheims near Damascus without causing damage.[105] On 19 May another British aerial attack near Damascus damaged several French aircraft and wounded a French soldier, while on 20 May British aircraft intentionally shot up six French aircraft and fifty vehicles.[106]
More dogfights between Vichy and British aircraft took place on 24 May, as well as a British sabotage mission by 13 sappers on the Aleppo-Mosul railway line, which led to a French armoured car firing on the British.[107] Further British-French aerial combat occurred on 28 May, in which a Blenheim was shot down by a French fighter, causing the death of all of its crew.[108] On the same day, French Morane fighters escorted four Nazi Ju52s near Nerab in eastern Syria.[109] More Vichy-British aerial combat occurred on 31 May.[110]
Britain was incensed that Vichy had assisted Italy and Germany in their attacks on the British in Iraq; attacks that would not have been possible if it was not for the connivance of the Vichy French.[111] The Vichyite actions ensured Britain began preparing for an invasion of Syria, which ultimately led to the Syria-Lebanon campaign of June-July.[112]
Italy
On 27 May, after being invited by Germany, 12 Italian Fiat CR.42s of the 155.a Squadriglia (renamed Squadriglia speciale Irak) of the Regia Aeronautica Italiana (Royal Italian Air Force) arrived at Mosul to operate under German command.[8] Also present were a Savoia-Marchetti SM.79 and Savoia-Marchetti SM.81 acting as pathfinder aircraft, which were stationed in Aleppo; personnel and equipment were brought in on three Savoia-Marchetti SM.82s.[113] By 29 May, Italian aircraft were reported in the skies over Baghdad.[114] Churchill claimed that the Italian aircraft accomplished nothing,[115] but on 29 May near Khan Nuqta the Italians intercepted a flight of Hawker Audaxes escorted by Gloster Gladiators of No. 94 Squadron. In the resulting combat, two Gladiators were lost for one CR.42 shot down by Wing Commander Wightman. This was the final aerial battle of the Anglo-Iraqi War.[113] The SM.79 was destroyed on the ground in Aleppo by RAF bombers. Three CR.42s were damaged and had to be abandoned during the Axis withdrawal from Iraq. The remaining Italian aircraft were evacuated at the end of May and used to defend Pantelleria.[116]
Plans were drawn up to supply troops but the German high command was hesitant and required the permission of Turkey for passage. In the end the Luftwaffe found conditions in Iraq intolerable, as spare parts were not available and even the quality of aircraft fuel was far below the Luftwaffe's requirements. With each passing day fewer aircraft remained serviceable and ultimately, all Luftwaffe personnel were evacuated on the last remaining Heinkel He 111.
Advance from Palestine
On 2 May, the day AVM Smart launched his airstrikes, Wavell continued to urge for further diplomatic action to be taken with the Iraqi government to end the current situation and accept the Turkish government's offer of mediation. He was informed by the Defence Committee that there would be no accepting the Turkish offer and that the situation in Iraq had to be restored.
Rutbah
Before Smart launched his airstrikes on 2 May, members of the Iraqi Desert Police had seized the fort at Rutbah for the "National Defence Government."[117] On 1 May, the police opened fire on British workers in Rutbah.[118] In response to these Iraqi actions, Major-General Clark had ordered the mechanised squadron of the Transjordan Frontier Force (TJFF), which was based at H4 pumping station, to seize the fort for the British. When the members of the TJFF refused, they were marched back to H3 and disarmed.[117]
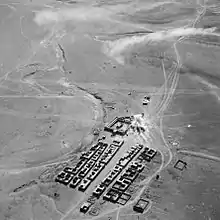
By the end of the first day of airstrikes, there had been reports that elements of the Royal Iraqi Army (RIrA) were advancing on the town of Rutbah.[66] C Company of the 1st Battalion The Essex Regiment were ordered to travel from Palestine to H4, between Haifa and Iraq; from here the company would join a detachment of RAF armoured cars and defend the position from the Iraqi rebels.[119]
On 4 May, Churchill ordered Wavell to dispatch a force from Palestine.[120] On 5 May, Wavell was placed in command of operations in northern Iraq and General Maitland Wilson was called back from Greece to take command of forces in Palestine and Transjordan. The Defence Committee and chiefs-of-staff rationale for taking military action against the Iraqi rebels was that they needed to secure the country from Axis intervention and considered Rashid Ali to have been conspiring with the Axis powers.[121] The Chiefs-of-Staff accepted full responsibility for the dispatch of troops to Iraq.[10]
On 8 May a column of the Arab Legion, under Glubb Pasha, reached the fort at Rutbah.[3] They picketed the ground surrounding the fort, to wait the RAF bombardment. The fort was defended by approximately 100 policemen, the majority of them being Iraqi Desert Police.[122] The H4-based Blenheims of 203 Squadron arrived and bombed the fort, and thinking that they had surrendered, left. The fort did not surrender and the RAF returned twice that day to bomb the fort without success.
The next day, the RAF continued to bomb the fort at intermittent intervals. One plane sustained such heavy small-arms fire that it crashed on the way home, killing the pilot. That evening, 40 trucks armed with machine guns arrived at the fort to reinforce the garrison. Half of the trucks were irregulars under the command of Fawzi al-Qawuqji and the other half were Iraqi Desert Police. Glubb decided to withdraw the troops back to H3 to await the reinforcement of the main column.
The Arab Legion returned to H3 on the morning of 10 May, and found No. 2 Armoured Car Company RAF under Squadron Leader Michael Casano waiting there. They had been sent up ahead of the main column to assist the Arab Legion in taking Rutbah. Casano took his RAF armoured cars to Rutbah whilst the Arab Legion replenished their supplies at H3. Casano's armoured cars fought an action against al-Qawuqji's trucks for most of the rest of the day, and although the result was not decisive the trucks retired to east under the cover of dark to leave the garrison to its fate. That night the RAF succeeded in a night bombing, with several bombs landing inside the fort.
Following the withdrawal of al-Qawuqji's trucks and the successful bombing by the RAF, the garrison withdrew from the fort under the cover of dark. In the morning, the Arab Legion column arrived and garrisoned the fort whilst Casano's armoured cars continued to fight remnants of the Iraqi Desert Police's forces.[123]
Habbaniya Force
The force put together in Palestine by Wavell was codenamed Habforce, short for Habbaniya Force.[124] The force was placed under the command of Major-General George Clark. Clark was already the commander of the 1st Cavalry Division which included the 4th Cavalry Brigade, the 5th Cavalry Brigade, and the 6th Cavalry Brigade. After Wavell complained that using any of the force stationed in Palestine for service in Iraq would put Palestine and Egypt at risk, Churchill wrote Hastings Ismay, Secretary of the Chiefs-of-Staff Committee, and asked: "Why would the force mentioned, which seems considerable, be deemed insufficient to deal with the Iraq Army?" Concerning the 1st Cavalry Division specifically, he wrote: "Fancy having kept the cavalry division in Palestine all this time without having the rudiments of a mobile column organised!"[125] On balance, Wavell wrote that the 1st Cavalry Division in Palestine had been stripped of its artillery, its Engineers, its Signals, and its transport to provide for the needs of other formations in Greece, North Africa, and East Africa. While one motorised cavalry brigade could be provided, this was only possible by pooling the whole of the divisional motor transport.[126]
It was after the TJFF refused to enter Iraq that Clark decided to divide Habforce into two columns.[117][127] The first column was a flying column[118] codenamed Kingcol. Kingcol was named after its commanding officer, Brigadier James Kingstone,[124] and was composed of the 4th Cavalry Brigade, two companies of the 1st battalion The Essex Regiment, the Number 2 Armoured Car Company RAF, and 237 Field Battery of 25 pounder howitzers from 60th (North Midland) Field Regiment, Royal Artillery.[128] The second column, the Habforce main force, under the command of Lieutenant-Colonel J. S. Nichols, was composed of the remaining elements of the 1st battalion The Essex Regiment, the remainder of the 60th Field Regiment, RA, one anti-tank battery, and ancillary services. In addition to Kingcol and the Habforce main force, there was available to Major-General Clark a 400-man strong detachment of the Arab Legion (al-Jaysh al-Arabī)[3][129] in the Emirate of Transjordan. The Arab Legion consisted of three mechanised squadrons[74] transported in a mixture of civilian Ford trucks and equipped with home-made armoured cars.[130] Unlike the TJFF, the Arab Legion was not part of the British Army. Instead, the Arab Legion was the regular Army of Transjordan and it was commanded by Lieutenant-General John Bagot Glubb, also known as "Glubb Pasha."[131]
Kingcol
During the morning of 11 May, Kingcol departed from Haifa[129] with orders to reach Habbaniya as quickly as possible.[118] The occasion was the last all-horse operation in British military history.[132] On 13 May, Kingcol arrived in Rutbah but found no military presence there. Glubb Pasha and the Arab Legion had already moved on. The flying column under Brigadier Kingstone then conducted maintenance at Rutbah before moving on themselves. On 15 May, the first contact was made with the Iraqi military when a Blenheim bomber strafed the column and dropped a bomb; no damage was inflicted and no casualties were sustained.[133][nb 15] On 16 May, further bombing attacks were made against the column when it was attacked by the Luftwaffe, again no damage was sustained but there were a few casualties.[85][134]
Also on 15 May, Fraser went sick and was replaced as the commander of the 10th Indian Division.[135] His illness had led to him losing the confidence of his own staff and he was replaced by the newly promoted Major-General William Slim. Slim would go on to show himself as one of the most dynamic and innovative British commanders of the war.[65] Also in early May, Longmore was replaced as Air Officer Commanding in the Middle East by his deputy, Sir Arthur Tedder.[31]
Arrival at Habbaniya
During the late evening of 17 May, Kingcol reached the vicinity of Habbaniya. The next morning the column entered the RAF base[134][136] and throughout the day the remainder of the 1st battalion The Essex Regiment were airlifted into the base.[137] The force dispatched from Palestine to relieve the Iraqi siege of RAF Habbaniya arrived about 12 days after the siege was lifted.[114]
Battle of Fallujah
With Habbaniya secure, the next objective for British forces was to secure the town of Fallujah as a preliminary objective before being able to march on Baghdad.[85] An Iraqi Brigade group was holding the town and bridge of Fallujah denying the road to Baghdad; a further Brigade group was holding the town of Ramadi, west of Habbaniya, barring all movement westwards.[138] Colonel Roberts dismissed the idea of attacking Ramadi because it was still garrisoned heavily by the Iraqi Army and was largely cut off by self-imposed flooding. Roberts would leave Ramadi isolated and, instead, secure the strategically important bridge over the Euphrates at Fallujah.[139]
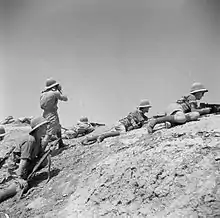
In the week following the withdrawal of the Iraqi forces near Habbaniya, Colonel Roberts formed what became known as the Habbaniya Brigade. The brigade was formed by grouping the 1st battalion The Essex Regiment from Kingcol with further infantry reinforcements that had arrived from Basra, the 2nd battalion 4th Gurkha Rifles, and some light artillery.[137][140]
During the night of 17–18 May, elements of the Gurkha battalion, a company of RAF Assyrian Levies, RAF Armoured Cars and some captured Iraqi howitzers crossed the Euphrates using improvised cable ferries.[nb 16] They crossed the river at Sin el Dhibban and approached Fallujah from the village of Saqlawiyah. During the early hours of the day, one company of the 1st battalion KORR were air transported by 4 Valentias and landed on the Baghdad road beyond the town near Notch Fall. A company of RAF Assyrian Levies, supported by artillery from Kingcol, was ordered to secure the bridge across the river. Throughout the day the RAF bombed positions in the town and along the Baghdad road, avoiding a general bombardment of the town because of the civilian population. On 19 May 57 aircraft began bombarding Iraqi positions within and around Fallujah before dropping leaflets requesting the garrison to surrender; no response was given and further bombing operations took place. The RAF dropped ten tons of bombs on Fallujah in 134 sorties.[142]
During the afternoon a ten-minute bombardment of Iraqi trenches near the bridge was made before the Assyrian Levies advanced, covered by artillery fire. Facing little opposition they captured the bridge within 30 minutes; they were then met by an Iraqi envoy who offered the surrender of the garrison and the town. 300 prisoners were taken and no casualties had been sustained by the British force.[143][144][145] The Luftwaffe responded to the British capture of the city by attacking the Habbaniya airfield, destroying and damaging several aircraft and inflicting a number of casualties.[146] On 18 May, Major-General Clark and AVM D'Albiac arrived in Habbaniya by air. They determined not to interfere with the ongoing operations of Colonel Roberts.[140] On 21 May, having secured Fallujah, Roberts returned to Shaibah and to his duties with the 10th Indian Infantry Division.[142]
Iraqi counterattack
On 22 May, the Iraqi 6th Infantry Brigade, of the Iraqi 3rd Infantry Division, conducted a counter-attack against the British forces within Fallujah. The Iraqi attack started at 02:30 hours supported by a number of Italian-built L3/35 light tanks. By 03:00 the Iraqis reached the north-eastern outskirts of the town. Two light tanks, which had penetrated into the town, were quickly destroyed. By dawn British counter-attacks had pushed the Iraqis out of north-eastern Fallujah. The Iraqis now switched their attack to the south-eastern edge of the town. But this attack met stiff resistance from the start and made no progress. By 10:00 Kingstone arrived with reinforcements, from Habbaniya, who were immediately thrown into battle. The newly arrived infantry companies, of the Essex Regiment, methodically cleared the Iraqi positions house-by-house. By 18:00 the remaining Iraqis had fled or were taken prisoner, sniper fire was silenced, six Iraqi light tanks were captured, and the town was secure.[147] On 23 May, aircraft of Fliegerführer Irak made a belated appearance. British positions at Fallujah were strafed on three separate occasions. But, while a nuisance, the attacks by the Luftwaffe accomplished little. Only one day earlier an air assault coordinated with Iraqi ground forces might have changed the outcome of the counter-attack.[148]
Jezireh
During this period of time, Glubb Pasha's Legionnaires dominated the tribal country north of Fallujah between the Euphrates and the Tigris, an area known as Jezireh. Lieutenant-General Glubb had been instructed to persuade the local tribes to stop supporting Rashid Ali's government. Using a combination of propaganda and raids against Iraqi government posts, his actions proved to be remarkably successful.[149] The British also used this period of time to increase air activity against the northern airfields of the Luftwaffe and to finally crush the German effort to support the Iraqis.[150]
Basra
In response to the initial Iraqi moves, the 10th Indian Infantry Division, under Major-General Fraser, occupied Basra airport, the city's docks, and the power station.[70] Elements of the 20th Indian Infantry Brigade, under Brigadier Powell, were used to occupy these sites. Between 18 and 29 April, two convoys had landed this brigade in the Basra area. 2nd battalion 8th Gurkha Rifles guarded the RAF airfield at Shabaih, 3rd battalion 11th Sikh Regiment secured the Maqil docks, and 2nd battalion 7th Gurkha Rifles were held in reserve.[151] Otherwise, no major operations took place in the Basra area. The principal difficulty was that there were insufficient troops to take over Maqil, Ashar, and Basra City concurrently. While the Iraqi troops in Basra agreed to withdraw on 2 May, they failed to do so.[114] On 6 May, the 21st Indian Infantry Brigade under the command of Brigadier Charles Joseph Weld arrived and disembarked at Basra. This was the 10th Indian Infantry Division's second brigade to arrive in Iraq.[151] The 21st Indian Infantry Brigade included 4th battalion 13th Frontier Force Rifles,[nb 17] 2nd battalion 4th Gurkha Rifles, and 2nd battalion 10th Gurkha Rifles.
Ashar
Starting on 7 May and ending 8 May, elements of the 20th Indian Infantry Brigade and the 21st Indian Infantry Brigade captured Ashar, near Basra. Ashar was well defended and the Iraqi defenders inflicted a number of casualties on the British attackers. The British units involved were A, B, C, and D companies of 2nd battalion 8th Gurkha Rifles and a half section of Rolls Royce armoured cars from 4th battalion 13th Frontier Force Rifles. 2nd battalion 4th Gurkha Rifles were held in reserve. As a result of the successful action against Ashar, Basra City was secured without a fight. However, armed resistance from Iraqi police and Army units continued until 17 May.[152] While the Basra area was now secured, it was flood season in Iraq, and the difficulty of northward movement from Basra by rail, road, or river towards Baghdad stifled further operations. In addition, Iraqi forces occupied points along the Tigris and along the railway to further discourage northward movement.[50]
On 8 May, operations in Iraq were passed, from under the control of Auchinleck's India Command, to the command of Wavell's Middle East Command.[10][153] Lieutenant-General Edward Quinan arrived from India to replace Fraser as commander of Iraqforce. Quinan's immediate task was to secure Basra as a base. He was ordered by Wavell not to advance north until the co-operation of the local tribes was fully assured. Quinan could also not contemplate any move north for three months on account of the flooding of the Tigris and Euphrates.[10][154] Directives were issued to Quinan prior to his assuming command. On 2 May, he had been directed as follows: "(a) Develop and organise the port of Basra to any extent necessary to enable such forces, our own or Allied, as might be required to operate in the Middle East including Egypt, Turkey, Iraq, and Iran, to be maintained. (b) Secure control of all means of communication, including all aerodromes and landing grounds in Iraq, and develop these to the extent requisite to enable the Port of Basra to function to its fullest capacity." Quinan was further instructed to "begin at once to plan a system of defences to protect the Basra Base against attack by armoured forces supported by strong air forces, and also to be ready to take special measures to protect: (i) Royal Air Force installations and personnel at Habbaniya and Shaiba. (ii) The lives of British subjects in Baghdad and elsewhere in Iraq. (iii) The Kirkuk oilfields and the pipe line to Haifa." Lastly, Quinan was directed "to make plans to protect the Anglo-Iranian Oil Company's installations and its British employees in South West Iran if necessary." Quinan was informed that "it was the intention to increase his force up to three infantry divisions and possibly also an armoured division, as soon as these troops could be despatched from India."[4]
Operations Regulta and Regatta
On 23 May, Wavell flew to Basra to discuss further reinforcements and operations in Iraq with Auchinleck. Additionally, he instructed Quinan, commanding the Indian forces there, to make plans for an advance from Basra towards Baghdad.[50] On 27 May, the forces from Basra started to advance northwards. In Operation Regulta, the 20th Indian Infantry Brigade, known as the "Euphrates Brigade", advanced along the Euphrates by boat and by road. In Operation Regatta, the 21st Indian Infantry Brigade, known as the "Tigris Brigade", advanced up the Tigris by boat to Kut.[43][155] On 30 May, the 10th Indian Infantry Division's third brigade, 25th Indian Infantry Brigade under Brigadier Ronald Mountain, arrived and disembarked at Basra. The 25th Indian Infantry Brigade included 3rd battalion 9th Jat Regiment, 2nd battalion 11th Royal Sikh Regiment, and 1st battalion 5th Mahratta Light Infantry.[156] In June 1941, additional British forces arrived in Basra from India. On 9 June, the 17th Indian Infantry Brigade arrived and, on 16 June, the 24th Indian Infantry Brigade arrived.[43]
Iraqi collapse
The British forces from Habbaniya pressed on to Baghdad after the defence of Fallujah. Major-General Clark decided to maintain the momentum because he expected that the Iraqis did not appreciate just how small and just how vulnerable his forces actually were. Clark had a total of about 1,450 men to attack at least 20,000 Iraqi defenders. However, Clark did enjoy an advantage in the air.[157]
Baghdad
On the night of 27 May, the British advance on Baghdad began. The advance made slow progress and was hindered by extensive inundations and by the many destroyed bridges over the irrigation waterways which had to be crossed.[115] Faced with Clark's advance, the government of Rashid Ali collapsed. On 29 May, Rashid Ali, the Grand Mufti, and many members of the "National Defence Government" fled to Persia. After Persia, they went on to Germany. On the morning of 31 May, the Mayor of Baghdad and a delegation approached British forces at the Washash Bridge. With the Mayor was Sir Kinahan Cornwallis, the British Ambassador, who had been confined to the British Embassy in Baghdad for the past four weeks.[21] Terms were quickly reached and an armistice was signed.[158][159] The Iraqi armed forces in the vicinity of Baghdad still greatly outnumbered the British and the British decided not to occupy Baghdad immediately. This was done partly to disguise the weakness of British forces outside the city.[160] On 1 June, Prince 'Abd al-Ilah returned to Baghdad as the Regent and the monarchy and a pro-British government were put back in place. On 2 June, Jamil al-Midfai was named Prime Minister.[160]
Aftermath
In the immediate aftermath of the fall of Rashid Ali's "National Defence Government" and the armistice, Baghdad was torn apart by rioting and looting.[114] Much of the violence was channelled towards the city's Jewish Quarter. Some 120 Jewish residents lost their lives and about 850 were injured before the Iraqi police were ordered to restore order with live ammunition.[160]
At least two British accounts of the conflict praised the efforts of the air and ground forces at RAF Habbaniya. According to Churchill, the landing of the 20th Indian Infantry Brigade at Basra on 18 April was "timely." In his opinion, the landing forced Rashid Ali into premature action. However, Churchill added that the "spirited defence" of Habbaniya by the Flying School was a "prime factor" in British success.[161] Wavell wrote that the "gallant defence" of Habbaniya and the bold advance of Habforce discouraged the Iraqi Army, while the Germans in their turn were prevented from sending further reinforcements by "the desperate resistance of our troops in Crete, and their crippling losses in men and aircraft."[21]
On 18 June, Lieutenant-General Quinan was given command of all British and Commonwealth forces in Iraq. Before this, Iraqforce was more or less limited to the forces landed at and advancing from Basra.[114]
After the Anglo-Iraq War, elements of Iraqforce (known as Iraq Command from 21 June) were used to attack the Vichy French-held Mandate of Syria during the Syria-Lebanon campaign, which started 8 June and ended 14 July. Iraq Command (known as Persia and Iraq Force (Paiforce from 1 September) was also used to attack Persia during the Anglo-Soviet invasion of Persia, which took place in August to September 1941. Forward defences against a possible German invasion from the north through the Caucasus were created in 1942, and the strength of Paiforce peaked at the equivalent of over 10 brigades before the Russians halted the German threat at the Battle of Stalingrad. After 1942, Iraq and Persia were used to transit war material to the Soviet Union and the British military presence became mainly lines of communication troops.
On 20 June, Churchill told Wavell that he was to be replaced by Auchinleck.[162] Of Wavell, Auchinleck wrote: "In no sense do I wish to infer that I found an unsatisfactory situation on my arrival – far from it. Not only was I greatly impressed by the solid foundations laid by my predecessor, but I was also able the better to appreciate the vastness of the problems with which he had been confronted and the greatness of his achievements, in a command in which some 40 different languages are spoken by the British and Allied Forces."[163]
British forces were to remain in Iraq until 26 October 1947 and the country remained effectively under British control. The British considered the occupation of Iraq necessary to ensure that access to its strategic oil resources be maintained. On 18 August 1942, General Maitland Wilson was appointed Commander-in-Chief of the Persia and Iraq Command. By 15 September, he was headquartered in Baghdad. Wilson's primary task was "to secure at all costs from land and air attack the oil fields and oil installations in Persia and Iraq." His secondary task was "to ensure the transport from the Persian Gulf ports of supplies to Russia to the maximum extent possible without prejudicing [his] primary task."[164]
While Rashid Ali and his supporters were in alliance with the Fascist Regime in Italy[165] the war demonstrated that Iraq's independence was at best conditional on British approval of the government's actions. Rashid Ali and the Mufti of Jerusalem fled to Persia, then to Turkey, then to Italy, and finally to Berlin, Germany, where Ali was welcomed by Hitler as head of the Iraqi government-in-exile.
Battle honours
The British and Commonwealth system of battle honours recognised participation in the Anglo-Iraq War by the award to 16 units of the battle honour Iraq 1941, for service in Iraq between 2–31 May 1941. The award was accompanied by honours for three actions during the war: Defence of Habbaniya awarded to one unit for operations against the Iraqi rebels between 2–6 May, Falluja awarded to two units for operations against the Iraqi rebels between 19–22 May, and Baghdad 1941 awarded to two units for operations against the Iraqi rebels between 28–31 May.[166]
Further reading
- Jackson, Ashley (2018). Persian Gulf Command: A History of the Second World War in Iran and Iraq. New Haven: Yale University Press. ISBN 978-0-300-22196-1.
Notes
Footnotes
- On 30 May Rashid Ali and his supporters fled to Persia. At 4 am on 31 May, the Mayor of Baghdad signed an armistice on a bridge across the Washash Canal.[2] Mercol, Gocol, and Harcol operations against guerrillas continued into June.
- HMAS Yarra, representing Australia, participated at sea.[4]
- HMNZS Leander, representing New Zealand, participated at sea.[5]
- Greek airmen undergoing training at Habbaniya flew sorties against the Iraqis.[6]
- See Iraqforce; Habforce constituted one reinforced Brigade group while the force based at RAF Habbaniya constituted the other.
- 85 aircraft based at RAF Habbaniya.[15][16] 18 bombers were flown into RAF Shaibah as reinforcements[12] while No. 244 Squadron RAF was already based there equipped with Vicker Vincents.[16] No. 84 Squadron RAF was rebased to RAF Aqir, in Palestine, to support British ground forces during the rebellion.[16] Four Bristol Blenheims of No. 203 Squadron RAF were flown to RAF Lydda, also in Palestine, to fly combat missions over Iraq.[16]
- See Role of Middle East Command for further details on the three Commanders-in-Chief based within the Mediterranean and Middle East.
- Wavell indicates that Fraser commanded the forces being landed at Basra.[60]
- Six Gloster Gladiators fighters and one Vickers Wellington bomber, carrying spare parts.[15]
- Lyman states that on the first day the Iraqi force had in fact deployed three infantry battalions and an artillery brigade on the escarpment.[73] Wavell indicates that, on 30 April, two brigades and some armoured cars took up positions on the escarpment.[4]
- Eight bombers from No. 70 Squadron RAF were initially dispatched and were later followed by 10 bombers from No. 37 Squadron RAF.[12]
- The Wellington bombers, based at Shaibah, only took part in these aerial attacks up to 10 May and returned to Egypt two days later.[85]
- Some sources indicate that this unit was named "Special Force Junck" (Sonderkommando Junck)[96]
- Playfair states this force was made up initially of 14 Messerschmitt 110 and seven Heinkel 111s.[7] Lyman states it was 12 Heinkel 111s and 12 Messerschmitt 110s,[89] while Mackenzie states the force consisted of 15 Heinkel 111s and 14 Messerschmitt 110s.[20]
- Accounts vary, but there are indications that the "Blenheim bomber" was a German Heinkel 111 of Fliegerführer Irak.[39]
- The cable ferry was fashioned by a section of the Queen Victoria's Own Madras Sappers and Miners flown in from Basra. Loaded barges were hooked onto a fixed wire cable they had stretched taught across the river, which was 750 feet (230 m) wide at the point of crossing.[141]
- Included two troops of Rolls Royce armoured cars.[151]
Citations
- Playfair 1956, pp. 182–183.
- Playfair 1956, pp. 192, 332.
- Young, p. 7.
- Wavell, p. 4094.
- Waters, p. 24.
- Carr, John (2012). On Spartan Wings – The Royal Hellenic Air Force in World War Two. Pen & Sword Aviation. ISBN 978-1-84884-798-9.
- Playfair 1956, p. 195.
- Playfair 1956, p. 196.
- Sutherland, Jon; Canwell, Diane (2011). Vichy Air Force at War: The French Air Force that Fought the Allies in World War II. Barnsley: Pen & Sword Aviation. pp. 38–43. ISBN 978-1-84884-336-3.
- Playfair 1956, p. 186.
- Playfair 1956, p. 179.
- Playfair 1956, p. 183.
- Patterson, David (2010). A Genealogy of Evil: Anti-Semitism from Nazism to Islamic Jihad. Cambridge University Press. p. 114. ISBN 978-0-521-13261-9.
- Mackenzie, p. 101.
- Playfair 1956, p. 182.
- Jackson, p. 159.
- url="https://resources.saylor.org/wwwresources/archived/site/wp-content/uploads/2011/08/HIST351-10.2.2-Anglo-Iraqi-War.pdf"
- Lyman, Iraq 1941, p. 25.
- Lyman, pp. 25–26.
- Mackenzie, p. 100.
- Wavell, p. 3439.
- "Resources.saylor.org" (PDF). Commonwealth War Graves Commission. Retrieved 12 August 2010.
- Playfair 1956, p. 193.
- Lyman, p. 48.
- Peretz, p. 107.
- Peretz, p. 441.
- Playfair 1954, p. 14.
- Peretz, p. 443.
- Playfair 1956, p. 177.
- Playfair 1954, p. 15.
- Lyman, p. 18.
- Lake 1999, p. 106.
- Lunt 1981, p. 42.
- Youssef Aboul-Enein, Basil Aboul-Enein. The Secret War for the Middle East: The Influence of Axis and Allied Intelligence operations During WW2. pp. 51–54. Naval Institute Press, 2013.
- Churchill, p. 224.
- Playfair 1956, p. 178.
- Lyman, p. 12.
- Lyman, p. 13.
- Lyman, p. 16.
- Lyman, p. 31.
- Lyman, p. 25.
- Ammentorp, Major-General George Guy Waterhouse
- Lyman, p. 88.
- Lyman, p.21.
- Lyman, p. 26.
- Lyman, pp. 23–24.
- Warwick, In Every Place, p. 9.
- Legate, Bryan (8 September 2014). "Two Dragons, or a Seal and a Walrus". Royal Air Force Museum. Retrieved 8 April 2020.
- Warwick, In Every Place, p. 281.
- Wavell, p. 3438.
- Lyman, p. 22.
- Lyman, p. 23.
- Wavell, p. 3437.
- Lyman, p. 15.
- Thomas, p. 127.
- Playfair 1956, pp. 178–179.
- Jackson, p. 148.
- Playfair 1956, pp. 177–178.
- Churchill, p. 225.
- Wavell, p. 4093.
- Playfair 1956, p. 181.
- Lyman, p. 28.
- Mackenzie, p. 92.
- Mackenzie, p. 96.
- Lyman, p. 20.
- Martin, p. 42.
- Playfair 1956, pp. 179–180.
- Churchill, pp. 225–226.
- Mackenzie, pp. 92–93.
- Jackson, p. 149.
- Mackenzie, p. 93.
- "RAF Museum British Military Aviation in 1941 – Part 2 entry for 30 April". RAF Museum. Archived from the original on 10 February 2009. Retrieved 13 December 2008.
- Lyman, p. 39.
- Mackenzie, p. 94.
- Richards, pp. 314–316.
- Playfair 1956, pp. 181–182.
- Len Deighton (1993), Blood, Tears and Folly
- Playfair 1956, p. 367.
- Jackson, p. 151.
- Mackenzie, p. 95.
- "RAF Valley No 4 Flying Training School". Royal Air Force.
- Playfair 1956, p. 184.
- Lyman, p. 43.
- Lyman, p. 19.
- Playfair 1956, p. 188.
- Kiwarkis. "Assyrian R.A.F. Levies: 1941 Habbanyia, Battle for Habbaniya – 1941 War Diary". Archived from the original on 20 December 2008.
- Lyman, p. 51.
- Churchill, p. 230.
- Lyman, p. 63.
- Sutherland & Canwell, p. 34.
- Sutherland & Canwell, p. 34.
- Sutherland & Canwell, p. 34.
- Playfair 1956, pp. 194–195.
- Churchill, p. 288.
- Sutherland & Canwell, p. 35.
- Weal, p. 102.
- Kurowski, p. 131.
- Lyman, p. 65.
- Time magazine, 30 June 1941.
- New York Times, 18 May 1941, p. 6.
- Lyman, p. 64.
- Churchill, p. 289.
- Sutherland & Canwell, p. 40.
- Lyman, pp. 66–68.
- Sutherland & Canwell, p. 41.
- Sutherland & Canwell, p. 42.
- Sutherland & Canwell, p. 43.
- Sutherland & Canwell, p. 43.
- Sutherland & Canwell, p. 43.
- Sutherland & Canwell, p. 44.
- Sutherland & Canwell, pp. 34–39.
- Sutherland & Canwell, p. 44.
- Thomas 2002, p. 81.
- Wavell, p. 4095.
- Churchill, p. 234.
- Lembo, Daniele. "La squadriglia speciale Irak." Aerei nella Storia Magazine, Delta editions, Parma, 9/1999, pp. 34–38.
- Lyman, p. 57.
- Playfair 1956, p. 187.
- Martin, pp. 42–43.
- Lyman, p.16.
- Playfair 1956, pp. 184–185.
- de Chair, p. 18.
- Glubb, pp. 263–267.
- Jackson, p. 152.
- Churchill, p. 228.
- Wavell, p. 3433.
- Martin, p. 44.
- Martin, pp. 44–45.
- Martin, p. 45.
- Lyman, p. 55.
- Lyman, pp. 54–55.
- Lyman, p. 53.
- Martin, p. 46.
- Martin, p. 47.
- Mackenzie, p. 101.
- Mackenzie, p. 102.
- Martin, p. 48.
- Martin, p. 49.
- Lyman, p. 89.
- Lyman, p. 69.
- Mackenzie, pp. 102–103.
- Lyman, p. 75.
- Lyman, p. 74.
- Martin, pp. 49–50.
- Playfair 1956, p. 189.
- Playfair 1956, p. 191.
- Lyman, pp. 75–76.
- Lyman, p. 76.
- Lyman, pp. 76–77.
- Churchill, pp. 233–234.
- Lyman, p. 32.
- Lyman, pp. 82–83.
- Mackenzie, p. 97.
- Mackenzie, pp. 101–102.
- Lyman, p. 17.
- Lyman, p. 36.
- Lyman, p. 77.
- Lyman, pp. 84–85.
- Mackenzie, p. 104.
- Lyman, p. 86.
- Churchill, pp. 235–236.
- Mead 2007, p. 476.
- Auchinleck, p. 4215.
- Wilson, p. 4333.
- "Italy and Saudi Arabia confronting the challenges of the XXI century" p. 20.
- Rodger, p. 271.
References
Books
- Auchinleck, Claude (1946). Despatch on Operations in the Middle East From 5th July, 1941 to 31st October 1941. London: War Office. in "No. 37695". The London Gazette (Supplement). 20 August 1946. pp. 4215–4230.
- Broich, John. Blood, Oil, and the Axis: The Allied Resistance against a Fascist State in Iraq and the Levant, 1941. Abrams Press, 2019) p. 365.
- de Chair, Somerset (1943). The Golden Carpet (2nd ed.). London: Faber and Faber. OCLC 633936612.
- Churchill, Winston (1985) [1950]. "14: The Revolt in Iraq". The Grand Alliance. The Second World War. III. Boston: Houghton Mifflin Company. ISBN 0-395-41057-6.
- Dudgeon, Anthony (2000). Hidden Victory: The Battle of Habbaniya, May 1941. Stroud and Charleston: Tempus Publishing. ISBN 0-7524-2001-1.
- Dunford Wood, Colin (2020). Big Little Wars: The War Diaries of Colin Dunford Wood, 1939-41, India and Iraq. London: Independent Publishing Network. ISBN 978-1838538484.
- Glubb, John Bagot (1948). The Story of the Arab Legion. Mazal Holocaust Collection. London: Hodder & Stoughton. OCLC 798611.
- Jackson, Ashley (2006). The British Empire and the Second World War. London: Hambledon Continuum. ISBN 1-85285-417-0.
- James, Barrie G. (2009). Hitler's Gulf War, The Fight for Iraq 1941. Barnsley: Pen & Sword Aviation. ISBN 978-1-84884-090-4.
- Kiwarkis, Gaby. "Assyrian RAF Levies". Retrieved 1 January 2016.
- Kurowski, Franz (2005). The Brandenburger Commandos: Germany's Elite Warrior Spies in World War II. Mechanicsburg, PA: Stackpole Books. ISBN 0-8117-3250-9.
- Lyman, Robert (2006). Iraq 1941: The Battles for Basra, Habbaniya, Fallujah and Baghdad. Campaign. Oxford: Osprey. ISBN 1-84176-991-6.
- Mackenzie, Compton (1951). Eastern Epic: September 1939 – March 1943 Defence. 1. London: Chatto & Windus. OCLC 59637091.
- Martin, Colonel Thomas Alexander (1952). The Essex Regiment, 1929–1950. Brentwood: Essex Regiment Association. OCLC 4045659.
- Mead, Richard (2007). Churchill's Lions: A Biographical Guide to the Key British Generals of World War II. Stroud: Spellmount. ISBN 978-1-86227-431-0.
- Peretz, Don (2004) [1963]. The Middle East Today. Santa Barbara, CA: Greenwood Press. ISBN 978-027594-576-3.
- Playfair, Major-General I. S. O.; Stitt RN, Commander G. M. S.; Molony, Brigadier C. J. C. & Toomer, Air Vice-Marshal S. E. (1954). Butler, J. R. M. (ed.). The Mediterranean and Middle East: The Early Successes Against Italy (to May 1941). History of the Second World War, United Kingdom Military Series. I. 3rd impression, 1959. HMSO. OCLC 888934805.
- Playfair, Major-General I. S. O.; with Flynn RN, Captain F. C.; Molony, Brigadier C. J. C. & Toomer, Air Vice-Marshal S. E. (2004) [1st. pub. HMSO 1956]. Butler, J. R. M. (ed.). The Mediterranean and Middle East: The Germans come to the help of their Ally (1941). History of the Second World War, United Kingdom Military Series. II. Naval & Military Press. ISBN 1-84574-066-1.
- Rodger, Alexander (2003). Battle Honours of the British Empire and Commonwealth Land Forces. Marlborough: The Crowood Press. ISBN 1-86126-637-5.
- Saunders, Hilary Adrian St George; Richards, Denis (1953). The Royal Air Force 1939–1945. I. London: HMSO. "The Fight at Odds". OCLC 64981511.
- Thomas, Andrew (2002). Gloster Gladiator Aces. Oxford: Osprey. ISBN 1-84176-289-X.
- Thomas, David A (1972). Nazi Victory: Crete 1941. New York: Stein and Day. ISBN 0812815599.
- Warwick, Nigel W. M. (2014). In Every Place: The RAF Armoured Cars in the Middle East 1921–1953. Rushden: Forces & Corporate Publishing. ISBN 978-0-9574725-2-5.
- Waters, S. D. (2008). HMNZS Leander. Wellington, NZ: Merriam Press. ISBN 978-1-4357-5892-6.
- Wavell, Archibald (1946). Despatch on Operations in the Middle East From 7th February, 1941 to 15th July 1941. London: War Office. in "No. 37638". The London Gazette (Supplement). 3 July 1946. pp. 3423–3444.
- Wavell, Archibald (1946). Despatch on Operations in Iraq, East Syria and Iran from 10th April, 1941 to 12th January, 1942. London: War Office. in "No. 37685". The London Gazette (Supplement). 13 August 1946. pp. 4093–4102.
- Weal, John (1999). Messerschmitt Bf 110 Zerstörer Aces of World War 2. Oxford: Osprey. ISBN 1855327538.
- Wilson, Maitland (1946). Despatch on the Persia and Iraq Command Covering the Period from 21st August, 1942, to 17th February, 1943. London: War Office. in "No. 37703". The London Gazette (Supplement). 28 August 1946. pp. 4333–4340.
- Young, Peter (1972). The Arab Legion. Men-at-Arms. Oxford: Osprey. ISBN 0850450845.
- Lake, Alan. Flying Units of the RAF – The ancestry, formation and disbandment of all flying units from 1912. Airlife Publishing Ltd, Shrewsbury, UK, 1999, ISBN 1840370866.
- Lunt, James. Imperial Sunset – Frontier Soldiering in the 20th Century. Macdonald, London and Sydney, 1981.
Websites
- Ammentorp, Steen. "Major-General George Guy Waterhouse". Generals of World War II website. Retrieved 2 November 2009.
- "4 FTS History". RAF Valley. Royal Air Force. Retrieved 1 January 2016.
- "Royal Air Force Museum". Royal Air Force. Retrieved 1 January 2016.
Further reading
- "Archibald Wavell's Despatch on Operations in the Middle East From 7th February, 1941 to 15th July 1941" (PDF). Supplement to the London Gazette, Number 37638. 3 July 1946. Retrieved 31 October 2009.
- "Archibald Wavell's Despatch on Operations in Iraq, East Syria, and Iran From 10th April, 1941 to 12th January 1942" (PDF). Supplement to the London Gazette, Number 37685. 13 August 1946. Retrieved 26 September 2009.
- "Claude Auchinleck's Despatch on Operations in the Middle East From 5th July, 1941 to 31st October 1941". Supplement to the London Gazette, Number 37695. 20 August 1946. Retrieved 6 November 2009.
- "Maitland Wilson's Despatch on the Persia and Iraq Command Covering the Period from 21st August, 1942, to 17th February, 1943" (PDF). Supplement to the London Gazette, Number 37703. 28 August 1946. Retrieved 6 July 2017.
